

 Free US Calls: 1-888-433-4735
 International: 305-545-5588
A Step-by-Step Guide to Installing a Sea Water Pump For Cummins KTA19
The Cummins KTA19 engine is a widely used industrial and marine diesel engine known for its durability and high power output. In marine environments, one of the most vital components is the sea water pump, which forms a critical part of the engine’s cooling system. Whether you’re doing a routine replacement, an upgrade, or replacing a failed unit, a proper installation is essential to maintain optimal performance and avoid overheating.
This guide provides a comprehensive, step-by-step walkthrough for installing a new sea water pump on the Cummins KTA19 engine. It is written for commercial vessel operators, diesel mechanics, and fleet maintenance personnel, with real-world, actionable steps.
Disclaimer: This guide is meant as a supplemental reference. For specific torque values, tightening sequences, and alignment procedures, consult the Cummins KTA19 OEM service manual.
Understanding the Sea Water Pump For Cummins KTA19
Function of the Sea Water Pump
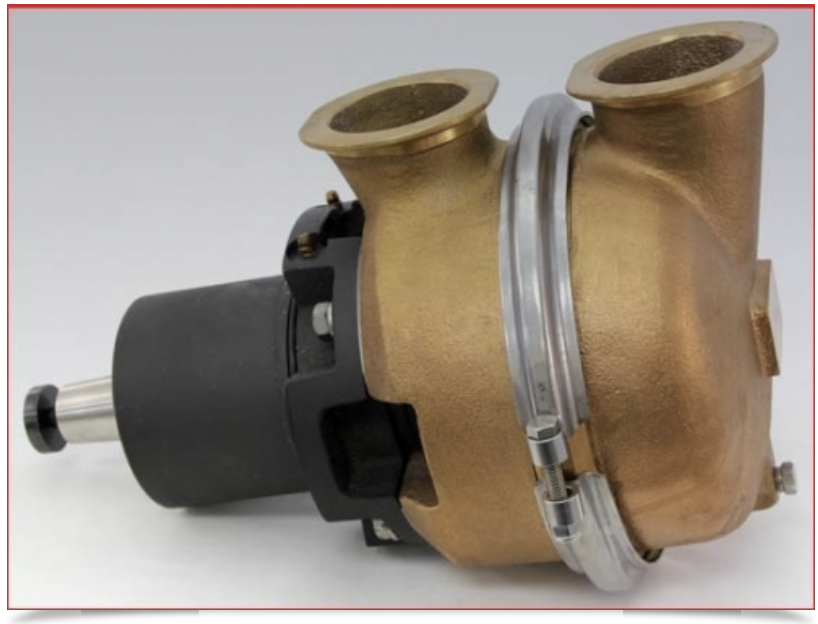
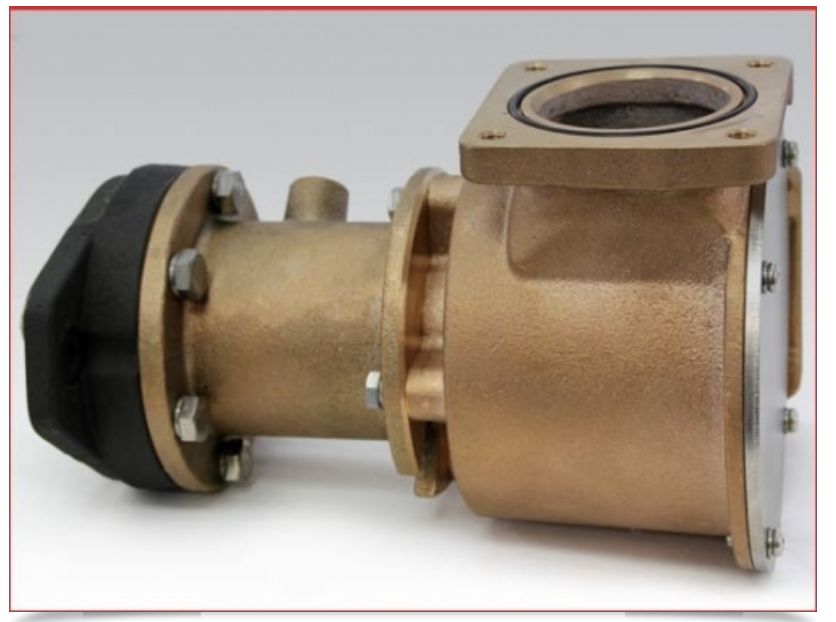
The sea water pump on the Cummins KTA19 is responsible for drawing in cold seawater and pushing it through the heat exchanger. This cools the engine coolant, which in turn maintains the engine’s operating temperature. Without this function, engine components would overheat and fail. This pump differs from the fresh water (jacket water) pump in that it operates on raw water, typically unfiltered and often corrosive.
Types of Sea Water Pumps Available
Diesel Pro Power offers two different versions of the sea water pump for the KTA19:
-
Standard Brass Impeller Pump – Reliable for general-purpose marine applications.
-
Upgraded Composite Impeller Pump – Designed for longer life and resistance to saltwater corrosion and electrolysis.
The composite version also includes improvements to bearing life and shaft durability. Both versions are bolt-on replacements but require proper matching with the engine’s cooling setup. Always verify your pump using the engine’s CPL number or serial.
Tools and Materials Required For Cummins KTA19 Sea Water Pump Installation
Tools List
-
3/8” and 1/2” drive ratchet and socket set (metric & SAE)
-
Open-end and box wrenches
-
Torque wrench (30–80 ft-lbs range)
-
Flathead and Phillips screwdrivers
-
Pry bar or rubber mallet (for stubborn fitment)
-
Flashlight or inspection mirror
-
Gasket scraper or wire brush
-
Marine-grade RTV sealant (if no paper gasket is used)
-
Thread locker (medium strength, blue)
-
Shop towels or lint-free cloth
-
Marine-grade anti-seize compound
Materials and Consumables
-
New sea water pump (OEM-style or upgraded)
-
New gasket or O-ring
-
Fresh hose clamps
-
Corrosion inhibitor or dielectric grease
-
Primer bulb (optional, for priming manually)
-
Bucket or catch pan for draining fluids
Safety Precautions Before Installation
-
Turn off the engine and allow it to cool completely.
-
Engage lock-out/tag-out procedures on the electrical system.
-
Close the sea cock or intake valve before disconnecting hoses.
-
Use proper PPE (eye protection, gloves, etc.)
-
Secure workspace to prevent water damage from spills.
Removing the Old Sea Water Pump For Cummins KTA19
Step 1: Drain the Raw Water System
-
Place a catch pan under the pump.
-
Open the seawater discharge hose and allow the system to drain completely.
-
You may need to remove the raw water strainer lid to help break vacuum.
Step 2: Disconnect Hoses
-
Use a flathead screwdriver or socket to loosen hose clamps.
-
Remove the inlet and outlet hoses from the pump.
-
Use a hose removal tool or twist the hoses gently to break adhesion.
-
Tag the hoses for reinstallation to avoid reversal.
Step 3: Remove the Drive Mechanism
Depending on your setup, the KTA19 sea water pump may be:
-
Belt-driven
-
Loosen the belt tensioner.
-
Slide the drive belt off the pulley.
-
Remove the pump pulley if necessary.
-
-
Gear-driven or flange-coupled
-
Unbolt the drive flange.
-
Gently separate the coupling from the shaft.
-
Avoid striking the shaft or housing directly—use a mallet and block of wood if needed.
Step 4: Remove Mounting Bolts
-
Locate the mounting bolts securing the pump to the timing gear housing or bracket.
-
Use the correct socket size to loosen and remove these bolts.
-
Retain bolts for inspection or replace with new if corroded.
Step 5: Extract the Pump
-
Carefully pull the pump away from the mounting face.
-
Use a pry bar gently if needed—do not bend or damage the pump flange.
-
Inspect the mating surface for corrosion or scoring.
Preparing for New Pump Installation
Step 6: Clean the Mounting Surface
-
Use a gasket scraper to remove old gasket or sealant residue.
-
Clean with brake cleaner or degreaser.
-
Inspect for pitting or corrosion.
-
Surface should be smooth, clean, and dry before new installation.
Step 7: Inspect the New Pump
-
Check impeller rotation (some KTA19 models require reverse rotation).
-
Spin the impeller by hand—there should be smooth resistance.
-
Confirm mounting hole alignment and shaft depth.
-
Apply marine grease to the impeller chamber if not pre-lubricated.
Step 8: Prepare Gasket or Sealant
-
If a paper gasket is included, apply a thin coat of gasket sealant (optional).
-
If using RTV sealant, apply a thin, continuous bead to the flange face.
-
Avoid excess sealant which may block coolant passages.
Installing the New Sea Water Pump For Cummins KTA19
Step 9: Align the Pump and Install Bolts
-
Place the pump against the mounting face.
-
Insert each bolt by hand to avoid cross-threading.
-
Start with bolts at opposite corners for even pressure.
Step 10: Torque Bolts to Specification
-
Refer to Cummins manual for your engine’s torque spec. Typical range:
-
3/8″ bolts: 30–35 ft-lbs
-
1/2″ bolts: 55–65 ft-lbs
-
-
Use a crisscross pattern to tighten bolts evenly.
-
Wait 10 minutes and re-torque to confirm gasket seating.
Step 11: Reinstall the Drive Mechanism
-
Reattach the pulley and belt if belt-driven.
-
Adjust belt tension to manufacturer specification (typically 1/2″ deflection with moderate thumb pressure).
-
For flange-coupled drives, align keyways and bolt holes precisely.
-
Torque coupling bolts evenly to prevent misalignment.
Step 12: Reconnect Hoses and Clamps
-
Attach inlet and outlet hoses to the correct ports.
-
Use new stainless steel hose clamps.
-
Check for proper fitment—there should be no bulging or flattening.
-
Apply a small amount of dielectric grease to hose fittings if needed.
Step 13: Prime the Pump
-
Open the sea cock or intake valve.
-
Use a primer bulb, hose funnel, or gravity feed to fill the pump with seawater.
-
This prevents dry start and damage to the impeller on first engine start.
Final System Testing and Inspection
Step 14: Initial Startup
-
Start the engine and let it idle.
-
Observe the pump for leaks at the mounting face and hoses.
-
Confirm the raw water outlet is discharging water (visual confirmation overboard).
Step 15: Monitor Engine Temperature
-
Allow the engine to reach operating temperature.
-
Monitor for any temperature spikes or abnormal readings.
-
Inspect strainer and discharge lines for blockages.
Step 16: Post-Run Checks
-
Shut down the engine after 15–20 minutes of run time.
-
Reinspect the pump and torque all bolts again if needed.
-
Check the belt tension again if applicable.
Troubleshooting Common Issues
Pump Not Drawing Water
-
Sea cock closed or obstructed
-
Intake strainer clogged
-
Airlock in pump housing
-
Impeller installed backward
Pump Leaking
-
Gasket improperly seated
-
Mating surface corroded or warped
-
Shaft seal worn or leaking from weep hole
Excessive Noise
-
Bearing damage inside pump
-
Shaft misalignment
-
Foreign object lodged in impeller housing
Maintenance Tips and Service Intervals
-
Inspect impeller every 250–500 hours
-
Replace sea water pump every 3,000–5,000 hours
-
Replace hoses and clamps every 2 years
-
Winterize raw water system in freezing climates
-
Flush with fresh water after extended saltwater use
FAQ – Cummins KTA19 Sea Water Pump Installation
How do I know which direction the impeller should rotate?
Check the rotation label on the old pump or verify with the engine’s gear train diagram in the Cummins service manual.
Do I need to use sealant with a paper gasket?
It’s optional. A thin coat of gasket adhesive can help hold the gasket in place and ensure a watertight seal.
Can I reuse my old hose clamps?
We strongly recommend replacing them with new stainless steel clamps to prevent failure under vibration and corrosion.
What torque should I use on the pump bolts?
Refer to your specific Cummins KTA19 service manual. Most 3/8″ bolts require 30–35 ft-lbs, and 1/2″ bolts require 55–65 ft-lbs.
How often should the sea water pump be replaced?
Typically every 3,000–5,000 engine hours, or sooner if showing signs of wear or leaking.
What happens if I install the pump dry?
Running the pump dry can damage the impeller and seals in seconds. Always prime with seawater before startup.
Can I install the pump myself without removing the engine?
Yes, the pump is accessible with the engine in place, although access may vary depending on your vessel layout.
Do you carry rebuild kits for the sea water pump?
Diesel Pro Power carries complete new pumps. If you need a rebuild kit, contact us with your pump casting number or engine CPL.
Is the upgraded pump compatible with all KTA19 models?
Most are, but you should confirm based on your engine’s CPL number. Reach out to us for exact fitment.
Do you offer support if I’m unsure which pump I need?
Yes! Send us your engine serial number or CPL and we’ll guide you to the correct replacement.
Conclusion
Installing a new sea water pump on the Cummins KTA19 is a manageable task that requires attention to detail, proper preparation, and post-installation testing. Whether you’re operating in commercial fishing, tugboats, offshore supply vessels, or industrial barges, keeping your cooling system in peak condition is critical to engine reliability.
If you’re looking for a reliable source for Cummins KTA19 parts, Diesel Pro Power stocks high-quality, marine-grade pumps that are trusted worldwide. Our upgraded pumps are designed for longer life, higher durability, and seamless installation.
For more help, browse our full selection of Cummins engine parts or contact us for one-on-one support.
See Our Videos On The Cummins KTA19 On Our YouTube Channel