

 Free US Calls: 1-888-433-4735
 International: 305-545-5588
The air intake and exhaust systems of the Cummins KTA19 play critical roles in maintaining engine performance, fuel efficiency, and emissions control. A properly functioning air intake system ensures the engine receives the necessary amount of clean, cool air for combustion, while the exhaust system expels gases efficiently, minimizing backpressure and harmful emissions.
In this comprehensive guide, we’ll explore the inspection, maintenance, and troubleshooting techniques for the turbocharger, air intake, and exhaust systems, helping you keep your KTA19 engine operating at peak performance.
Parts Catalog for Cummins KTA19 Marine Engine
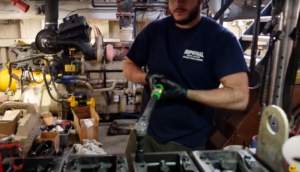
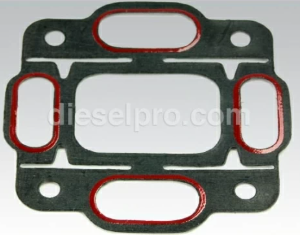
Turbo & Related components for Cummins KTA19 Engine
Turbocharger Inspection and Maintenance
The turbocharger on the Cummins KTA19 significantly enhances engine performance by forcing more air into the combustion chamber. This allows for better fuel combustion, improved power output, and increased efficiency. Since the turbo operates under extreme conditions—including high speeds, temperatures, and pressures—regular inspection and maintenance are crucial.
The Function of the Turbocharger
- Increases air pressure: Compresses incoming air to improve engine efficiency.
- Enhances combustion: More air allows for more fuel to be burned, creating additional power.
- Reduces emissions: Efficient combustion helps lower harmful exhaust emissions.
Routine Turbocharger Inspection
-
Visual Inspection:
- Check for oil leaks around the turbocharger housing and connections.
- Inspect the compressor and turbine housings for cracks or signs of heat damage.
- Ensure all fasteners, clamps, and bolts are tight and secure.
-
Check Shaft Play:
- Remove the intake hose to access the compressor wheel.
- Gently wiggle the shaft; slight radial play is normal, but excessive movement indicates worn bearings.
-
Inspect Compressor and Turbine Blades:
- Look for signs of damage, such as chipped or bent blades.
- Check for foreign object damage (FOD) caused by debris entering the intake.
-
Examine Oil Supply Lines:
- Verify that the oil feed and return lines are clear and free from blockages.
- Look for oil coking, which can restrict flow and cause turbo failure.
Maintenance Tips:
- Change oil and filters regularly to ensure clean lubrication reaches the turbo.
- Avoid shutting down the engine immediately after heavy load operations—allow the turbo to cool down by idling for a few minutes.
- Ensure air filters are clean to prevent debris from damaging the turbo’s compressor blades.
Recognizing Signs of Turbocharger Failure
Early detection of turbocharger problems can prevent costly repairs. Common symptoms of turbo issues include:
-
Loss of Power:
- A failing turbo reduces boost pressure, leading to sluggish acceleration and poor engine performance.
- A failing turbo reduces boost pressure, leading to sluggish acceleration and poor engine performance.
-
Excessive Exhaust Smoke:
- Blue smoke: Indicates oil leaking into the combustion chamber.
- Black smoke: Suggests improper fuel-to-air ratio due to inadequate boost.
-
Unusual Noises:
- A high-pitched whining or whistling sound may indicate air leaks or worn bearings.
- Rattling or grinding noises can signal severe internal damage.
-
Oil Leaks:
- Oil around the turbo’s seals, compressor housing, or exhaust system may indicate seal failure.
- Oil around the turbo’s seals, compressor housing, or exhaust system may indicate seal failure.
-
Increased Oil Consumption:
- A malfunctioning turbo can cause the engine to burn oil, leading to frequent top-offs.
- A malfunctioning turbo can cause the engine to burn oil, leading to frequent top-offs.
Cleaning and Servicing the Turbocharger
Proper cleaning and servicing of the turbocharger can extend its lifespan and ensure peak performance.
Tools You’ll Need:
- Clean lint-free cloths
- Turbo-safe cleaning solvent
- Torque wrench
- Basic hand tools for disassembly
Steps to Clean the Turbocharger:
- Remove the Turbo:
- Disconnect the intake and exhaust piping.
- Carefully remove the turbo from the exhaust manifold and oil lines.
- Disassemble for Inspection:
- Remove the compressor housing.
- Inspect the turbine wheel, compressor wheel, and bearings.
- Clean Components:
- Use turbo-safe solvents to clean carbon deposits and oil buildup.
- Avoid abrasive materials that could damage sensitive surfaces.
- Inspect for Wear:
- Check seals, bearings, and blades for signs of damage or excessive wear.
- Check seals, bearings, and blades for signs of damage or excessive wear.
- Reassemble and Test:
- Apply fresh oil to the bearings before reassembly.
- Ensure all fasteners are torqued to Cummins KTA19 specifications.
Proper Reinstallation Techniques
Reinstalling the turbocharger correctly is crucial to avoid future failures.
Reinstallation Steps:
- Prepare the Mounting Surface:
- Clean the exhaust manifold flange and turbo mounting surfaces.
- Replace any gaskets with new ones.
- Reconnect Oil Lines:
- Ensure the oil feed and return lines are clean and free from blockages.
- Prime the turbo with fresh oil before startup.
- Secure Fasteners:
- Tighten all bolts to the manufacturer’s torque specifications to prevent leaks.
- Tighten all bolts to the manufacturer’s torque specifications to prevent leaks.
- Check for Leaks:
- After installation, run the engine and check for oil, air, or exhaust leaks.
- After installation, run the engine and check for oil, air, or exhaust leaks.
- Monitor Turbo Performance:
- Observe boost pressure levels to confirm proper turbo function.
- Observe boost pressure levels to confirm proper turbo function.
Air Filtration and Manifold Servicing
A clean and efficient air intake system is essential for the KTA19 to deliver peak performance. Contaminated air can lead to turbocharger damage, poor combustion, and engine wear.
Air Filtration System Components:
- Air Filter: Traps dirt, dust, and debris before it enters the turbocharger.
- Air Intake Ducting: Directs clean air to the turbo.
- Charge Air Cooler (Intercooler): Cools compressed air for improved efficiency.
- Intake Manifold: Distributes air evenly to the engine cylinders.
Ensuring Proper Airflow to the Engine
- Inspect Air Filters Regularly:
- Check for clogs, tears, or debris.
- Replace filters according to the maintenance schedule or if heavily contaminated.
- Clean the Intake Manifold:
- Remove carbon buildup that can restrict airflow.
- Use an approved solvent and soft brushes to clean the manifold interior.
- Inspect Ducting and Hoses:
- Check for cracks, loose clamps, or collapsed hoses that can restrict airflow.
- Replace any damaged parts.
- Test for Air Leaks:
- Perform a pressure test to identify leaks in the intake system.
- Perform a pressure test to identify leaks in the intake system.
Troubleshooting Common Air Intake Issues
1. Restricted Airflow:
- Symptoms: Reduced power, black smoke, excessive turbo boost pressure.
- Causes: Clogged air filters, collapsed hoses, or intake manifold obstructions.
- Solution: Clean or replace filters, inspect hoses, and clean the manifold.
2. Air Leaks:
- Symptoms: Whistling noises, loss of power, poor fuel economy.
- Causes: Loose clamps, cracked hoses, or damaged intercoolers.
- Solution: Tighten connections, replace damaged hoses, and repair leaks.
3. Turbo Lag:
- Symptoms: Delayed power response when accelerating.
- Causes: Air leaks, dirty turbocharger, or faulty wastegate.
- Solution: Inspect the turbo and wastegate, and ensure proper airflow.
Exhaust System Overview
The exhaust system expels combustion gases from the engine while minimizing noise and harmful emissions. Key components include:
- Exhaust Manifold: Collects exhaust gases from the engine cylinders.
- Turbocharger (if applicable): Utilizes exhaust gases to boost intake air.
- Exhaust Piping: Directs gases away from the engine.
- Muffler: Reduces exhaust noise.
Diagnosing Exhaust Leaks and Emission Control Issues
Common Symptoms of Exhaust Leaks:
- Loud Exhaust Noise:
- A hissing or tapping sound often indicates a leak near the manifold.
- A hissing or tapping sound often indicates a leak near the manifold.
- Reduced Engine Performance:
- Leaks can cause loss of backpressure, reducing power output.
- Leaks can cause loss of backpressure, reducing power output.
- Visible Soot or Exhaust Odor:
- Black soot around joints or unusual exhaust smells indicate a leak.
- Black soot around joints or unusual exhaust smells indicate a leak.
Emission Control Issues:
- Excessive Smoke: May result from poor combustion or turbo issues.
- Failed Emissions Test: Indicates problems with the exhaust after-treatment system.
Servicing the Exhaust Manifold

1. Inspection:
- Look for cracks, warping, or gasket leaks around the manifold.
- Check for loose or missing bolts.
2. Removing the Manifold:
- Allow the engine to cool completely.
- Remove heat shields and disconnect exhaust piping.
- Carefully unbolt the manifold from the engine.
3. Cleaning and Repair:
- Clean gasket surfaces thoroughly.
- Replace damaged gaskets and hardware.
4. Reinstallation:
- Use new gaskets and torque bolts to Cummins specifications.
- Run the engine and check for leaks after reassembly.
Maintenance Best Practices
- Regular Inspections: Check for leaks, loose clamps, and signs of wear.
- Timely Filter Changes: Replace air filters regularly to prevent debris from reaching the turbo.
- Monitor Boost Pressure: Sudden changes can indicate issues with the intake or exhaust system.
- Use Quality Parts: Always use OEM or high-quality aftermarket components for replacements.
Disclaimer
Turbocharger systems operate under high pressure. Always consult the Cummins KTA19 service manual before performing repairs. Proper handling of the air intake and exhaust system is essential to avoid personal injury and prevent engine damage.
Parts Catalog for Cummins KTA19 Marine Engine
Turbo & Related components for Cummins KTA19 Engine