

 Free US Calls: 1-888-433-4735
 International: 305-545-5588

Cam Follower Removal and Replacement
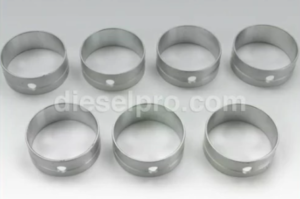
The cam followers and tappets in Cummins ISM, ISMe, and QSM11 engines play a vital role in transferring motion from the camshaft lobes to the pushrods and valves. They ensure precise valve timing and fuel injector activation, which directly impacts engine efficiency, fuel consumption, and emissions performance.
Over time, cam followers and tappets can experience wear, scuffing, or loss of lubrication, leading to valve timing issues, misfiring, and reduced power output. A proper removal, inspection, and replacement procedure is essential to maintaining the engine’s performance and longevity.
This guide provides a detailed step-by-step process for removing, inspecting, and replacing cam followers and tappets, along with important best practices for lubrication, reinstallation, and final adjustments.
For exact torque specifications, reassembly tolerances, and service intervals, consult an OEM service manual or contact Diesel Pro Power for expert guidance.
Parts Catalog for ISM Cummins Marine and Industrial Engines
Parts Catalog for QSM Cummins Marine and Industrial Engines
Safety and Preparation Before Cam Follower Removal
Since cam followers and tappets are internal engine components, proper safety precautions must be followed during removal and reinstallation to prevent personal injury and component damage.
Personal Protective Equipment (PPE)
✔ Safety glasses – Protect against metal debris and oil splashes.
✔ Mechanic gloves – Prevent cuts, burns, and oil contamination on hands.
✔ Steel-toe boots – Protect feet from heavy engine parts.
✔ Hearing protection – Recommended when working near running engines or power tools.
Work Area and Tool Preparation
- Ensure a clean, well-lit workspace free from dirt and debris.
- Use magnetic trays or labeled containers to store fasteners and small components.
- Use an engine hoist or support stand if working on a disassembled engine.
- Clean all oil passages and bearing surfaces before reinstallation.
Essential Tools for Cam Follower Removal and Replacement

✔ Torque wrench – For properly torquing bolts upon reassembly.
✔ Feeler gauges – For measuring valve lash clearance.
✔ Dial indicator – For checking cam follower wear and travel distance.
✔ Straightedge and micrometer – For checking camshaft alignment.
✔ Solvent and brushes – For degreasing and cleaning components.
Step-by-Step Cam Follower Removal and Inspection Procedures
Proper removal and inspection of cam followers is critical for detecting early signs of wear, lubrication issues, and component misalignment.
Step 1: Engine Preparation for Cam Follower Removal
- Shut Down the Engine and Allow it to Cool
- Always work on a cold engine to prevent burns and reduce thermal expansion effects.
- Always work on a cold engine to prevent burns and reduce thermal expansion effects.
- Disconnect the Battery and Fuel System
- Prevent accidental cranking by disconnecting the negative (-) battery terminal.
- Shut off the fuel supply and depressurize the system to prevent leaks.
- Drain the Engine Oil
- Remove the oil drain plug and allow all oil to drain into a collection pan.
- Replace the oil filter if performing a complete camshaft and valvetrain overhaul.
- Remove the Valve Cover and Rocker Assembly
- Unbolt and lift off the valve cover.
- Loosen and remove rocker arms, pushrods, and injector hold-down bolts.
- Label and store each component in order for proper reinstallation.
Step 2: Cam Follower Removal Procedure
- Loosen and Remove the Cam Follower Cover Plate
- Locate the cam follower access plate on the side of the engine block.
- Use a gasket scraper to remove any sealant or debris from the cover plate.
- Extract the Cam Followers from Their Bores
- Use needle-nose pliers or a specialized puller to carefully lift the cam followers out.
- If cam followers are stuck due to varnish or oil sludge, apply penetrating oil and allow time to loosen deposits.
- Label and Organize the Removed Followers
- Keep each cam follower paired with its original location to maintain wear pattern consistency.
- Keep each cam follower paired with its original location to maintain wear pattern consistency.
Step 3: Inspecting Cam Followers and Tappets for Wear
Proper inspection of cam followers helps identify early signs of excessive wear, oil starvation, or material fatigue.
- Examine the Cam Follower Roller Surface
- Look for pitting, excessive wear, or flat spots on the roller.
- Check for metal transfer from the camshaft lobes.
- Check the Cam Follower Guide Bore for Scuffing
- Inspect the cam follower housing inside the engine block.
- Look for excessive clearance or signs of metal scoring.
- Measure Cam Follower Travel and Clearance
- Use a dial indicator to measure the up-and-down movement of the cam follower.
- If travel exceeds specification, replace the cam follower assembly.
Step-by-Step Cam Follower Replacement and Reinstallation

After inspection, cam followers must be properly lubricated and reinstalled following OEM specifications.
Step 1: Preparing New Cam Followers for Installation
- Lubricate the Cam Follower Rollers and Bearings
- Apply engine assembly lubricant or clean motor oil to each roller surface.
- Apply engine assembly lubricant or clean motor oil to each roller surface.
- Ensure Proper Orientation of the Cam Followers
- Align each cam follower to its corresponding camshaft lobe.
- Verify the markings on the follower body to match OEM guidelines.
Step 2: Installing the Cam Followers into the Block
- Carefully Insert the Cam Followers into Their Guide Bores
- Press the followers into place by hand, ensuring smooth movement without resistance.
- Press the followers into place by hand, ensuring smooth movement without resistance.
- Reinstall the Cam Follower Cover Plate
- Apply a thin layer of gasket sealant to prevent oil leaks.
- Tighten the cover plate bolts in a cross-pattern sequence to prevent warping.
Step 3: Reassembling the Valvetrain Components
- Reinstall the Rocker Arms, Pushrods, and Injector Hold-Downs
- Position each rocker lever and pushrod in its original location.
- Position each rocker lever and pushrod in its original location.
- Adjust Valve Lash to OEM Specifications
- Use a feeler gauge to set intake and exhaust valve clearance.
- Torque adjusting screws to manufacturer-recommended values.
- Reinstall the Valve Cover and Gasket
- Use a new gasket and secure the valve cover bolts evenly.
- Use a new gasket and secure the valve cover bolts evenly.
Step 4: Final System Checks Before Engine Start-Up
- Refill the Engine with Clean Oil
- Use OEM-approved oil viscosity and fill to recommended capacity.
- Use OEM-approved oil viscosity and fill to recommended capacity.
- Reconnect the Battery and Fuel System
- Ensure all fuel lines and electrical connections are secure.
- Ensure all fuel lines and electrical connections are secure.
- Prime the Oil System Before Initial Start-Up
- Use a manual oil pump primer to lubricate the camshaft and valvetrain components.
- Use a manual oil pump primer to lubricate the camshaft and valvetrain components.
- Start the Engine and Monitor Performance
- Check for oil leaks, fuel leaks, or unusual noises.
- Verify cam follower movement and valve function using a stethoscope.
Final Notes on Cam Follower Removal and Replacement
✔ Follow proper torque sequences to prevent warping or misalignment.
✔ Use high-quality lubricants to ensure proper cam follower operation.
✔ Inspect wear patterns to detect early signs of camshaft or lifter failure.
✔ Recheck valve lash after a few hours of engine operation.
✔ Consult an OEM manual or Diesel Pro Power for precise service specifications.
By following these detailed procedures, you ensure optimal valve timing, fuel injection performance, and extended service life for Cummins ISM, ISMe, and QSM11 engines.
Parts Catalog for ISM Cummins Marine and Industrial Engines
Parts Catalog for QSM Cummins Marine and Industrial Engines