November 13, 2024
Signs Of Wear In Cylinder Head Gaskets For Detroit Diesel 149 Series Engines (8V149, 12V149, 16V149)
Why the Cylinder Head Gasket Matters
Common Signs of Cylinder Head Gasket Wear
Causes of Head Gasket Failure in Detroit Diesel 149 Series Engines
Best Practices for Inspection and Maintenance
When to Replace the Cylinder Head Gasket
Replacing Cylinder Head Gaskets For Detroit Diesel 149 Engines (8V149, 12V49, 16V149):
Introduction
Tools and Materials Needed
Procedure
Step 1: Preparation
Step 2: Bolt Removal Sequence
Notes from the Manual:
Step 3: Cylinder Head Removal
Step 4: Surface Preparation
Step 5: Installing the New Gasket
Step 6: Reinstalling the Cylinder Head
Step 7: Reassembly
Step 8: Final Checks
Tips for Success
Maintenance Schedule
Read More
November 13, 2024
Signs Of Wear In Valve Springs In Detroit Diesel 149 Engines (8V149, 12V149, 16V149)
Key Functions of Valve Springs
Signs of Wear in Valve Springs
Inspection Process
Preventive Measures to Reduce Wear
Replacing Valve Springs For Detroit Diesel 149 Engines (8V149, 12V49, 16V149):
Tools and Materials Needed
Procedure
Tips for Success
Maintenance and Replacement Schedule
Read More
November 12, 2024
Signs of Wear: Recognizing Fatigue in Parts Like Springs, Gaskets, and Liners For Detroit Diesel 149 Series Engines (8V149, 12V149, 16V149)
Key Functions of Valve Springs
Signs of Wear in Valve Springs
Inspection Process
Preventive Measures to Reduce Wear
Replacement Cylinder Liners for Detroit Diesel 149 Series Engines
Find High-Quality Piston Rings for Detroit Diesel 149 Series Engines
Procedure for Part Replacement: Step-by-Step Guidance on Replacing Valve Springs, Cylinder Head Gaskets, and Other Commonly Worn Parts
Tools and Materials Needed
Introduction
Procedure
Replacing Cylinder Liners For Detroit Diesel 149 Engines (8V149, 12V49, 16V14):
Introduction
Procedure
Tips for Success
Maintenance Schedule
Introduction
Procedure
Tips for Success
Introduction
Procedure
Tips for Success
Read More
November 11, 2024
Safe Cleaning Methods: Steam, Solvent Tanks, and Compressed Air
Steam Cleaning:
Solvent Tanks:
Compressed Air:
Ultrasonic Cleaning (if available):
Cleaning Critical Components: Careful Handling of Injector Tubes, Valves, and Head Gaskets
Injector Tubes:
Valves:
Valve Seats and Guides:
Read More
November 11, 2024
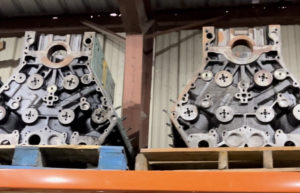
Cylinder Block Inspection for Detroit Diesel 149 Series Engines (8V149, 12V149, 16V149)
1. Key Areas to Inspect
2. Tools for Inspection
3. Inspection Process
4. Preventive Measures
Cylinder Head Inspection for Detroit Diesel 149 Series Engines (8V149, 12V149, 16V149)
Importance of Cylinder Head Inspection
Inspection Process
Tools and Techniques
When to Repair or Replace
Preventive Measures
Valve Wear Inspection for Detroit Diesel 149 Series Engines (8V149, 12V149, 16V149)
Common Causes of Valve Wear
Key Areas to Inspect
Inspection Process
Maintenance and Repair
Preventive Measures
Piston and Cylinder Wear: Inspection and Maintenance For Detroit Diesel 149 Series (8V149, 12V149, 16V149)
Common Causes of Wear
Key Areas to Inspect
Inspection Process
Repair and Maintenance
Preventive Measures
Signs of Piston and Cylinder Wear
Injector Condition: Inspection and Maintenance For Detroit Diesel 149 Series Engines (8V149, 12V149, 16V149)
Common Signs of Injector Issues
Inspection Process
Maintenance Steps
Preventive Measures
Cooling System Check for Detroit Diesel 149 Series Engines (Marine and Non-Marine Applications) (8V149, 12V149, 16V149)
Key Components in Cooling Systems
Universal Components (Marine and Non-Marine Applications)
Marine-Specific Components
Non-Marine-Specific Components
Inspection and Maintenance Procedures
Preventive Measures
Signs of Cooling System Problems
Crankshaft and Bearing Wear: Inspection and Maintenance For Detroit Diesel 149 Series Engines (8V149, 12V149, 16V149)
Common Causes of Crankshaft and Bearing Wear
Inspection Process
Repair and Maintenance
Preventive Measures
Signs of Crankshaft and Bearing Wear
Read More
November 11, 2024
What is Valve Clearance In Detroit Diesel 149 Series Engines?
Step-by-Step Valve Clearance Adjustment Procedure For Detroit Diesel 149 Series Engines (8V149, 12V149, 16V149)
1. Prepare the Engine
2. Position the Cylinder
3. Measure Valve Clearance
4. Adjust Valve Clearance
5. Repeat for All Cylinders
6. Recheck Adjustments
Additional Notes for Mechanics
Read More
Page 5 of 11« First«...34567...10...»Last »


 Free US Calls: 1-888-433-4735
 International: 305-545-5588


