Processes For Cleaning and Inspection Of Detroit Diesel 71 Series Inline Engines (271, 371, 471, 671)

Thorough cleaning and inspection of the engine components are essential for maintaining the overall health of the Detroit Diesel Series 71 engines. Over time, dirt, carbon, and debris can accumulate in critical areas, leading to reduced engine performance or mechanical failures if not addressed. Regular cleaning and careful inspections help ensure that components operate efficiently and prevent costly repairs.
Importance of Thorough Cleaning and Inspection
Regular cleaning and inspections during scheduled maintenance or overhauls are key to preventing the buildup of harmful deposits and identifying early signs of wear or damage. Cleaning removes carbon, grease, dirt, and scale from parts, ensuring they function properly, while inspections allow for timely repairs or part replacements before they lead to more significant problems.
Safe Cleaning Procedures
When cleaning engine parts, it is essential to use safe and effective procedures to avoid damaging components and protect yourself from harmful chemicals. Below are common cleaning methods used for different parts of the engine:
- Steam Cleaning:
-
Application: Steam cleaning is an effective way to remove grease, oil, and dirt from the exterior of engine parts such as the cylinder block, oil pan, and valve covers. It’s especially useful for cleaning large components without the use of harsh chemicals.
- Best Practices:
- Use a steam cleaner to loosen dirt and oil from engine parts.
- Avoid directing steam at delicate components like electrical wiring or rubber seals.
- After steam cleaning, dry all components thoroughly to prevent rust and corrosion.
Parts Catalog for Detroit Diesel 271 Marine Engine
-
- Alkaline Solutions:
-
Application: Commercial-grade alkaline cleaners are effective for cleaning metal parts, particularly when dealing with heavy carbon deposits or grease buildup.
- Best Practices:
- Submerge metal parts such as cylinder heads, pistons, and exhaust manifolds in an alkaline solution to loosen grime and deposits.
- Rinse the parts with clean water after cleaning to remove the solution and prevent residue buildup.
- Use alkaline cleaners according to manufacturer guidelines, as prolonged exposure may corrode certain types of metal.
Parts Catalog for Detroit Diesel 371 Marine Engine
-
- Chemical Degreasers:
-
Application: Use degreasers to clean components like injectors, valves, and fuel system parts that are covered with oil or fuel residues.
- Best Practices:
- Apply degreaser to parts and let it sit for a few minutes to break down stubborn deposits.
- Use a brush to scrub off residue, followed by a thorough rinse with water.
- Ensure that any degreased parts are dried properly and apply rust-preventive oil where necessary to avoid corrosion.
Parts Catalog for Detroit Diesel 471 Marine Engine
-
- Rust Prevention:
-
Application: After cleaning metal parts, especially using water-based methods, it’s crucial to prevent rust formation.
- Best Practices:
- Dry all parts thoroughly using compressed air or heat.
- Apply a rust preventive compound to metal surfaces that won’t be reassembled immediately. Dip or spray the parts with a rust inhibitor, ensuring even coverage.
- Store parts in a dry environment if they need to remain disassembled for an extended period.
Parts Catalog for Detroit Diesel 671 Marine Engine
-
Critical Inspection Points
During the inspection process, it’s important to focus on key engine components where wear and damage are most likely to occur. Below are the critical areas that should be inspected carefully:
- Cylinder Bores:

Detroit Diesel 671 Cylinder Block
What to Check: Inspect cylinder bores for signs of scoring, pitting, or out-of-roundness. Irregular wear can lead to poor sealing between the piston rings and cylinder walls, resulting in compression loss, reduced power, and oil consumption.
- Measurement: Use a bore gauge to measure the diameter and roundness of the cylinder bore at several points along its length. If the bore exceeds wear limits, consider honing or re-sleeving.
- Common Problems:
- Excessive wear can cause oil consumption and power loss.
- Scoring on the bore surface can allow blow-by, where combustion gases escape into the crankcase.
- Measurement: Use a bore gauge to measure the diameter and roundness of the cylinder bore at several points along its length. If the bore exceeds wear limits, consider honing or re-sleeving.
- Valves and Valve Seats:

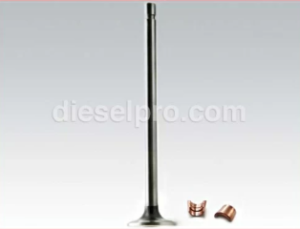
Valve for Detroit Diesel 671
What to Check: Inspect the valve faces and seats for burning, pitting, or improper seating. Worn or damaged valves can result in poor sealing, leading to a loss of compression, incomplete combustion, and reduced efficiency.
- Measurement: Use a valve seat gauge to check seat width and angle. Ensure the valve seats are properly machined and the valve face sits evenly on the seat.
- Common Problems:
- Pitting or burning can lead to exhaust gas leaks, reducing engine efficiency.
- Uneven seating may allow combustion gases to escape, resulting in power loss.
- Measurement: Use a valve seat gauge to check seat width and angle. Ensure the valve seats are properly machined and the valve face sits evenly on the seat.
- Pistons and Rings:

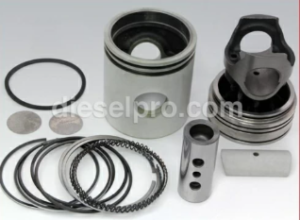
2 piece Piston Kit for Detroit Diesel 471
What to Check: Inspect pistons for scoring, cracks, or excessive wear. Check piston rings for proper fit and end gap, as worn rings can reduce compression, leading to power loss and increased oil consumption.
- Measurement: Measure the piston ring end gap using feeler gauges and check the piston’s diameter to ensure it is within tolerances. Replace pistons or rings if wear exceeds specifications.
- Common Problems:
- Scored pistons can result in friction and loss of performance.
- Worn rings lead to increased oil consumption and loss of compression.
Cylinder Kits for Detroit Diesel Marine Engine
- Measurement: Measure the piston ring end gap using feeler gauges and check the piston’s diameter to ensure it is within tolerances. Replace pistons or rings if wear exceeds specifications.
- Gaskets and Seals:

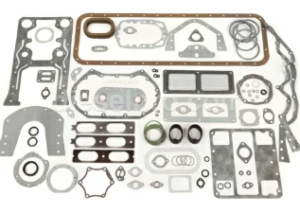
Overhaul Gasket Kit for Detroit Diesel 671
What to Check: Examine all gaskets and seals for leaks or signs of wear. Leaking gaskets can lead to air, coolant, or oil leaks, which may cause engine overheating, poor performance, or mechanical damage.
- Replacement: Replace any damaged gaskets or seals during routine maintenance or overhauls to ensure the engine remains properly sealed.
- Common Problems:
- Leaking gaskets can cause coolant or oil loss, leading to overheating.
- Damaged seals can allow contaminants to enter the engine or fluids to escape.
Gaskets for Detroit Diesel Marine Engine
- Replacement: Replace any damaged gaskets or seals during routine maintenance or overhauls to ensure the engine remains properly sealed.
Recommended Tools for Inspection
- Bore Gauge: Use to measure the internal diameter and roundness of cylinder bores.
- Feeler Gauge: Ideal for checking valve clearance and piston ring end gap.
- Dial Indicator: Used to measure end play and runout for rotating components like the crankshaft and camshaft.
- Micrometer: Helps measure the thickness of pistons, valves, and other engine components.
- Valve Seat Gauge: Measures valve seat width and angle to ensure proper sealing between the valve face and seat.
Common Symptoms of Wear or Damage During Inspection:
- Loss of Compression: Low compression may indicate worn pistons, rings, or valves. Check these components for excessive wear and replace as necessary.
- Oil Leaks: Oil leaking from the engine may be a sign of worn seals or gaskets. Replacing these parts during an inspection will help prevent further damage.
- Knocking Sounds: Engine knocking or rattling may be caused by worn bearings, pistons, or valves. Inspect these parts for wear or damage and replace them if needed.
Conclusion On Cleaning & Inspection Section
Thorough cleaning and regular inspection of engine components are vital to maintaining the performance and reliability of the Detroit Diesel Series 71 engine. By using safe cleaning methods, inspecting critical engine components for wear, and using the appropriate tools to measure tolerances, operators can detect and address potential issues before they cause significant damage. Regular maintenance will prolong the life of the engine, improve fuel efficiency, and reduce costly repairs.


 Free US Calls: 1-888-433-4735
 International: 305-545-5588