

 Free US Calls: 1-888-433-4735
 International: 305-545-5588

Introduction
The Cummins KTA38 and KTA50 engines are high-performance diesel engines designed for marine, industrial, and power generation applications. These engines are known for their durability, efficiency, and reliability, but to maintain their performance, it is crucial to follow accurate torque specifications when assembling and servicing engine components.
Proper torque values ensure structural integrity, prevent component failure, and minimize the risk of leaks or premature wear. This guide provides detailed torque values and assembly procedures for critical components, along with explanations on why correct torque application is essential for long-term engine reliability.

Parts Catalog for KTA38 Cummins Marine and Industrial Engines
Parts Catalog for KTA50 Cummins Marine and Industrial Engines
Understanding Torque Values in Diesel Engines
Why Torque Values Matter
Applying the correct torque values to fasteners is critical for engine performance and longevity. Incorrect torque can result in:
- Loose components – Leading to vibration, wear, and failure.
- Over-tightening – Causing thread damage, warping, and component stress.
- Uneven clamping force – Resulting in gasket leaks, misalignment, and uneven pressure distribution.
How to Properly Apply Torque
To ensure the correct torque is applied:
- Use a calibrated torque wrench – Avoid using impact guns for precision applications.
- Apply torque in stages – Gradually tighten bolts in the recommended sequence.
- Follow the tightening pattern – Critical for components like cylinder heads, main bearings, and rocker arms.
- Check torque settings twice – Verify fasteners have settled correctly after initial tightening.
- Use thread lubricants or sealants where required – Reduces friction and ensures consistent torque application.
Specifications & Torque Values for Cummins KTA38 and KTA50
Below are the standard torque values for essential fasteners in the Cummins KTA38 and KTA50 engines. Always refer to your specific engine model’s service manual for exact specifications.
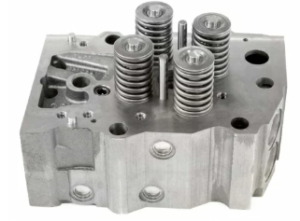
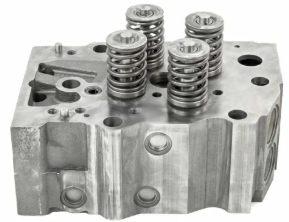
1. Cylinder Head Bolts
- Torque Specification: 190-210 lb-ft
- Purpose: Secures the cylinder head to the engine block, maintaining a proper seal between the combustion chamber and coolant passages.
Tightening Procedure:
- Apply light engine oil to bolt threads and washer surfaces.
- Tighten bolts in four stages:
- Stage 1: 50 lb-ft
- Stage 2: 100 lb-ft
- Stage 3: 150 lb-ft
- Stage 4: 190-210 lb-ft (final torque)
- Follow the specified tightening sequence – This prevents uneven stress distribution.
Common Issues with Cylinder Head Bolts:
- Improper torque sequence – May lead to head gasket failure.
- Loose bolts – Can cause compression leaks, oil leaks, or coolant loss.
- Over-tightening – Risk of cracking the cylinder head or stripping threads.
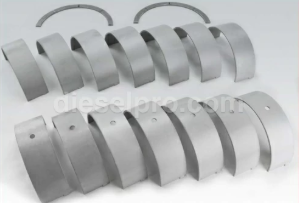
2. Main Bearing Cap Bolts
- Torque Specification: 275-300 lb-ft
- Purpose: Holds the crankshaft main bearings in place, ensuring proper rotation and lubrication.
Tightening Procedure:
- Apply a thin coat of assembly lube to the bolt threads.
- Tighten bolts in three stages:
- Stage 1: 100 lb-ft
- Stage 2: 200 lb-ft
- Stage 3: 275-300 lb-ft (final torque)
- Check clearances with plastigauge before final torqueing.
Common Issues with Main Bearing Cap Bolts:
- Loose bolts – May lead to crankshaft misalignment and bearing wear.
- Over-tightening – Increases stress on the engine block and bearings.
- Uneven torque – Can cause excessive bearing wear and oil clearance issues.
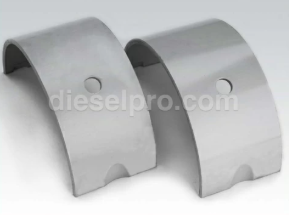
3. Connecting Rod Bolts
- Torque Specification: 125-140 lb-ft
- Purpose: Secures the connecting rod to the crankshaft, ensuring proper reciprocating motion.
Tightening Procedure:
- Apply assembly lube to the threads and underside of the bolt heads.
- Tighten bolts in two stages:
- Stage 1: 75 lb-ft
- Stage 2: 125-140 lb-ft
- Check bearing clearances with plastigauge before final tightening.
Common Issues with Connecting Rod Bolts:
- Loose bolts – Can cause rod bearing failure, knocking noises, or catastrophic engine failure.
- Over-tightening – May lead to thread stripping or rod cap distortion.
- Incorrect sequence – Results in misaligned connecting rods and uneven bearing wear.
4. Injector Hold-Down Bolts

- Torque Specification: 55-60 lb-ft
- Purpose: Secures fuel injectors in place, ensuring proper fuel spray and combustion.
Tightening Procedure:
- Ensure injector seats are clean before installation.
- Tighten bolts in two stages:
- Stage 1: 30 lb-ft
- Stage 2: 55-60 lb-ft
- Inspect injectors for proper alignment and sealing.
Common Issues with Injector Hold-Down Bolts:
- Loose bolts – Leads to fuel leaks and poor injector sealing.
- Over-tightening – Can crack the injector body or warp the hold-down clamp.
5. Rocker Arm Support Bolts
- Torque Specification: 65-75 lb-ft
- Purpose: Holds the rocker arm assembly in place, allowing proper valve operation.
Tightening Procedure:
- Lubricate the bolt threads and contact surfaces.
- Tighten in three stages:
- Stage 1: 30 lb-ft
- Stage 2: 50 lb-ft
- Stage 3: 65-75 lb-ft (final torque)
- Check valve lash clearance after tightening.
Common Issues with Rocker Arm Bolts:
- Loose bolts – Can cause valve train misalignment, loss of power, and noisy operation.
- Over-tightening – May lead to cracked rocker arms or excessive stress on valve components.
Additional Torque Values for Cummins KTA38 and KTA50
| Component | Torque Specification (lb-ft) |
| Flywheel Bolts | 450-500 |
| Camshaft Gear Bolts | 90-110 |
| Exhaust Manifold Bolts | 55-70 |
| Intake Manifold Bolts | 35-45 |
| Oil Pan Bolts | 18-22 |
| Crankshaft Damper Bolts | 275-325 |
Final Considerations for Torqueing Fasteners
1. Always Use a Torque Wrench
- Ensures precision and prevents over-tightening or under-tightening.
2. Follow Proper Tightening Sequences
- Crucial for cylinder heads, bearing caps, and rocker arm supports.
3. Retorque After Initial Run-In
- Some components settle after first startup, requiring a retorque to maintain correct clamping force.
4. Inspect for Thread Damage
- Stripped threads must be repaired using a heli-coil insert or thread chaser.
5. Apply Thread Lubricants Where Specified
- Prevents galling, corrosion, and inconsistent torque values.
Conclusion
Correct torque specifications and proper installation techniques are critical to the long-term durability and performance of Cummins KTA38 and KTA50 engines. Using a calibrated torque wrench, following recommended procedures, and rechecking fasteners ensures reliability and prevents premature failure.
Key Takeaways:
 Always follow the correct torque sequence for critical components.
Use a torque wrench to prevent damage and ensure accuracy.
Check for thread wear and apply lubricants as necessary.
Re-torque certain components after break-in.
For high-quality Cummins replacement parts, visit Diesel Pro Power, where we provide premium aftermarket components for your KTA38 and KTA50 engines.
Parts Catalog for KTA38 Cummins Marine and Industrial Engines
Parts Catalog for KTA50 Cummins Marine and Industrial Engines