

 Free US Calls: 1-888-433-4735
 International: 305-545-5588
Introduction
The electrical system in Cummins QSC 8.3 and QSL 9 engines plays a vital role in starting the engine, powering essential components, and ensuring overall reliability. A properly maintained electrical system prevents starting issues, charging failures, and potential breakdowns.
This guide covers battery maintenance and replacement, alternator and starter inspections, wiring system diagnostics, and common troubleshooting techniques to keep the electrical system in optimal working condition.
Parts Catalog for QSC 8.3 Cummins Marine and Industrial Engines
Starter & Alternator and Related Components for Cummins QSC Engines
Parts Catalog for QSL 9 Cummins Marine and Industrial Engines
Starter & Alternator and Related Components for Cummins QSL Engines
Battery Maintenance and Replacement
The battery provides the initial power required to start the engine and support auxiliary electrical systems. Proper battery maintenance is essential for ensuring reliable engine operation in all conditions.
The Role of the Battery in the Electrical System
- Supplies high cranking power for engine startup.
- Powers essential electronic components before the alternator takes over.
- Stores electrical energy for backup power when the engine is off.
- Stabilizes voltage fluctuations to prevent damage to electrical components.
Signs of a Weak or Failing Battery
- Engine cranks slowly or fails to start.
- Dim dashboard lights and weak electrical accessory performance.
- Clicking noise when turning the key, indicating insufficient power to engage the starter.
- Battery warning light illuminated on the dashboard.
- Corroded battery terminals causing poor connections.
Battery Maintenance Best Practices
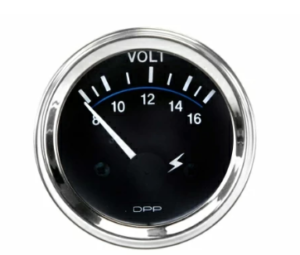
- Check battery voltage regularly. A fully charged battery should read 12.6V to 12.8V when the engine is off and 13.7V to 14.7V when running.
- Inspect for corrosion. Clean battery terminals using baking soda and water to prevent poor connections.
- Tighten battery cables securely. Loose terminals can cause intermittent starting issues.
- Ensure proper electrolyte levels. For non-sealed batteries, maintain proper water levels using distilled water.
- Test battery health every 6 months. Use a load tester to check cranking capacity.
Replacing a Battery in Cummins QSC 8.3 and QSL 9 Engines
- Turn off the engine and disconnect the battery cables. Always remove the negative (-) cable first, then the positive (+) cable.
- Remove the old battery from its tray. Inspect the tray for corrosion or dirt buildup.
- Install the new battery securely. Ensure proper alignment with battery hold-down clamps.
- Reconnect the battery cables. Attach the positive cable first, then the negative cable.
- Test the electrical system by starting the engine and checking for proper voltage output.
Batteries should be replaced every 3-5 years, depending on usage and environmental conditions.
Alternator, Starter, and Wiring Checks

The alternator and starter are critical components in the charging and ignition system. A failing alternator can result in battery drain and electrical failure, while a faulty starter can prevent the engine from cranking.
The Role of the Alternator
- Converts mechanical energy into electrical energy to charge the battery.
- Powers the engine control module (ECM), fuel system, and auxiliary electronics.
- Regulates voltage to prevent overcharging or undercharging the battery.
Signs of a Failing Alternator
- Dim or flickering headlights and dashboard lights.
- Battery warning light illuminated while driving.
- Frequent battery drain, requiring multiple jump-starts.
- Burning smell or whining noise from the alternator due to bearing wear.
- Low voltage readings. Alternator output should be between 13.7V and 14.7V under normal operation.
How to Test and Maintain the Alternator
- Perform a voltage test using a multimeter. Set the meter to DC voltage and check the battery terminals with the engine running.
- Inspect the alternator belt for cracks or looseness. A slipping belt reduces charging efficiency.
- Check the alternator wiring connections for corrosion or loose terminals. Poor connections can lead to charging issues.
- Test the alternator diodes using a multimeter in diode mode. A faulty diode can cause voltage fluctuations.
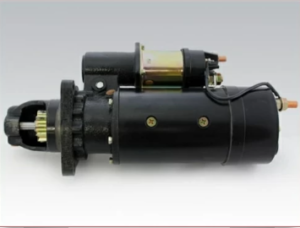
The Role of the Starter Motor
The starter motor is responsible for cranking the engine and engaging the flywheel to initiate combustion. A failing starter can prevent the engine from turning over, even with a fully charged battery.
Signs of a Failing Starter
- Clicking sound when turning the key, but the engine does not crank.
- Slow or weak cranking, even with a good battery.
- Grinding noise from the starter motor, indicating worn gears.
- Starter motor stays engaged, leading to potential damage to the flywheel.
How to Inspect and Test the Starter
- Check battery voltage to ensure sufficient power. A weak battery can mimic starter failure.
- Inspect starter wiring for loose connections or corrosion. Dirty terminals can cause starting issues.
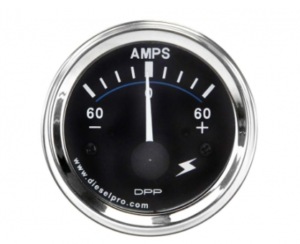
- Perform a starter draw test using a multimeter. A healthy starter should draw between 100-200 amps during cranking.
- Remove and inspect the starter motor for wear. Check for worn brushes, faulty solenoids, or damaged pinions.
Wiring System Checks
The electrical wiring system consists of various harnesses, relays, and fuses that connect the alternator, battery, starter, and engine control module (ECM).
Common Wiring Issues and How to Fix Them
- Loose battery cables or corroded terminals: Clean terminals with battery cleaner and a wire brush.
- Blown fuses causing electrical failures: Replace burnt fuses with the correct amperage rating.
- Chafed or exposed wires leading to shorts: Inspect and replace damaged wiring harnesses.
- Faulty ground connections causing intermittent power loss: Ensure grounding points are secure and free of rust.
Common Electrical Troubleshooting Techniques
Electrical issues in Cummins QSC 8.3 and QSL 9 engines can be challenging to diagnose. Using systematic troubleshooting techniques helps pinpoint faults and prevent unnecessary part replacements.
Step 1: Check Battery Voltage and Connections
- Ensure the battery has at least 12.6V when the engine is off.
- Inspect battery terminals for loose connections or corrosion.
Step 2: Test the Alternator Charging System
- Use a multimeter to check charging voltage at the battery terminals.
- A reading below 13.7V indicates the alternator is not charging properly.
Step 3: Inspect the Starter Motor
- Perform a voltage drop test between the battery and starter terminal.
- A drop of more than 0.5V suggests excessive resistance in the circuit.
Step 4: Scan for Diagnostic Trouble Codes (DTCs)
- Use an OBD-II scanner to check for electrical system faults stored in the engine control module (ECM).
- Look for codes related to low voltage, alternator issues, or sensor failures.
Step 5: Inspect the Wiring and Fuses
- Check all wiring harnesses for damage, corrosion, or loose connectors.
- Replace any blown fuses that may indicate a short circuit or excessive load.
Step 6: Verify Grounding Points
- Poor grounding can cause voltage drops and erratic electrical behavior.
- Clean ground straps and ensure secure mounting to the chassis or engine block.
Step 7: Test Sensors and Relays
- Faulty sensors, such as the crankshaft position sensor, can cause starting issues.
- Use a relay tester or swap with a known working relay to verify function.
Preventative Electrical System Maintenance
- Inspect and clean battery terminals every six months to prevent corrosion.
- Check alternator belt tension and replace if worn to avoid charging failures.
- Perform a voltage check on the battery and alternator regularly to monitor system health.
- Replace worn wiring harnesses before they cause electrical failures.
- Ensure proper grounding for all electrical components to maintain stable voltage levels.
Conclusion
Proper maintenance of the electrical system in Cummins QSC 8.3 and QSL 9 engines is essential for reliable starting, consistent power delivery, and efficient operation. By following battery maintenance schedules, alternator and starter inspections, wiring system diagnostics, and electrical troubleshooting techniques, engine operators can prevent costly downtime and ensure peak performance.
For OEM-quality electrical components, batteries, alternators, and starters, visit Diesel Pro Power for high-performance solutions.
Parts Catalog for QSC 8.3 Cummins Marine and Industrial Engines
Starter & Alternator and Related Components for Cummins QSC Engines
Parts Catalog for QSL 9 Cummins Marine and Industrial Engines
Starter & Alternator and Related Components for Cummins QSL Engines