

 Free US Calls: 1-888-433-4735
 International: 305-545-5588
Introduction
Proper torque specifications and adjustments are essential for ensuring the structural integrity, performance, and longevity of Cummins QSC 8.3 and QSL 9 engines. These engines are built for heavy-duty applications, and precise tightening of bolts and fasteners prevents vibrations, leaks, and premature component failure.
Critical adjustments such as valve clearance and timing settings must be performed correctly to ensure smooth operation, fuel efficiency, and optimal power output. This guide provides detailed torque specifications, best practices for tightening bolts, valve lash adjustments, and timing alignment procedures to help mechanics, technicians, and engine owners maintain these engines properly.
Parts Catalog for QSC 8.3 Cummins Marine and Industrial Engines
Parts Catalog for QSL 9 Cummins Marine and Industrial Engines
Torque Settings for Bolts and Fasteners
The Importance of Proper Torque Settings
Bolts and fasteners play a crucial role in securing engine components and maintaining structural integrity. Incorrect torque values can result in:
- Loose fasteners, causing leaks, misalignment, and vibrations
- Over-tightened bolts, leading to thread stripping or component warping
- Uneven bolt tension, affecting gasket sealing and mechanical balance
Using a torque wrench to follow manufacturer-recommended torque values ensures consistent, secure fastening of engine components.
Torque Specifications for Key Components
TORQUE SPECS FOR CUMMINS ISC, QSC, ISL, & QSL
Below is a breakdown of recommended torque settings for the Cummins QSC 8.3 and QSL 9 engines.
Component |
Torque Specification |
Notes |
| Cylinder Head Bolts | 90 ft-lbs + 90-degree turn | Tighten in three stages using the proper sequence |
| Main Bearing Bolts | 120 ft-lbs | Apply engine oil to threads before tightening |
| Connecting Rod Bolts | 85 ft-lbs | Use a torque-angle gauge for precise tightening |
| Rocker Arm Shaft Bolts | 40 ft-lbs | Ensure even tightening to avoid shaft warping |
| Valve Cover Bolts | 18 ft-lbs | Over-tightening can cause gasket failure |
| Intake Manifold Bolts | 35 ft-lbs | Cross-tighten to ensure even gasket sealing |
| Exhaust Manifold Bolts | 32 ft-lbs | Use high-temperature anti-seize compound on threads |
| Turbocharger Mounting Bolts | 45 ft-lbs | Check for proper alignment before final tightening |
| Fuel Injector Hold-Down Bolts | 55 ft-lbs | Ensure injectors are properly seated before torquing |
| Flywheel Bolts | 250 ft-lbs | Use thread locker to prevent loosening |
| Oil Pan Bolts | 18 ft-lbs | Avoid over-tightening to prevent warping |
| Water Pump Bolts | 25 ft-lbs | Ensure uniform tightening to prevent leaks |
Best Practices for Torque Applications
- Use a calibrated torque wrench for accurate readings.
- Follow a three-stage tightening process (initial, intermediate, and final torque values).
- Tighten bolts in a crisscross or spiral pattern for even distribution of clamping force.
- Apply thread sealant or lubricant where specified to ensure proper clamping.
- Check torque values during routine maintenance to prevent fastener loosening.
Valve Clearance Adjustments
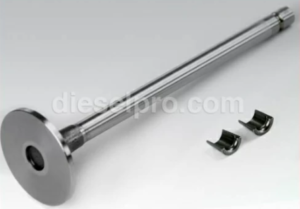
The Role of Valve Clearance Adjustments
Proper valve clearance adjustment is critical to engine efficiency and longevity. The valves control the flow of air and exhaust gases, and incorrect clearance can lead to poor combustion, increased fuel consumption, and valve damage.
When the valve clearance is too tight, the valves may not fully close, causing compression loss and potential engine overheating. If the valve clearance is too loose, excessive valve train noise and reduced power output can occur.
Recommended Valve Lash Specifications
| Valve Type | Cold Clearance (Intake) | Cold Clearance (Exhaust) |
| QSC 8.3 | 0.014 inches | 0.027 inches |
| QSL 9 | 0.015 inches | 0.028 inches |
Valve lash should be checked and adjusted every 1,000 hours or as part of routine maintenance.
Step-by-Step Valve Clearance Adjustment Procedure
- Ensure the engine is cold before making adjustments.
- Remove the valve cover and inspect the rocker arms and pushrods.
- Rotate the crankshaft to bring the first cylinder to Top Dead Center (TDC).
- Insert a feeler gauge between the valve stem and rocker arm.
- Adjust the valve clearance by loosening the locknut and turning the adjusting screw.
- Retighten the locknut while holding the adjusting screw in place.
- Recheck the clearance to ensure the proper gap.
- Repeat the process for all cylinders, following the valve sequence chart.
- Reinstall the valve cover and torque bolts to specification.
Common Mistakes to Avoid
- Skipping rechecking clearances after adjustment.
- Adjusting valves on a warm engine, leading to incorrect settings.
- Over-tightening the locknut, which can damage threads.
- Using a damaged or worn feeler gauge, leading to inaccurate measurements.
Timing Settings and Proper Alignment
The Importance of Correct Timing
Engine timing ensures that pistons, valves, and fuel injectors operate in perfect synchronization. Incorrect timing settings can cause poor fuel combustion, loss of power, engine knocking, and potential valve damage.
The Cummins QSC 8.3 and QSL 9 engines rely on a timing gear system to synchronize crankshaft, camshaft, and fuel injection timing.
Timing Gear and Injector Pump Alignment
| Component | Timing Specification |
| Camshaft Timing Gear | Align timing marks at TDC (Top Dead Center) |
| Crankshaft Timing Gear | Position at 0-degree mark |
| Fuel Injector Timing | Set to Cummins spec for injection duration |
| Flywheel Timing Mark | Align with timing pointer at TDC |
Step-by-Step Timing Adjustment Procedure
- Turn the crankshaft to align the TDC mark on the flywheel.
- Verify that the camshaft gear timing marks are correctly positioned.
- Align the fuel injection pump gear with the camshaft timing marks.
- Install the timing gear cover and torque fasteners to specification.
- Rotate the crankshaft manually to confirm smooth operation.
- Check injector synchronization using a diagnostic scanner if applicable.
Common Timing Issues and Solutions
| Issue | Possible Cause | Solution |
| Engine misfires after timing adjustment | Incorrect camshaft or injector pump alignment | Recheck timing marks and correct alignment |
| Engine won’t start after timing work | Crankshaft or flywheel position misaligned | Verify TDC position and reset timing |
| Excessive white smoke from exhaust | Injector timing too advanced | Retard injection timing slightly and test |
| Knocking noise from engine | Valve timing incorrect | Recheck and adjust valve lash settings |
Best Practices for Setting Timing
- Always verify TDC on the flywheel before adjusting camshaft or injector timing.
- Use a dial indicator to measure cam lift and injection pump stroke for precise tuning.
- Tighten timing gears and bolts to proper torque values to prevent slippage.
- After timing adjustments, run the engine at idle and check for unusual noises or smoke.
Conclusion
Proper torque specifications, valve adjustments, and timing settings are critical for maintaining engine performance, efficiency, and durability in Cummins QSC 8.3 and QSL 9 engines. Following recommended procedures, using accurate tools, and adhering to Cummins specifications will ensure smooth operation and prevent premature failures.
Parts Catalog for QSC 8.3 Cummins Marine and Industrial Engines
Parts Catalog for QSL 9 Cummins Marine and Industrial Engines