Inspection Points For Detroit Diesel 71 Series Inline Engines (271, 371, 471, 671)

Routine inspection of key components in the Detroit Diesel Series 71 engine is essential to maintain engine efficiency and prevent costly breakdowns. Over time, engine parts are subjected to wear and tear, and early detection of problems can help avoid major failures. This section highlights the critical areas that must be closely inspected and provides guidelines on what to look for and how to measure component wear accurately.
1. Cylinder Bores

What to Check:
- Scoring or Wear: Inspect the cylinder bores for scoring, scratches, or excessive wear. Scoring can reduce the effectiveness of the seal between the cylinder wall and piston rings, leading to loss of compression and increased oil consumption.
- Out-of-Roundness: Measure the cylinder bores to check for out-of-roundness, which can occur due to uneven wear.
- Taper: The cylinder bores may wear unevenly, causing a taper from top to bottom. Tapered bores can lead to poor piston ring sealing and affect engine performance.
Measurement:
- Use a bore gauge to measure the internal diameter of the cylinder bore at multiple points, both vertically and horizontally.
- Compare these measurements to the manufacturer’s specifications. If wear exceeds limits, the bores may need to be honed or re-sleeved.
- Maximum Out-of-Roundness: Generally, the maximum allowable out-of-roundness for the Detroit Diesel Series 71 cylinder bores is 0.003 inches (0.076 mm).
- Taper Limit: The allowable taper should be no more than 0.005 inches (0.127 mm).
Parts Catalog for Detroit Diesel 271 Marine Engine
Parts Catalog for Detroit Diesel 371 Marine Engine
Parts Catalog for Detroit Diesel 471 Marine Engine
Parts Catalog for Detroit Diesel 671 Marine Engine
Common Problems:
- Excessive scoring or wear can lead to poor piston performance, oil blow-by, and power loss.
- If out-of-roundness or taper exceeds limits, it may be necessary to machine the cylinder bores or install new liners.
2. Pistons and Rings

What to Check:
- Scoring and Wear: Inspect the piston skirts and crowns for scoring, pitting, or cracks. Scored pistons can result in excessive friction, poor combustion, and potential engine failure.
- Piston Ring End Gap: Check the piston ring end gap, which is the space between the ends of the piston rings when installed in the cylinder. Worn rings with excessive gaps can lead to loss of compression.
- Ring Wear: Inspect the piston rings for signs of wear, cracks, or deformation. Replace any worn or damaged rings to restore compression and engine performance.
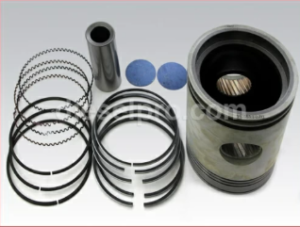
Cylinder Kit & Related Components for Detroit Diesel Marine Engines
Measurement:
- Use a feeler gauge to measure the piston ring end gap by placing the ring inside the cylinder bore.
- Ring End Gap Tolerance: For the Detroit Diesel Series 71 engine, the typical piston ring end gap should be between 0.010 to 0.020 inches (0.25 to 0.50 mm).
- Measure the piston diameter with a micrometer and compare it with the manufacturer’s tolerances to determine whether the piston is within the acceptable wear limits.
Common Problems:
- Worn rings can cause low compression and excessive oil consumption.
- Cracked pistons or severely scored piston surfaces indicate the need for immediate replacement.
3. Crankshaft Journals

What to Check:
- Bearing Surface Condition: Inspect the crankshaft journals for scratches, scoring, or wear. The journals must be smooth and free from damage to ensure proper bearing contact.
- Crankshaft Runout: Measure the straightness of the crankshaft to check for runout. Excessive runout can cause vibrations and uneven wear on bearings.
- Crankshaft Journal Diameter: Measure the diameter of the crankshaft journals to ensure they fall within allowable tolerances. Worn journals can affect bearing clearance and lead to oil pressure issues.
Measurement:
- Use a micrometer to measure the diameter of the crankshaft journals at several points along their length.
- Runout: Use a dial indicator to measure crankshaft runout. For the Detroit Diesel Series 71 engine, the maximum allowable runout is typically 0.001 to 0.002 inches (0.025 to 0.050 mm).
- Main Bearing and Rod Bearing Clearance: The clearance between the crankshaft journals and bearings should be measured using a plastic gauge or a micrometer. The typical clearance should be between 0.0015 to 0.0035 inches (0.038 to 0.089 mm).
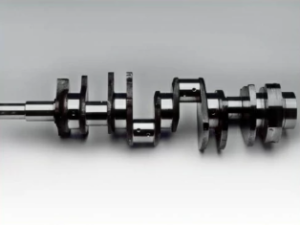
Crankshaft for & Related Components Detroit Diesel Marine Engines
Common Problems:
- Scored or worn crankshaft journals can lead to improper lubrication, increased friction, and bearing failure.
- Excessive runout can cause engine vibration, poor performance, and premature wear on bearings and journals.
4. Valves and Valve Seats

What to Check:
- Valve Face Condition: Inspect the valve faces for signs of pitting, burning, or warping. Damaged valve faces may not seat properly, leading to loss of compression.
- Valve Seat Condition: Inspect the valve seats for signs of wear or improper contact with the valve face.
- Valve Stem Wear: Check the valve stems for excessive wear or bending, which can cause improper valve operation.
Measurement:
- Use a valve seat gauge to measure the width and angle of the valve seat. The correct valve seat width for the Detroit Diesel Series 71 engine should typically be between 0.060 to 0.090 inches (1.5 to 2.3 mm).
- Measure the valve stem-to-guide clearance using a micrometer and compare the clearance to the specified limits (generally 0.0015 to 0.003 inches (0.038 to 0.076 mm)).
Common Problems:
- Worn valve faces and seats can lead to poor sealing, resulting in compression loss and incomplete combustion.
- Excessive valve stem wear can cause improper valve operation and poor performance.
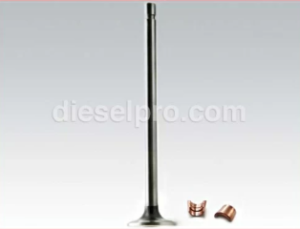
Valve Seat & Related parts for Detroit Diesel Engines
5. Bearings

What to Check:
- Bearing Surface Wear: Inspect the main and rod bearings for signs of scoring, pitting, or wear. Bearings must have smooth surfaces to allow proper lubrication and reduce friction between the rotating components.
- Bearing Clearance: Measure the clearance between the bearings and the crankshaft journals. Too much clearance can reduce oil pressure, while too little clearance can cause excessive friction.
Measurement:
- Use a micrometer or plastic gauge to measure bearing clearance. The typical clearance for the Detroit Diesel Series 71 engine bearings should fall between 0.0015 to 0.0035 inches (0.038 to 0.089 mm).
- Replace bearings if they show signs of scoring, wear, or if the clearance exceeds the specified limits.
Common Problems:
- Worn bearings can result in low oil pressure, engine knocking, and eventual bearing failure.
- Excessive bearing clearance can cause poor lubrication, leading to increased friction and overheating.
Crankshaft Bearings & Related Parts For Detroit DieselConnecting Rod Bearings & Related Parts For Detroit Diesel
6. Gaskets and Seals

What to Check:
- Signs of Leaks: Inspect all gaskets and seals for signs of wear or leakage. Gaskets and seals must be intact to prevent the leakage of oil, coolant, or air from the engine.
- Proper Seating: Check that all gaskets are seated properly and are not damaged during assembly. Poorly seated gaskets can cause fluid leaks and air ingress into the engine.
Replacement:
- Replace any gaskets or seals that show signs of damage, wear, or leakage to ensure proper sealing of the engine.
Common Problems:
- Leaking gaskets or seals can cause oil or coolant loss, leading to overheating or contamination of engine components.
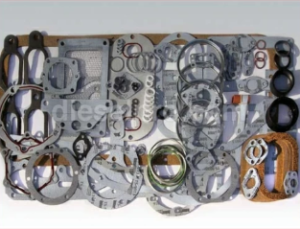
Gaskets and Seals Kit & Related Components for Detroit Diesel Marine Engines
Conclusion To Critical Inspection Points
Routine inspection of the critical points mentioned above is crucial for maintaining the performance and reliability of the Detroit Diesel Series 71 engine. By closely inspecting cylinder bores, pistons, crankshaft journals, valves, bearings, and seals, operators can detect early signs of wear and prevent major engine failures. Regularly measuring tolerances and replacing worn components will ensure that the engine operates at peak efficiency and minimizes downtime.


 Free US Calls: 1-888-433-4735
 International: 305-545-5588