
Taking Apart The Air Cleaner For The Detroit Diesel 71 Inline Series Engine (271, 371, 471, 671)
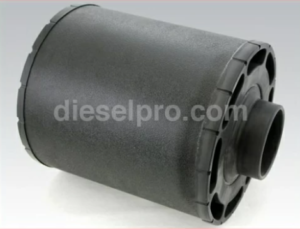
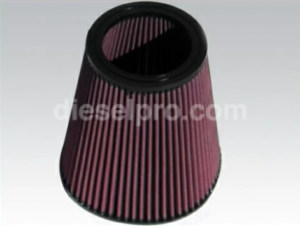
The air cleaner is an essential component of the engine’s air intake system, designed to filter out dirt, dust, and other contaminants from the air before it enters the engine. Proper maintenance of the air cleaner is crucial to prevent debris from entering the combustion chamber, which can cause damage and reduce engine performance. Regular inspection, cleaning, or replacement of the air cleaner ensures that the engine receives clean air, improving fuel efficiency and extending engine life.
Parts Catalog for Turbo & Related Components for Detroit Diesel Marine Engine
Parts Catalog for Blower & Related Components for Detroit Diesel Marine Engine
Parts Catalog for Exhaust & Related Components for Detroit Diesel Marine Engine
Safety Precautions
- Ensure the Engine is Cool: Allow the engine to cool down before working on the air cleaner, as hot components may cause burns.
- Wear Protective Gear: Use gloves and safety goggles to protect yourself from dirt, dust, and debris during disassembly and cleaning.
Disassembly Steps
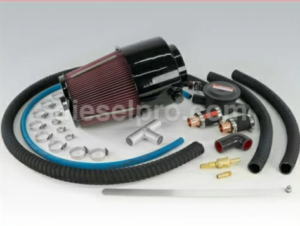
1. Locate and Access the Air Cleaner
The air cleaner is typically mounted on or near the engine’s air intake system, leading to the turbocharger or intake manifold.
- Ensure Accessibility:
- Before removing the air cleaner, ensure that there are no components obstructing access, such as hoses or wiring. Move aside any components as necessary to gain access to the air cleaner.
- Before removing the air cleaner, ensure that there are no components obstructing access, such as hoses or wiring. Move aside any components as necessary to gain access to the air cleaner.
2. Remove the Air Cleaner Cover
The air cleaner is housed within a protective cover that must be removed to access the filter element inside.
- Loosen the Cover Fasteners:
- Use a socket wrench or screwdriver to loosen the fasteners securing the air cleaner cover. These may include bolts, screws, or clamps, depending on the engine’s configuration.
- Use a socket wrench or screwdriver to loosen the fasteners securing the air cleaner cover. These may include bolts, screws, or clamps, depending on the engine’s configuration.
- Carefully Remove the Cover:
- Once the fasteners are removed, carefully lift the air cleaner cover away from the housing. Set the cover aside in a clean area to prevent contamination.
- Once the fasteners are removed, carefully lift the air cleaner cover away from the housing. Set the cover aside in a clean area to prevent contamination.
3. Remove the Air Filter Element
Inside the air cleaner housing, you will find the air filter element, which is the component that traps dirt and debris.
- Remove the Filter:
- Carefully lift the air filter element out of the housing. Be cautious not to dislodge any trapped dirt or debris into the air intake. Depending on the design, the filter may be a paper, foam, or reusable mesh element.
- Carefully lift the air filter element out of the housing. Be cautious not to dislodge any trapped dirt or debris into the air intake. Depending on the design, the filter may be a paper, foam, or reusable mesh element.
- Inspect the Filter:
- Examine the air filter for dirt, damage, or clogging. If the filter is heavily soiled or damaged, it should be replaced. If the filter is reusable, it should be cleaned according to the manufacturer’s instructions.
Inspection of the Air Cleaner Components
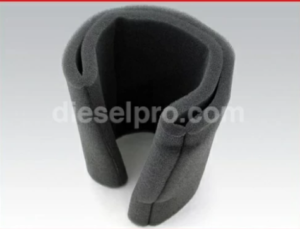
- Inspect the Air Filter Element:
- If the air filter is a reusable type (foam or mesh), inspect it for holes, tears, or excessive wear. If the filter is damaged or beyond cleaning, it should be replaced. Disposable filters should be replaced regularly, especially in dusty environments.
- If the air filter is a reusable type (foam or mesh), inspect it for holes, tears, or excessive wear. If the filter is damaged or beyond cleaning, it should be replaced. Disposable filters should be replaced regularly, especially in dusty environments.
- Check for Debris in the Housing:
- Inspect the air cleaner housing for any accumulated dust, dirt, or debris that may have bypassed the filter. Use a clean rag or vacuum to remove any contaminants from the housing to prevent them from entering the engine.
- Inspect the air cleaner housing for any accumulated dust, dirt, or debris that may have bypassed the filter. Use a clean rag or vacuum to remove any contaminants from the housing to prevent them from entering the engine.
- Inspect the Seals and Gaskets:
- Check the rubber seals and gaskets around the air cleaner cover and housing for wear or cracks. Worn or damaged seals can allow unfiltered air to bypass the filter, leading to engine damage.
Reassembly Notes
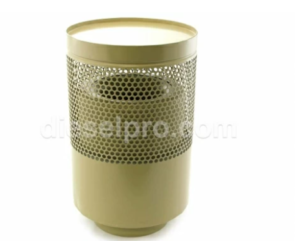
- Install a New or Cleaned Air Filter:
- If you are using a new air filter, ensure it is the correct size and type for your engine. If you have cleaned a reusable filter, ensure it is completely dry before reinstalling it in the air cleaner housing. Place the filter into the housing carefully, ensuring it is seated properly.
- If you are using a new air filter, ensure it is the correct size and type for your engine. If you have cleaned a reusable filter, ensure it is completely dry before reinstalling it in the air cleaner housing. Place the filter into the housing carefully, ensuring it is seated properly.
- Reinstall the Air Cleaner Cover:
- Once the filter is in place, reinstall the air cleaner cover. Ensure that the cover is aligned properly with the housing, and tighten the fasteners evenly. Avoid over-tightening, as this can damage the cover or seals.
- Once the filter is in place, reinstall the air cleaner cover. Ensure that the cover is aligned properly with the housing, and tighten the fasteners evenly. Avoid over-tightening, as this can damage the cover or seals.
- Reconnect Any Obstructed Components:
- If any hoses or wiring were moved to access the air cleaner, reconnect and secure them properly during reassembly.
Inspection Tips
- Regular Filter Replacement:
- For disposable air filters, replace them at regular intervals based on the engine’s operating environment. In dusty or harsh conditions, air filters may need to be replaced more frequently to maintain engine performance.
- For disposable air filters, replace them at regular intervals based on the engine’s operating environment. In dusty or harsh conditions, air filters may need to be replaced more frequently to maintain engine performance.
- Clean Reusable Filters:
- If using a reusable filter, clean it according to the manufacturer’s specifications. Ensure that it is completely dry before reinstallation to prevent moisture from entering the air intake.
- If using a reusable filter, clean it according to the manufacturer’s specifications. Ensure that it is completely dry before reinstallation to prevent moisture from entering the air intake.
- Check for Proper Sealing:
- After reassembly, check that the air cleaner cover is properly sealed. Improper sealing can allow dirt and debris to enter the intake, causing engine damage.
Parts Catalog for Turbo & Related Components for Detroit Diesel Marine Engine
- After reassembly, check that the air cleaner cover is properly sealed. Improper sealing can allow dirt and debris to enter the intake, causing engine damage.
Taking Apart The Air Shutdown System For The Detroit Diesel 71 Inline Series Engine (271, 371, 471, 671)
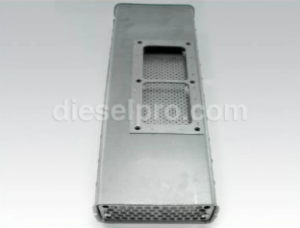
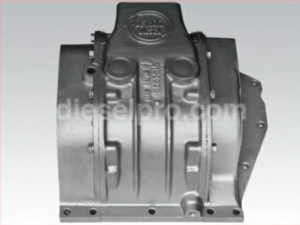
The air shutdown system is a critical safety feature on diesel engines that allows for an emergency shutdown by cutting off the air supply to the engine. This system is often used in situations where fuel shutoff alone is not enough to stop the engine, such as in runaway conditions. The air shutdown housing encloses the components of this system, and its proper maintenance ensures that the shutdown function works reliably when needed.
Safety Precautions
- Ensure the Engine is Cool: Before working on the air shutdown system, allow the engine to cool down completely to avoid burns or injury from hot components.
- Disconnect the Battery: Always disconnect the battery before working on the air shutdown housing to prevent accidental engine start-up during maintenance.
- Wear Protective Gear: Use gloves and safety goggles to protect your hands and eyes from debris or sharp edges during disassembly.
Disassembly Steps
1. Locate the Air Shutdown Housing
The air shutdown housing is typically mounted near the air intake system, before the turbocharger or intake manifold, and is connected to the engine’s air intake piping.
- Ensure Accessibility:
- Check for any components, such as hoses or electrical wiring, that may obstruct access to the air shutdown housing. If necessary, move or disconnect these components to gain clear access.
- Check for any components, such as hoses or electrical wiring, that may obstruct access to the air shutdown housing. If necessary, move or disconnect these components to gain clear access.
2. Remove the Air Shutdown Housing Cover
The air shutdown housing consists of a cover that protects the internal components responsible for shutting off the engine’s air supply.
- Loosen the Fasteners:
- Use a socket wrench or screwdriver to loosen the bolts, screws, or clamps securing the air shutdown housing cover in place. Carefully set aside these fasteners for reassembly.
- Use a socket wrench or screwdriver to loosen the bolts, screws, or clamps securing the air shutdown housing cover in place. Carefully set aside these fasteners for reassembly.
- Carefully Remove the Cover:
- Once the fasteners are removed, carefully lift the air shutdown housing cover away. Be mindful of any attached components or gaskets that may need to be handled with care.
- Once the fasteners are removed, carefully lift the air shutdown housing cover away. Be mindful of any attached components or gaskets that may need to be handled with care.
3. Inspect the Internal Components of the Air Shutdown System
Inside the air shutdown housing, you will find components such as the air shutoff valve or butterfly valve, which is responsible for closing off the airflow in the event of an emergency shutdown.
- Inspect the Air Shutoff Valve:
- Examine the air shutoff valve for signs of wear, damage, or carbon buildup. The valve should move freely without binding or sticking, as any malfunction could prevent the system from operating effectively.
- Examine the air shutoff valve for signs of wear, damage, or carbon buildup. The valve should move freely without binding or sticking, as any malfunction could prevent the system from operating effectively.
- Check the Valve Linkages:
- Inspect the linkages that connect the air shutoff valve to the control mechanism. Ensure that all linkages are properly aligned, free of corrosion, and functioning smoothly. Lubricate them if necessary to ensure smooth operation.
Inspection of the Air Shutdown Housing Components
- Inspect the Housing for Cracks or Damage:
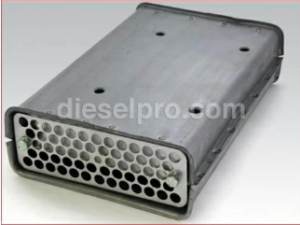
- Examine the air shutdown housing itself for any signs of cracks, warping, or damage. The housing must remain airtight to effectively cut off the air supply during shutdown.
- Examine the air shutdown housing itself for any signs of cracks, warping, or damage. The housing must remain airtight to effectively cut off the air supply during shutdown.
- Check for Air Leaks:
- Inspect the seals and gaskets around the air shutdown housing cover for wear or damage. Leaks in the system could prevent it from functioning properly in an emergency. Replace any damaged seals or gaskets during reassembly.
- Inspect the seals and gaskets around the air shutdown housing cover for wear or damage. Leaks in the system could prevent it from functioning properly in an emergency. Replace any damaged seals or gaskets during reassembly.
- Ensure the Valve Closes Properly:
- Manually operate the air shutoff valve to ensure it closes fully and creates a complete seal. If the valve does not close properly, it may need to be cleaned, adjusted, or replaced.
Reassembly Notes
- Clean the Components:
- Before reassembly, clean the inside of the air shutdown housing and any internal components, such as the air shutoff valve, using a degreaser or appropriate cleaning solution. Remove any carbon buildup, dirt, or debris that could interfere with the system’s operation.
- Before reassembly, clean the inside of the air shutdown housing and any internal components, such as the air shutoff valve, using a degreaser or appropriate cleaning solution. Remove any carbon buildup, dirt, or debris that could interfere with the system’s operation.
- Reinstall the Air Shutdown Housing Cover:
- After cleaning and inspecting all components, carefully reinstall the air shutdown housing cover. Ensure that the cover is properly aligned and that all fasteners are tightened evenly to prevent air leaks.
- After cleaning and inspecting all components, carefully reinstall the air shutdown housing cover. Ensure that the cover is properly aligned and that all fasteners are tightened evenly to prevent air leaks.
- Check the Linkages:
- Recheck the valve linkages to ensure they are properly aligned and functioning smoothly. Lubricate the linkages if necessary to reduce friction and ensure proper operation.
- Recheck the valve linkages to ensure they are properly aligned and functioning smoothly. Lubricate the linkages if necessary to reduce friction and ensure proper operation.
- Reconnect Any Obstructed Components:
- Reconnect any hoses, wiring, or other components that were disconnected or moved during the disassembly process. Ensure that all connections are secure and correctly routed.
Inspection Tips
- Test the System:
- After reassembly, test the air shutdown system by manually activating the air shutoff valve to ensure it operates smoothly and completely closes off the air supply.
- After reassembly, test the air shutdown system by manually activating the air shutoff valve to ensure it operates smoothly and completely closes off the air supply.
- Regular Maintenance:
- Regularly inspect the air shutdown housing and components to ensure the system remains functional. Clean and lubricate the air shutoff valve and linkages during routine maintenance.
- Regularly inspect the air shutdown housing and components to ensure the system remains functional. Clean and lubricate the air shutoff valve and linkages during routine maintenance.
- Inspect the Seals and Gaskets:
- During routine maintenance, check the condition of the seals and gaskets around the air shutdown housing to ensure there are no leaks that could prevent the system from operating effectively in an emergency.
Parts Catalog for Turbo & Related Components for Detroit Diesel Marine Engine
Parts Catalog for Blower & Related Components for Detroit Diesel Marine Engine
Parts Catalog for Exhaust & Related Components for Detroit Diesel Marine Engine
- During routine maintenance, check the condition of the seals and gaskets around the air shutdown housing to ensure there are no leaks that could prevent the system from operating effectively in an emergency.


 Free US Calls: 1-888-433-4735
 International: 305-545-5588