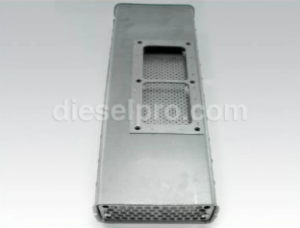
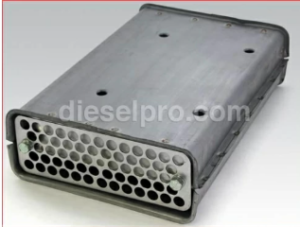
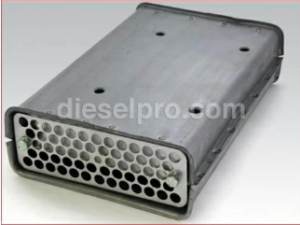
Disassembly Of Air Box Covers For Detroit Diesel 71 Series Inline Engines (271, 371, 471, 671)

The air box covers on the Detroit Diesel Series 71 engine are essential for managing airflow into the engine and keeping debris out of the air box passages. Removing these covers is necessary when performing deeper maintenance on the engine’s air system, blower, or cylinders. Proper disassembly ensures the air box passages remain clean and free from contaminants.
Safety Precautions:
- Wear Protective Gear: Always wear gloves and safety goggles when working on the air box covers. Dust, dirt, and other debris can accumulate around the covers, which may be disturbed during removal.
- Ensure the Engine is Cool: Make sure the engine has cooled before working on the air box covers to avoid burns from any residual heat.
Blower & Related Components for Detroit Diesel Marine and Industrial EngineTurbo & Related Components for Detroit Diesel Marine Industrial Engine
Disassembly Steps

1. Locate and Access the Air Box Covers
The airbox covers are usually located on both sides of the engine and provide access to the airbox passages. These covers help regulate airflow into the engine and prevent contamination.
- Ensure Accessibility:
- Before removing the covers, make sure you have clear access to the air box areas by moving aside any components that may block the removal process. This could include hoses, cables, or other engine components that need to be temporarily repositioned.
- Before removing the covers, make sure you have clear access to the air box areas by moving aside any components that may block the removal process. This could include hoses, cables, or other engine components that need to be temporarily repositioned.
2. Loosen and Remove the Fasteners
The airbox covers are secured to the engine block with bolts or screws. Removing these fasteners carefully will ensure that the covers come off without damaging the sealing surfaces.
- Use the Correct Tool:
- Use a wrench or socket set to remove the bolts securing the air box covers. If the fasteners are rusted or tight, apply penetrating oil and allow it to sit for a few minutes before loosening them.
- Use a wrench or socket set to remove the bolts securing the air box covers. If the fasteners are rusted or tight, apply penetrating oil and allow it to sit for a few minutes before loosening them.
- Loosen in an Even Pattern:
- Loosen the bolts evenly to avoid putting too much stress on any one area of the cover. If necessary, support the cover as you remove the last few bolts to prevent it from falling.
- Loosen the bolts evenly to avoid putting too much stress on any one area of the cover. If necessary, support the cover as you remove the last few bolts to prevent it from falling.
3. Carefully Remove the Air Box Covers
Once all fasteners have been removed, gently pry the air box covers away from the engine block. Take care not to damage the covers or the gasket beneath them.
- Use a Soft Tool to Pry if Necessary:
- If the cover is stuck due to an old gasket or dirt buildup, use a soft plastic or rubber tool to gently pry it free. Avoid using metal tools that could damage the sealing surfaces.
- If the cover is stuck due to an old gasket or dirt buildup, use a soft plastic or rubber tool to gently pry it free. Avoid using metal tools that could damage the sealing surfaces.
- Inspect the Gasket:
- After removing the covers, inspect the gasket for wear or damage. If the gasket is worn, cracked, or stuck to the sealing surface, it should be replaced. Remove any old gasket material carefully using a scraper or gasket remover.
- After removing the covers, inspect the gasket for wear or damage. If the gasket is worn, cracked, or stuck to the sealing surface, it should be replaced. Remove any old gasket material carefully using a scraper or gasket remover.
4. Inspect the Air Box and Covers
With the covers removed, inspect the air box and the covers themselves for signs of dirt, oil, or damage.
- Check for Dirt or Debris:
- The air box area should be free of debris, dust, or oil buildup. Clean the air box passages if needed to ensure unrestricted airflow. Use compressed air or a clean rag to remove any dirt or foreign material.
- The air box area should be free of debris, dust, or oil buildup. Clean the air box passages if needed to ensure unrestricted airflow. Use compressed air or a clean rag to remove any dirt or foreign material.
- Inspect the Covers for Damage:
- Look over the air box covers for any signs of cracks, warping, or corrosion. Damaged covers should be repaired or replaced to ensure they seal properly during reassembly.
Reassembly Notes

- Clean the Sealing Surface:
- Before reinstalling the air box covers, thoroughly clean the sealing surfaces on both the engine block and the covers. Remove any old gasket material or dirt to ensure a tight seal when the new gaskets are installed.
- Before reinstalling the air box covers, thoroughly clean the sealing surfaces on both the engine block and the covers. Remove any old gasket material or dirt to ensure a tight seal when the new gaskets are installed.
- Install New Gaskets:
- Always install new gaskets when reassembling the air box covers. This ensures that no air or debris can enter the air box passages. Make sure the gaskets are aligned correctly with the bolt holes and seating surfaces.
- Always install new gaskets when reassembling the air box covers. This ensures that no air or debris can enter the air box passages. Make sure the gaskets are aligned correctly with the bolt holes and seating surfaces.
- Reinstall the Air Box Covers:
- Place the air box covers back onto the engine block, ensuring they are aligned with the mounting points. Hand-tighten the bolts first to ensure proper alignment, then use a torque wrench to tighten them evenly in a criss-cross pattern according to the manufacturer’s specifications.
- Place the air box covers back onto the engine block, ensuring they are aligned with the mounting points. Hand-tighten the bolts first to ensure proper alignment, then use a torque wrench to tighten them evenly in a criss-cross pattern according to the manufacturer’s specifications.
- Check for Proper Sealing:
- After reassembling, check that the air box covers are sealing tightly by visually inspecting the seams around the covers. Ensure there are no gaps or signs of improper fitment.
- After reassembling, check that the air box covers are sealing tightly by visually inspecting the seams around the covers. Ensure there are no gaps or signs of improper fitment.
- Reposition Any Disconnected Components:
- If you moved any hoses, cables, or other components to access the air box covers, reposition and secure them properly.
Inspection Tips:
- Look for Signs of Oil: If you find oil in the air box, this could indicate a potential issue with the piston rings or valves. Investigate the source of the oil and address any underlying problems.
- Check for Loose Debris: Ensure no loose debris or dirt remains in the air box area before reassembling the covers, as this could interfere with engine performance.
- Ensure Cleanliness: Keeping the air box area clean is critical for engine performance. Regularly inspect and clean this area during routine maintenance to prevent contaminants from entering the engine.
Blower & Related Components for Detroit Diesel Marine Industrial Engine
Turbo & Related Components for Detroit Diesel Marine Industrial Engine


 Free US Calls: 1-888-433-4735
 International: 305-545-5588