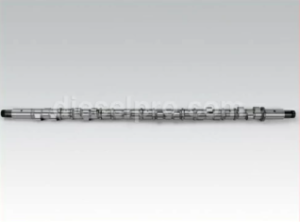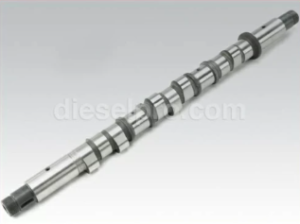
The camshaft and balance shaft are essential components for the proper timing and smooth operation of the Detroit Diesel Series 71 engine. The camshaft controls the opening and closing of the valves, while the balance shaft helps reduce engine vibrations. Proper disassembly of these components is crucial during maintenance, overhaul, or replacement. Careful handling of the camshaft and balance shaft is necessary to prevent damage to the lobes, bearings, or timing mechanism.
Safety Precautions:
- Disconnect the Battery: Always disconnect the battery before working on the camshaft and balance shaft to prevent accidental engine start-up or electrical shorts.
- Ensure the Engine is Cool: Make sure the engine has fully cooled down before starting disassembly to avoid burns or damage to hot components.
- Wear Protective Gear: Use gloves and safety goggles to protect yourself from oil, debris, or sharp edges during the disassembly process.
Disassembly Steps For Detroit Diesel 71 Series Inline Camshaft & Balancer Shaft (271, 371, 471, 671)

1. Remove the Valve Cover and Rocker Assemblies
Before accessing the camshaft, you’ll need to remove the valve cover and rocker assemblies.
- Remove the Valve Cover:
- Use a socket wrench to remove the bolts securing the valve cover to the cylinder head. Lift the valve cover off and place it aside in a clean area.
- Inspect the valve cover gasket for wear or damage. Replace it during reassembly if necessary.
- Remove the Rocker Assemblies:
- The rocker arms are mounted on a shaft that controls the movement of the valves. Loosen and remove the bolts securing the rocker arms and shaft to the cylinder head.
- Carefully lift the rocker assembly off and inspect the components for wear. Set them aside in an organized manner for reassembly.
2. Disconnect the Timing Gear Cover
To access the camshaft, you need to remove the timing gear cover.
- Remove the Timing Gear Cover Bolts:
- The timing gear cover is secured with a series of bolts. Use a socket wrench to remove these bolts, taking care not to damage the cover. Once all the bolts are removed, gently pry off the cover using a soft tool like a rubber mallet or plastic pry bar.
- Inspect the timing gear cover for any signs of wear, cracks, or oil leaks. Replace the cover or gasket if needed.
3. Remove the Timing Gears
The camshaft and balance shaft are driven by the engine’s timing gears. These gears must be removed to free the camshaft and balance shaft.
- Mark the Timing Gear Positions:
- Before removing the timing gears, mark their positions with reference points to ensure proper reinstallation. This is critical for maintaining the engine’s timing during reassembly.
- Before removing the timing gears, mark their positions with reference points to ensure proper reinstallation. This is critical for maintaining the engine’s timing during reassembly.
- Loosen and Remove the Timing Gears:
- Use a gear puller to carefully loosen and remove the timing gears from the camshaft and balance shaft. Be cautious not to damage the gear teeth or shafts during removal.
- Set the timing gears aside and inspect them for wear. Replace any gears that show signs of damage or excessive wear.
4. Remove the Camshaft
With the timing gears removed, the camshaft is now free to be removed from the engine.
- Loosen the Camshaft Bearings:
- The camshaft is supported by bearings, which need to be loosened before the camshaft can be removed. Use a socket wrench to loosen and remove the camshaft bearing caps.
- Carefully lift the camshaft out of the engine block, ensuring that you do not damage the lobes or journals as you remove it.
- Inspect the Camshaft:
- Once removed, inspect the camshaft lobes for wear, pitting, or damage. Check the journals for scoring or roughness. If the camshaft is worn, it may need to be re-ground or replaced.
- Also inspect the camshaft bearings for wear or damage. Replace them if necessary during reassembly.
5. Remove the Balance Shaft
The balance shaft works to reduce engine vibrations, ensuring smooth operation. Once the camshaft is removed, the balance shaft can be taken out as well.
- Loosen the Balance Shaft Bearings:
- The balance shaft is supported by bearings similar to the camshaft. Use a socket wrench to loosen and remove the balance shaft bearing caps.
- Carefully lift the balance shaft out of the engine block, ensuring that you don’t damage the shaft or bearings during removal.
- Inspect the Balance Shaft:
- Inspect the balance shaft for wear, scoring, or damage. Make sure the shaft is straight and free from any defects that could affect engine performance.
- Inspect the balance shaft bearings for wear or damage. Replace them if necessary.
Reassembly Notes

- Install New Bearings and Seals:
- Before reinstalling the camshaft and balance shaft, install new bearings and seals. Proper lubrication of the bearings is essential to ensure smooth operation and prevent premature wear.
- Before reinstalling the camshaft and balance shaft, install new bearings and seals. Proper lubrication of the bearings is essential to ensure smooth operation and prevent premature wear.
- Reinstall the Camshaft:
- Carefully place the camshaft back into the engine block, ensuring the lobes and journals are properly aligned. Secure the camshaft with the bearing caps, tightening the bolts to the manufacturer’s specified torque settings.
- Ensure the camshaft rotates smoothly and without resistance.
- Reinstall the Balance Shaft:
- Place the balance shaft back into the engine block, securing it with the bearing caps. Tighten the bolts to the manufacturer’s specified torque settings.
- Rotate the balance shaft to ensure it moves freely and without binding.
- Reinstall the Timing Gears:
- Align the timing gears with the marks made during disassembly to ensure proper engine timing. Reinstall the gears onto the camshaft and balance shaft, tightening them to the specified torque settings.
- Verify that the timing gears mesh correctly and turn smoothly.
- Reinstall the Timing Gear Cover:
- After the camshaft, balance shaft, and timing gears are in place, reinstall the timing gear cover. Replace the gasket if necessary to ensure proper sealing. Tighten the cover bolts evenly to avoid warping the cover.
- After the camshaft, balance shaft, and timing gears are in place, reinstall the timing gear cover. Replace the gasket if necessary to ensure proper sealing. Tighten the cover bolts evenly to avoid warping the cover.
- Reinstall the Rocker Assemblies and Valve Cover:
- Reinstall the rocker arms and shaft, ensuring that they are properly aligned with the valves. Tighten the bolts to the manufacturer’s specified torque settings.
- Reinstall the valve cover and replace the gasket if necessary to prevent oil leaks.
Inspection Tips
- Check for Proper Camshaft Alignment:
During reassembly, ensure the camshaft is properly aligned with the timing gears. Misalignment can lead to improper valve timing, which can significantly affect engine performance.
- Inspect for Wear on Bearings:
Regularly inspect the camshaft and balance shaft bearings for signs of wear. Worn bearings can lead to excessive play, which affects the smooth operation of the engine.
- Check for Oil Leaks:
After reassembly, inspect the timing gear cover and valve cover for signs of oil leaks. If leaks are present, replace the gaskets to ensure a proper seal.
 Camshaft & Related Components for Detroit Diesel


 Free US Calls: 1-888-433-4735
 International: 305-545-5588