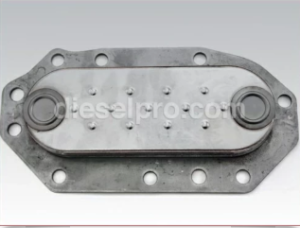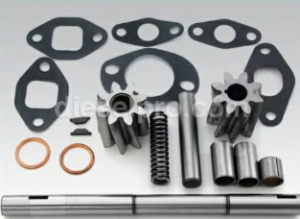
The oil system in the Detroit Diesel Series 71 engine plays a critical role in lubricating, cooling, and cleaning the engine’s moving parts. The key components of the oil system include the oil pump, oil cooler, oil filter housing, and various lines and fittings. Proper disassembly of these components is essential for maintenance, overhaul, or troubleshooting oil system issues such as leaks or low oil pressure.
Safety Precautions:
- Allow the Engine to Cool: Ensure the engine has fully cooled down to avoid burns from hot oil or components.
- Drain the Engine Oil: Before beginning disassembly, always drain the engine oil to prevent spills during component removal.
- Wear Protective Gear: Wear gloves and safety goggles to protect yourself from hot oil, debris, and other hazards during disassembly.
Oil Pump & Related Components for Detroit Diesel Marine Engine
Disassembly Steps For The Oil System Of A Detroit Diesel 71 Series Inline Engine (271, 371, 471, 671)

1. Drain the Engine Oil
Before removing any oil system components, the engine oil must be completely drained from the system.
- Locate the Oil Drain Plug:
- Place a drain pan under the engine’s oil pan and remove the oil drain plug using a socket wrench. Allow the oil to drain fully from the engine.
- Place a drain pan under the engine’s oil pan and remove the oil drain plug using a socket wrench. Allow the oil to drain fully from the engine.
- Remove the Oil Filter:
- Unscrew the oil filter from its housing. Use an oil filter wrench if necessary. Allow any residual oil to drain from the filter, and dispose of it according to environmental regulations.
Oil Pump & Related Components for Detroit Diesel Marine Engine
- Unscrew the oil filter from its housing. Use an oil filter wrench if necessary. Allow any residual oil to drain from the filter, and dispose of it according to environmental regulations.
2. Remove the Oil Filter Housing
The oil filter housing connects the filter to the engine’s oil passages. Removing this housing is necessary to access the oil cooler and oil pump in some setups.
- Loosen the Oil Filter Housing Bolts:
- Use a socket wrench to remove the bolts securing the oil filter housing to the engine block. Carefully remove the housing and set it aside.
- Use a socket wrench to remove the bolts securing the oil filter housing to the engine block. Carefully remove the housing and set it aside.
- Inspect the Housing:
- Inspect the oil filter housing for cracks or damage. Check the gasket and replace it during reassembly to prevent oil leaks.
Oil Pump & Related Components for Detroit Diesel Marine Engine
- Inspect the oil filter housing for cracks or damage. Check the gasket and replace it during reassembly to prevent oil leaks.
3. Remove the Oil Cooler (If Equipped)
The oil cooler helps regulate the temperature of the engine oil by transferring excess heat to the engine’s coolant. Disassembly of the oil cooler may be necessary for inspection or replacement.
- Disconnect the Oil Cooler Lines:
- The oil cooler is connected to the engine via oil lines. Use a wrench to loosen and disconnect the oil lines from the cooler. Cap the open oil ports to prevent contamination.
- The oil cooler is connected to the engine via oil lines. Use a wrench to loosen and disconnect the oil lines from the cooler. Cap the open oil ports to prevent contamination.
- Remove the Mounting Bolts:
- Use a socket wrench to remove the bolts securing the oil cooler to the engine. Carefully lift the cooler away from the engine block, being mindful of any residual oil inside the unit.
- Use a socket wrench to remove the bolts securing the oil cooler to the engine. Carefully lift the cooler away from the engine block, being mindful of any residual oil inside the unit.
- Inspect the Oil Cooler:
- Check the oil cooler for signs of leaks, corrosion, or blockages. If the cooler is damaged or clogged, it should be replaced or cleaned during reassembly.
Oil Pump & Related Components for Detroit Diesel Marine Engine
- Check the oil cooler for signs of leaks, corrosion, or blockages. If the cooler is damaged or clogged, it should be replaced or cleaned during reassembly.
4. Remove the Oil Pump
The oil pump is responsible for circulating oil throughout the engine’s lubrication system. Proper removal of the oil pump is necessary during engine overhauls or if oil pressure issues are detected.
- Locate the Oil Pump:
- The oil pump is typically located near the bottom of the engine, either in the oil pan or mounted to the engine block. In some configurations, you may need to remove the oil pan to access the pump.
- The oil pump is typically located near the bottom of the engine, either in the oil pan or mounted to the engine block. In some configurations, you may need to remove the oil pan to access the pump.
- Remove the Oil Pan (If Necessary):
- If the oil pump is located inside the oil pan, remove the oil pan bolts and carefully lift the pan away from the engine. Be prepared for any residual oil to spill when removing the pan.
- If the oil pump is located inside the oil pan, remove the oil pan bolts and carefully lift the pan away from the engine. Be prepared for any residual oil to spill when removing the pan.
- Loosen and Remove the Oil Pump Bolts:
- Use a socket wrench to remove the bolts securing the oil pump to the engine. Carefully detach the oil pump from its mounting and inspect it for wear or damage.
- Use a socket wrench to remove the bolts securing the oil pump to the engine. Carefully detach the oil pump from its mounting and inspect it for wear or damage.
- Inspect the Oil Pump:
- Check the pump gears or rotors for signs of wear, scoring, or damage. Also, inspect the pump housing and ensure that the oil pickup screen is free of debris.
Oil Pump & Related Components for Detroit Diesel Marine Engine
- Check the pump gears or rotors for signs of wear, scoring, or damage. Also, inspect the pump housing and ensure that the oil pickup screen is free of debris.
5. Disconnect and Remove Oil Lines and Fittings
The oil system includes several oil lines and fittings that deliver oil to different parts of the engine, including the cylinder heads, camshaft, and crankshaft.
- Disconnect Oil Lines:
- Use a wrench to disconnect the oil lines from the engine. These lines are typically connected to the oil pump, oil cooler, and other oil passages in the engine block. Label the lines if necessary to ensure proper reassembly.
- Use a wrench to disconnect the oil lines from the engine. These lines are typically connected to the oil pump, oil cooler, and other oil passages in the engine block. Label the lines if necessary to ensure proper reassembly.
- Remove Oil Fittings:
- Inspect and remove any fittings or adapters connected to the oil lines. These fittings should be inspected for leaks or damage and replaced if necessary during reassembly.
Oil Pump & Related Components for Detroit Diesel Marine Engine
- Inspect and remove any fittings or adapters connected to the oil lines. These fittings should be inspected for leaks or damage and replaced if necessary during reassembly.
Reassembly Notes

-
Inspect and Clean Oil System Components:
- Before reassembling the oil system, thoroughly clean all components, including the oil filter housing, oil cooler, oil pump, and oil lines. Ensure that no dirt or debris is present in the system, as this can lead to oil contamination and engine damage.
- Before reassembling the oil system, thoroughly clean all components, including the oil filter housing, oil cooler, oil pump, and oil lines. Ensure that no dirt or debris is present in the system, as this can lead to oil contamination and engine damage.
-
Reinstall the Oil Pump:
- Position the oil pump back in its mounting location and secure it with the mounting bolts. Tighten the bolts to the manufacturer’s specified torque. Ensure the oil pickup screen is free from debris and properly installed.
- Position the oil pump back in its mounting location and secure it with the mounting bolts. Tighten the bolts to the manufacturer’s specified torque. Ensure the oil pickup screen is free from debris and properly installed.
-
Reinstall the Oil Cooler (If Equipped):
- Reattach the oil cooler to the engine using the mounting bolts. Ensure the oil cooler lines are properly connected and tightened to prevent leaks. Check the cooler for proper alignment and ensure it is free from obstructions.
- Reattach the oil cooler to the engine using the mounting bolts. Ensure the oil cooler lines are properly connected and tightened to prevent leaks. Check the cooler for proper alignment and ensure it is free from obstructions.
-
Reinstall the Oil Filter Housing:
- Secure the oil filter housing back onto the engine block using the bolts. Replace the gasket to ensure a proper seal and prevent oil leaks. Tighten the bolts evenly to prevent warping.
- Secure the oil filter housing back onto the engine block using the bolts. Replace the gasket to ensure a proper seal and prevent oil leaks. Tighten the bolts evenly to prevent warping.
-
Reconnect Oil Lines and Fittings:
- Reconnect the oil lines and fittings to their respective locations on the engine. Ensure that all fittings are tightened securely and that no oil lines are kinked or damaged.
- Reconnect the oil lines and fittings to their respective locations on the engine. Ensure that all fittings are tightened securely and that no oil lines are kinked or damaged.
-
Reinstall the Oil Filter:
- Install a new oil filter by hand-tightening it onto the oil filter housing. Ensure it is properly seated to prevent oil leaks.
- Install a new oil filter by hand-tightening it onto the oil filter housing. Ensure it is properly seated to prevent oil leaks.
-
Refill the Engine with Oil:
- After all components are reassembled, refill the engine with the appropriate type and amount of oil. Check for leaks around the oil pump, cooler, filter housing, and lines.
Inspection Tips
- Check Oil Pressure:
- After reassembling the oil system, start the engine and monitor the oil pressure. If oil pressure is low, inspect the pump and lines for blockages or leaks.
- After reassembling the oil system, start the engine and monitor the oil pressure. If oil pressure is low, inspect the pump and lines for blockages or leaks.
- Inspect for Leaks:
- Carefully inspect all oil lines, fittings, and gaskets for signs of leaks after reassembly. Any leaks should be addressed immediately to prevent engine damage.
- Carefully inspect all oil lines, fittings, and gaskets for signs of leaks after reassembly. Any leaks should be addressed immediately to prevent engine damage.
- Test the Oil Cooler:
- If the oil cooler was removed, test it for proper function by checking the temperature of the oil during engine operation. If the oil is overheating, the cooler may need to be replaced.


 Free US Calls: 1-888-433-4735
 International: 305-545-5588