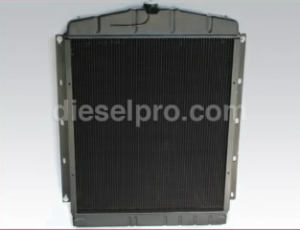
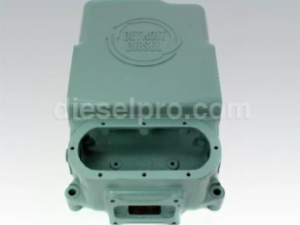
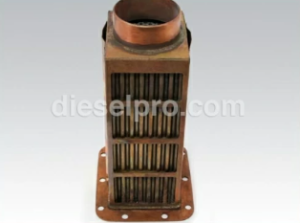
Disassembly Of The Radiator and Fan Guard or Heat Exchanger For Detroit Diesel 71 Series Inline Engines (271, 371, 471, 671)

The radiator, fan guard, and heat exchanger play crucial roles in maintaining the engine’s cooling system. These components must be removed carefully during maintenance or engine disassembly to prevent damage to the cooling system and ensure proper reassembly later. The radiator dissipates heat from the coolant, while the heat exchanger performs a similar role, particularly in marine applications.
Fresh Water Pump & Related Components for Detroit Diesel Marine Engine
Marine Water Pump & Related Components for Detroit Diesel Marine Engine
Safety Precautions:
- Ensure the Engine is Cool
- Drain Coolant
- Wear Protective Gear
Disassembly Steps

1. Drain the Coolant
Before removing the radiator or heat exchanger, you must first drain the coolant from the system.
- Locate the Drain Plug
- Open the Radiator Cap
- Open the Drain Plug
2. Remove the Fan Guard (If Equipped)
The fan guard protects the radiator from debris and helps maintain safety around the engine’s rotating parts. It must be removed before accessing the radiator or heat exchanger.
- Remove the Guard Fasteners
- Carefully Remove the Fan Guard
3. Disconnect the Radiator or Heat Exchanger Hoses
The radiator or heat exchanger is connected to the engine via upper and lower hoses, which carry coolant to and from the engine.
- Loosen Hose Clamps:
- Use a flathead screwdriver or socket to loosen the clamps securing the hoses to the radiator or heat exchanger.
- Use a flathead screwdriver or socket to loosen the clamps securing the hoses to the radiator or heat exchanger.
- Disconnect the Hoses:
- Carefully disconnect the hoses from the radiator or heat exchanger. Some coolant may still be inside the hoses, so use a rag or container to catch any spills. Inspect the hoses for wear or cracks—if damaged, replace them during reassembly.
- Carefully disconnect the hoses from the radiator or heat exchanger. Some coolant may still be inside the hoses, so use a rag or container to catch any spills. Inspect the hoses for wear or cracks—if damaged, replace them during reassembly.
4. Remove the Radiator or Heat Exchanger
With the hoses disconnected and the coolant drained, you can now remove the radiator or heat exchanger.
- Remove the Mounting Bolts:
- The radiator or heat exchanger is secured to the engine bay with mounting bolts. Use a socket wrench to remove these bolts. If the radiator is large or heavy, consider having an assistant help you lift it.
- The radiator or heat exchanger is secured to the engine bay with mounting bolts. Use a socket wrench to remove these bolts. If the radiator is large or heavy, consider having an assistant help you lift it.
- Carefully Lift the Radiator or Heat Exchanger:
- Lift the radiator or heat exchanger out of the engine bay. Be careful not to damage the cooling fins or the core, as these are essential for proper heat dissipation. Place the component in a safe area for inspection.
- Lift the radiator or heat exchanger out of the engine bay. Be careful not to damage the cooling fins or the core, as these are essential for proper heat dissipation. Place the component in a safe area for inspection.
5. Inspect the Radiator or Heat Exchanger
Once removed, thoroughly inspect the radiator or heat exchanger for damage or signs of wear.
- Check for Leaks:
- Inspect the core and tanks for any signs of leaks or corrosion. Look for discoloration or wet spots, which could indicate a slow leak.
- Inspect the core and tanks for any signs of leaks or corrosion. Look for discoloration or wet spots, which could indicate a slow leak.
- Inspect the Cooling Fins:
- Check the cooling fins for damage, such as bent or clogged fins. Bent fins can be straightened using a fin comb, while clogged fins should be cleaned to ensure optimal airflow.
- Check the cooling fins for damage, such as bent or clogged fins. Bent fins can be straightened using a fin comb, while clogged fins should be cleaned to ensure optimal airflow.
- Inspect the Mounting Brackets:
- Inspect the mounting brackets and ensure they are not cracked or damaged. Replace or repair any damaged brackets before reassembly.
Reassembly Notes

- Reinstall the Radiator or Heat Exchanger:
- Position the radiator or heat exchanger back into the engine bay, making sure it aligns with the mounting points.
- Insert the mounting bolts and tighten them to the manufacturer’s recommended torque specifications.
- Reconnect the Hoses:
- Reconnect the upper and lower hoses to the radiator or heat exchanger. Ensure the hoses are properly seated and that the clamps are securely tightened to prevent leaks.
- If the hoses show signs of wear or cracking, replace them with new hoses during reassembly.
- Refill the Coolant:
- After the radiator or heat exchanger is securely in place, refill the system with the appropriate coolant mixture. Always use the correct coolant specified by the manufacturer for optimal cooling performance.
- After the radiator or heat exchanger is securely in place, refill the system with the appropriate coolant mixture. Always use the correct coolant specified by the manufacturer for optimal cooling performance.
- Bleed the Cooling System:
- After refilling the coolant, bleed the cooling system to remove any trapped air. This ensures proper coolant circulation and prevents overheating.
- After refilling the coolant, bleed the cooling system to remove any trapped air. This ensures proper coolant circulation and prevents overheating.
- Reinstall the Fan Guard (If Equipped):
- Reattach the fan guard, ensuring it is securely fastened and properly aligned. The guard must be positioned correctly to protect the radiator and other engine components from debris.
- Reattach the fan guard, ensuring it is securely fastened and properly aligned. The guard must be positioned correctly to protect the radiator and other engine components from debris.
- Check for Leaks:
- Start the engine and allow it to reach operating temperature. Check for leaks around the hoses, radiator, or heat exchanger. If any leaks are detected, address them immediately before continuing engine operation.
Fresh Water Pump & Related Components for Detroit Diesel Marine Engine
Marine Water Pump & Related Components for Detroit Diesel Marine Engine
- Start the engine and allow it to reach operating temperature. Check for leaks around the hoses, radiator, or heat exchanger. If any leaks are detected, address them immediately before continuing engine operation.


 Free US Calls: 1-888-433-4735
 International: 305-545-5588