

 Free US Calls: 1-888-433-4735
 International: 305-545-5588

Reliable electrical systems are critical for the efficient operation of Detroit Diesel 53 Series engines. Alternators, starters, and batteries are the backbone of these systems, ensuring dependable starting, charging, and power supply. This section provides an in-depth guide to maintaining alternators and starters, as well as tips for battery servicing to prolong their lifespan.
Starters & Alternators & Related Components for Detroit Diesel 353 Non–Turbo Marine & Industrial Engines
Starters & Alternators & Related Components for Detroit Diesel 353 Turbo Marine & Industrial Engines
Starters & Alternators & Related Components for Detroit Diesel 453 Non – Turbo Marine & Industrial Engines
Starters & Alternators & Related Components for Detroit Diesel 453 Turbo Marine & Industrial Engines
Starters & Alternators & Related Components for Detroit Diesel 6V53 Non – Turbo Marine & Industrial Engines
Starters & Alternators & Related Components for Detroit Diesel 6V53 Turbo Marine & Industrial Engines
Starters & Alternators & Related Components for Detroit Diesel 8V53 Non – Turbo Marine & Industrial Engines
Starters & Alternators & Related Components for Detroit Diesel 8V53 Turbo Marine & Industrial Engines
Alternators and Starters: Maintenance for Reliable Starting and Power Supply
The Role of the Alternator
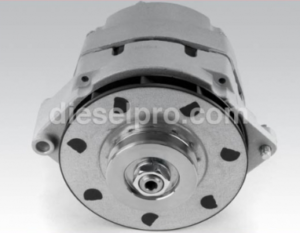
The alternator is responsible for charging the battery and supplying electrical power to the engine’s systems. It converts mechanical energy from the engine into electrical energy, ensuring uninterrupted operation.
Components of the Alternator
- Rotor and Stator:
- The rotor generates a magnetic field that induces electricity in the stator windings.
- Wear or damage to these components can reduce charging efficiency.
- Rectifier Assembly:
- Converts the alternator’s AC output into DC for battery charging and electrical system use.
- Faulty diodes can lead to inconsistent charging.
- Voltage Regulator:
- Maintains a stable output voltage, typically around 13.8–14.2 volts.
- A malfunctioning regulator can cause overcharging or undercharging of the battery.
- Drive Belt and Pulley System:
- Transfers engine power to the alternator.
- Worn or loose belts can reduce alternator performance.
Alternator Maintenance
- Inspection:
- Check the drive belt for wear, cracks, or improper tension. Adjust or replace as needed.
- Inspect electrical connections for corrosion or looseness.
- Testing Output Voltage:
- Use a multimeter to measure the alternator’s output at the battery terminals.
- At idle, the voltage should range between 13.8 and 14.2 volts.
- Cleaning:
- Keep the alternator clean and free of dirt or grease to prevent overheating.
- Keep the alternator clean and free of dirt or grease to prevent overheating.
- Common Issues and Solutions:
- Low Output Voltage: Check for loose connections, worn brushes, or a failing voltage regulator.
- No Output: Inspect the rotor, stator, and rectifier assembly for damage.
The Role of the Starter
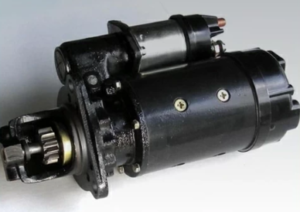
The starter motor provides the initial torque needed to turn the engine’s crankshaft during startup. It relies on a powerful burst of electrical energy from the battery.
Components of the Starter Motor
- Armature and Field Windings:
- Convert electrical energy into mechanical rotation.
- Damaged windings can result in a weak or non-functional starter.
- Starter Solenoid:
- Acts as a switch to engage the starter motor when the ignition key is turned.
- A faulty solenoid can cause intermittent starting issues.
- Drive Gear (Bendix):
- Engages the engine’s flywheel to crank the engine.
- Wear on the gear teeth can lead to poor engagement and starting failure.
Starter Maintenance
- Inspection:
- Visually inspect the starter motor for physical damage, loose connections, or signs of overheating.
- Visually inspect the starter motor for physical damage, loose connections, or signs of overheating.
- Testing:
- Use a starter load tester to measure current draw during operation.
- Excessive current draw may indicate a mechanical fault or electrical short.
- Cleaning and Lubrication:
- Clean the drive gear and apply a light lubricant to ensure smooth engagement.
- Clean the drive gear and apply a light lubricant to ensure smooth engagement.
- Common Issues and Solutions:
- Clicking Noise Without Cranking: Indicates a weak battery or a faulty solenoid.
- No Response: Check the battery, electrical connections, and starter motor for defects.
Battery Servicing: Testing and Upkeep Tips to Extend Battery Life
The battery is essential for starting the engine and powering electrical systems when the alternator is not operational. Proper maintenance is critical to avoid downtime caused by battery failure.
Battery Maintenance Guidelines
Regular Inspection
- Visual Check:
- Inspect the battery for cracks, swelling, or leaks. Replace damaged batteries immediately.
- Check the terminals for corrosion. Clean with a baking soda and water solution if buildup is present.
- Electrolyte Levels:
- For non-sealed batteries, ensure the electrolyte covers the plates.
- Use distilled water to top off low electrolyte levels.
Battery Testing
- Voltage Testing:
- Use a multimeter to check the battery voltage.
- A fully charged battery should read between 12.6 and 12.8 volts with the engine off.
- Load Testing:
- Use a battery load tester to evaluate the battery’s ability to sustain voltage under load.
- If the voltage drops below 9.6 volts under load, replace the battery.
- Hydrometer Testing:
- For non-sealed batteries, use a hydrometer to test the specific gravity of the electrolyte.
- A reading of 1.265 indicates a fully charged cell.
Charging the Battery
- Charging Procedure:
- Use a regulated battery charger with the correct settings for the battery type.
- Avoid overcharging, which can damage the battery and reduce its lifespan.
- Cold Weather Charging:
- In cold climates, ensure the battery is fully charged to prevent freezing.
- In cold climates, ensure the battery is fully charged to prevent freezing.
Extending Battery Life
- Keep the Battery Clean:
- Dirt and grime on the battery case can create a conductive path for current, leading to self-discharge.
- Dirt and grime on the battery case can create a conductive path for current, leading to self-discharge.
- Tighten Connections:
- Loose terminals can result in poor electrical contact and starting issues.
- Loose terminals can result in poor electrical contact and starting issues.
- Use Anti-Corrosion Spray:
- Apply a protective spray to the terminals to prevent corrosion buildup.
- Apply a protective spray to the terminals to prevent corrosion buildup.
- Avoid Deep Discharges:
- Avoid allowing the battery to discharge completely, as this can shorten its lifespan.
- Avoid allowing the battery to discharge completely, as this can shorten its lifespan.
- Proper Storage:
- For long-term storage, disconnect the battery and store it in a cool, dry place. Use a trickle charger to maintain charge levels.
- For long-term storage, disconnect the battery and store it in a cool, dry place. Use a trickle charger to maintain charge levels.
Troubleshooting Common Battery Issues
Battery Fails to Hold a Charge
- Symptoms:
- The engine cranks slowly or not at all.
- Battery voltage drops quickly after charging.
- Causes:
- Sulfation on the battery plates due to prolonged discharge.
- Internal short circuits or aging.
- Solutions:
- Replace the battery if sulfation or internal damage is evident.
- Replace the battery if sulfation or internal damage is evident.
Corrosion on Terminals
- Symptoms:
- Poor starting performance or intermittent electrical issues.
- Poor starting performance or intermittent electrical issues.
- Causes:
- Acid seepage from the battery.
- Acid seepage from the battery.
- Solutions:
- Clean the terminals with a baking soda solution and apply an anti-corrosion spray.
- Clean the terminals with a baking soda solution and apply an anti-corrosion spray.
Overcharging
- Symptoms:
- Swelling or warping of the battery case.
- Swelling or warping of the battery case.
- Causes:
- Faulty voltage regulator in the alternator.
- Faulty voltage regulator in the alternator.
- Solutions:
- Inspect the alternator and replace the voltage regulator if necessary.
- Inspect the alternator and replace the voltage regulator if necessary.
By maintaining alternators, starters, and batteries according to these detailed guidelines, you can ensure the reliable operation of your Detroit Diesel 53 Series engine. Proper care of electrical systems reduces downtime, prevents costly repairs, and extends the life of essential components.
Starters & Alternators & Related Components for Detroit Diesel 353 Non–Turbo Marine & Industrial Engines
Starters & Alternators & Related Components for Detroit Diesel 353 Turbo Marine & Industrial Engines
Starters & Alternators & Related Components for Detroit Diesel 453 Non – Turbo Marine & Industrial Engines
Starters & Alternators & Related Components for Detroit Diesel 453 Turbo Marine & Industrial Engines
Starters & Alternators & Related Components for Detroit Diesel 6V53 Non – Turbo Marine & Industrial Engines
Starters & Alternators & Related Components for Detroit Diesel 6V53 Turbo Marine & Industrial Engines
Starters & Alternators & Related Components for Detroit Diesel 8V53 Non – Turbo Marine & Industrial Engines
Starters & Alternators & Related Components for Detroit Diesel 8V53 Turbo Marine & Industrial Engines