

 Free US Calls: 1-888-433-4735
 International: 305-545-5588
The Cummins KTA19 engine is known for its power and reliability in industrial, marine, and heavy-duty applications. However, its performance also relies heavily on the electrical system, which ensures smooth starting, consistent charging, and the proper operation of auxiliary components. Regular maintenance of electrical equipment like the starter motor, alternator, wiring, and connections is crucial to prevent breakdowns and ensure optimal engine performance.
In this comprehensive guide, we’ll cover everything from starter motor inspection, alternator diagnostics, to basic electrical system checks to help you maintain your KTA19 effectively.
Parts Catalog for Cummins KTA19 Marine Engine
Starter & Alternator related components for Cummins KTA19 Engine
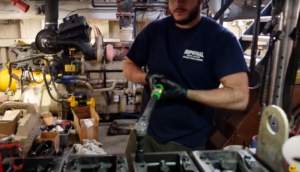
Starter Motor Inspection and Replacement
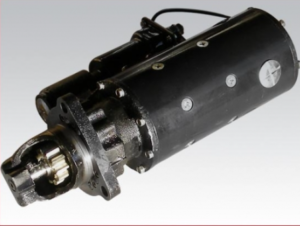
The starter motor is responsible for cranking the engine, enabling it to start. Given its critical role, any failure in the starter can leave equipment inoperable, which is particularly problematic in demanding environments like marine vessels or industrial machinery.
Key Functions of the Starter Motor:
- Converts electrical energy from the battery into mechanical energy to crank the engine.
- Engages with the flywheel to initiate the engine’s combustion cycle.
- Disengages automatically after the engine starts to prevent damage.
Diagnosing Starter Motor Failures
Common starter motor issues can stem from electrical faults, mechanical wear, or both. Recognizing these symptoms early can prevent costly downtime.
Symptoms of a Failing Starter Motor:
- Clicking Sound but No Crank:
- Indicates a weak battery, faulty solenoid, or poor electrical connection.
- Indicates a weak battery, faulty solenoid, or poor electrical connection.
- Grinding Noise:
- Worn starter drive gear or flywheel teeth.
- Worn starter drive gear or flywheel teeth.
- Slow Cranking:
- Weak battery, corroded connections, or internal motor issues.
- Weak battery, corroded connections, or internal motor issues.
- Intermittent Operation:
- Faulty solenoid, loose wiring, or worn brushes.
- Faulty solenoid, loose wiring, or worn brushes.
- No Response When Turning the Key:
- Blown fuse, faulty ignition switch, or starter motor failure.
- Blown fuse, faulty ignition switch, or starter motor failure.
Troubleshooting Starter Motor Issues:
- Check the Battery:
- Ensure it’s fully charged. A weak battery may not supply enough current.
- Ensure it’s fully charged. A weak battery may not supply enough current.
- Inspect Electrical Connections:
- Look for corrosion, loose connections, or damaged wires.
- Look for corrosion, loose connections, or damaged wires.
- Test the Solenoid:
- Use a multimeter to check for continuity. A faulty solenoid won’t engage the starter.
- Use a multimeter to check for continuity. A faulty solenoid won’t engage the starter.
- Bypass Test:
- Jump the starter directly to the battery (bypass the ignition switch) to determine if the issue is electrical or mechanical.
- Jump the starter directly to the battery (bypass the ignition switch) to determine if the issue is electrical or mechanical.
Removing and Installing the Starter
Tools Needed:
- Wrenches and sockets
- Screwdrivers
- Multimeter (for testing)
- Torque wrench
Removal Procedure:
- Disconnect the Battery:
- Always disconnect the negative terminal first to prevent electrical shorts.
- Always disconnect the negative terminal first to prevent electrical shorts.
- Locate the Starter:
- Typically mounted near the engine’s flywheel housing.
- Typically mounted near the engine’s flywheel housing.
- Disconnect Wiring:
- Remove the main power cable and signal wire from the solenoid.
- Remove the main power cable and signal wire from the solenoid.
- Remove Mounting Bolts:
- Carefully support the starter as you remove it to avoid dropping and damaging it.
- Carefully support the starter as you remove it to avoid dropping and damaging it.
- Inspect the Flywheel:
- Check the flywheel teeth for wear or damage while the starter is out.
- Check the flywheel teeth for wear or damage while the starter is out.
Installation Procedure:
- Position the New Starter:
- Align it with the flywheel housing and secure it with mounting bolts.
- Align it with the flywheel housing and secure it with mounting bolts.
- Torque Bolts Properly:
- Refer to the Cummins KTA19 service manual for specific torque specifications.
- Refer to the Cummins KTA19 service manual for specific torque specifications.
- Reconnect Electrical Connections:
- Ensure tight, clean connections to avoid voltage drops.
- Ensure tight, clean connections to avoid voltage drops.
- Reconnect the Battery:
- Reconnect the negative terminal last.
- Reconnect the negative terminal last.
- Test the Starter:
- Start the engine and listen for smooth, strong cranking without unusual noises.
- Start the engine and listen for smooth, strong cranking without unusual noises.
Alternator Diagnostics
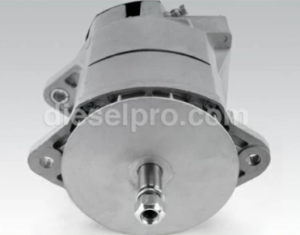
The alternator is responsible for maintaining battery charge and powering electrical systems while the engine runs. A malfunctioning alternator can lead to battery drain, resulting in starting issues and system failures.
Functions of the Alternator:
- Charges the battery during engine operation.
- Supplies power to lights, instruments, sensors, and other auxiliary systems.
- Regulates voltage through an internal or external voltage regulator.
Testing Charging System Output
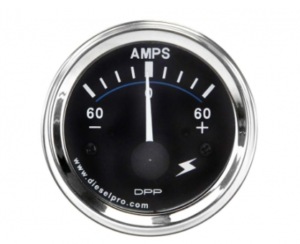
Tools Required:
- Multimeter
- Battery load tester
- Alternator tester (optional)
Procedure:
- Visual Inspection:
- Check for loose belts, corroded terminals, and damaged wires.
- Check for loose belts, corroded terminals, and damaged wires.
- Battery Voltage Test (Engine Off):
- Set the multimeter to DC volts.
- A healthy battery should read around 12.6 volts.
- Charging Voltage Test (Engine Running):
- Start the engine and measure voltage at the battery terminals.
- The reading should be between 13.8 to 14.5 volts.
- A reading below 13 volts indicates undercharging, while over 15 volts suggests overcharging.
- Load Test:
- Turn on all electrical accessories (lights, HVAC, etc.).
- Ensure the alternator maintains at least 13 volts under load.
- Ripple Voltage Test:
- Check for AC ripple using the multimeter set to AC volts.
- A ripple above 0.5 volts AC indicates potential issues with the alternator’s diodes.
Identifying Faulty Alternators
Common Symptoms of a Failing Alternator:
- Dim or Flickering Lights:
- Inconsistent voltage output causes lighting issues.
- Inconsistent voltage output causes lighting issues.
- Battery Warning Light On:
- Indicates charging system malfunction.
- Indicates charging system malfunction.
- Dead Battery:
- The alternator isn’t replenishing the battery after starting.
- The alternator isn’t replenishing the battery after starting.
- Strange Noises:
- Worn bearings or internal alternator damage may cause whining or grinding sounds.
- Worn bearings or internal alternator damage may cause whining or grinding sounds.
- Burning Smell:
- Overworked alternators or slipping belts can produce excessive heat.
- Overworked alternators or slipping belts can produce excessive heat.
Causes of Alternator Failure:
- Worn Brushes: Affect electrical contact within the alternator.
- Faulty Diodes: Cause poor charging and voltage irregularities.
- Belt Issues: Loose or worn belts can reduce alternator output.
- Corroded Connections: Increase resistance, leading to charging inefficiencies.
Basic Electrical System Checks
Beyond the starter and alternator, the KTA19 relies on a robust network of wiring, connectors, fuses, and sensors. Regular inspection and maintenance of these systems can prevent unexpected failures.
Inspecting Wiring and Connections
What to Look For:
- Corrosion:
- Check battery terminals, ground connections, and electrical plugs.
- Check battery terminals, ground connections, and electrical plugs.
- Loose or Damaged Wires:
- Look for frayed insulation, broken strands, or loose connectors.
- Look for frayed insulation, broken strands, or loose connectors.
- Overheating Marks:
- Burnt or melted insulation may indicate electrical overload.
- Burnt or melted insulation may indicate electrical overload.
- Ground Connections:
- Poor grounding can cause erratic electrical behavior.
- Poor grounding can cause erratic electrical behavior.
Preventing Common Electrical Failures
- Secure Connections:
- Tighten loose terminals and clean corroded contacts.
- Tighten loose terminals and clean corroded contacts.
- Protect Wiring:
- Use conduit or loom to shield wiring from heat, vibration, and moisture.
- Use conduit or loom to shield wiring from heat, vibration, and moisture.
- Regularly Test Battery Health:
- Weak batteries strain the starter and alternator.
- Weak batteries strain the starter and alternator.
- Fuse and Relay Checks:
- Replace blown fuses with the correct rating. Test relays for proper function.
- Replace blown fuses with the correct rating. Test relays for proper function.
- Avoid Overloading Circuits:
- Don’t add high-current devices without verifying the system’s capacity.
- Don’t add high-current devices without verifying the system’s capacity.
Troubleshooting Electrical System Issues
- No Power to Accessories:
- Check the fuse box for blown fuses.
- Inspect battery connections and ground straps.
- Intermittent Electrical Failures:
- Look for loose connectors or damaged wires.
- Wiggle wires gently to detect intermittent faults.
- Battery Draining Overnight:
- Perform a parasitic drain test using a multimeter to identify current leaks.
- Perform a parasitic drain test using a multimeter to identify current leaks.
- Inconsistent Engine Starting:
- Check the ignition switch, starter relay, and wiring harness.
- Check the ignition switch, starter relay, and wiring harness.
Essential Tools for Electrical Diagnostics
- Multimeter: Measures voltage, resistance, and current.
- Clamp Meter: Monitors current flow without disconnecting wires.
- Test Light: Quick checks for power presence in circuits.
- Battery Load Tester: Evaluates battery capacity under load.
- Wiring Diagrams: Essential for tracing circuits accurately.
Safety Precautions When Working on Electrical Systems
- Disconnect the Battery: Prevent accidental shorts or shocks. Always disconnect the negative terminal first.
- Avoid Sparks: Especially around fuel lines or batteries to prevent fire hazards.
- Use Insulated Tools: Reduces the risk of electrical shock or accidental short-circuits.
- Wear Protective Gear: Safety glasses and gloves protect against accidental sparks.
Maintenance Schedule for Electrical Systems in Cummins KTA19
| Component | Inspection Frequency | Maintenance Tips |
| Battery | Monthly | Check voltage, clean terminals |
| Starter Motor | Every 500 hours | Inspect connections, test function |
| Alternator | Every 500 hours | Check output voltage, inspect belts |
| Wiring & Connectors | Every 1,000 hours | Look for corrosion, loose wires |
| Fuses & Relays | As needed | Replace faulty components |
Troubleshooting Quick Reference
| Symptom | Possible Cause | Solution |
| Engine won’t crank | Dead battery, faulty starter | Check battery, starter connections |
| Battery drains overnight | Parasitic draw, faulty alternator diode | Perform parasitic drain test |
| Dim lights | Weak alternator output, bad ground | Test alternator, clean ground points |
| Clicking sound when starting | Weak battery, bad solenoid | Charge battery, test solenoid |
| Overcharging battery | Faulty voltage regulator | Replace regulator or alternator |
Disclaimer
Electrical systems can pose shock risks. Disconnect the battery and refer to Cummins guidelines when working on electrical components. Improper handling can result in injury or equipment damage. Always consult the Cummins KTA19 service manual for detailed procedures and safety instructions.
Parts Catalog for Cummins KTA19 Marine Engine
Starter & Alternator related components for Cummins KTA19 Engine