Fuel leaks in Detroit Diesel V71 engines can lead to performance issues, safety hazards, and increased fuel costs. Prompt identification and repair of fuel leaks are critical for maintaining engine efficiency, preventing environmental damage, and ensuring safe operation. Below is a comprehensive guide to identifying, diagnosing, and resolving fuel leaks on V71 engines.
Injector & Related Components for Detroit Diesel V71 Series Marine & Industrial Engines
Fuel Pump & Related Components for Detroit Diesel V71 Series Marine & Industrial Engines
Fuel Filter & Related Components for Detroit Diesel V71 Series Marine & Industrial Engines
1. Symptoms of Fuel Leaks
Fuel leaks are often accompanied by clear signs that indicate a problem in the fuel delivery system. Key symptoms to watch for include:
- Visible Fuel Leaks: Diesel fuel pooling under the engine, drips on engine components, or fuel-soaked hoses are clear indicators of a leak.
- Reduced Fuel Efficiency: A sudden drop in miles per gallon or increased fuel consumption suggests fuel is escaping the system.
- Difficulty Starting: Air entering the fuel system through leaks can cause hard starts, as the fuel pressure drops, leading to improper fuel atomization.
- Excessive Smoke: Poor fuel delivery due to leaks can cause incomplete combustion, resulting in increased black smoke from the exhaust.
- Diesel Odor: Strong diesel fumes, particularly near the engine bay or fuel lines, indicate fuel seepage or leaks.
2. Common Causes of Fuel Leaks
Fuel leaks typically occur due to wear, vibration, and aging components. The most common causes include:
- Worn Injector Seals:

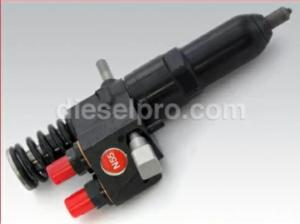
Injector for Detroit Diesel 16V71
- Injector seals wear out over time, causing fuel to leak at the base of the injector where it mates with the cylinder head.
- Heat and pressure exacerbate the wear on seals, leading to seepage.
- Cracked or Damaged Fuel Lines:
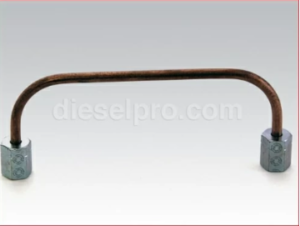
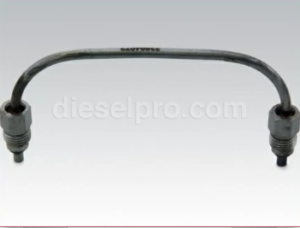
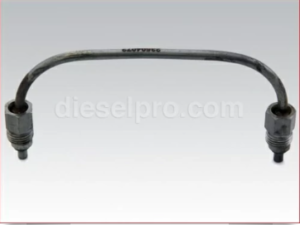
Fuel Line (Short) for Detroit Diesel V71 Engines

Fuel Line (Long) for Detroit Diesel V71 Engines
- Fuel lines are prone to cracking due to age, heat, or vibration.
- Rubber fuel lines can degrade, while metal lines may develop small cracks or pinholes.
2. Loose Connections or Fittings:

-
- Loose fuel line fittings, injector fittings, or banjo bolts may allow fuel to escape under pressure.
- Vibration during engine operation can gradually loosen connections over time.
- Corroded Fuel Components:
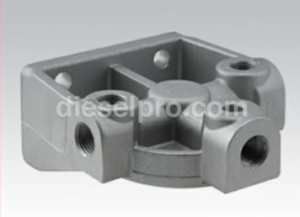
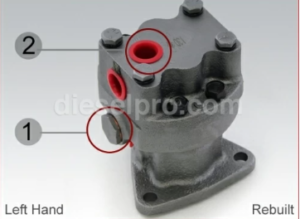
Base for fuel filter for Detroit Diesel V71 Engines
- Corrosion on fuel filter housings, injectors, or connection points can lead to leaks, especially in marine or humid environments.
- Corrosion on fuel filter housings, injectors, or connection points can lead to leaks, especially in marine or humid environments.
- Faulty Fuel Filters:

Primary Fuel Filter for Detroit Diesel 16V71
- Improper installation or damage to the fuel filter O-rings can cause leaks around the filter housing.
- Improper installation or damage to the fuel filter O-rings can cause leaks around the filter housing.
3. Diagnosing Fuel Leaks
Step 1: Visual Inspection
- Check for Obvious Leaks: Start by inspecting visible areas around the fuel injectors, lines, and fuel filter housings. Look for wet spots, fuel drips, or staining.
- Inspect Fuel Lines: Examine both rubber and metal fuel lines for cracks, pinholes, or visible damage. Pay close attention to bends, clamps, and fittings.
- Examine Injectors: Look for leaks around the injector base where it meets the cylinder head, as well as the high-pressure fuel fittings.
- Inspect Filter Housings and Seals: Check for leaks around the fuel filter, ensuring the O-ring or gasket is properly seated and free from damage.
Step 2: Use Diagnostic Tools
- Pressure Testing: Use a fuel pressure gauge to check for drops in fuel pressure, which can indicate a leak.
- Fuel Dye Testing: Add a fuel-compatible UV dye to the diesel fuel system. Run the engine and inspect with a UV light to pinpoint small leaks.
- Bubble Test for Air Leaks: If starting issues occur, check for air entering the system by introducing light pressure and observing bubbles in a clear fuel line or fuel filter bowl.
Step 3: Identify the Leak Source
- Clean any suspected areas with a degreaser to remove residual fuel and dirt.
- Start the engine and observe carefully to trace the origin of the fuel leak.
4. Solutions to Fuel Leaks
Once the fuel leak source has been identified, apply the appropriate repair solution:
1. Replace Faulty Injector Seals
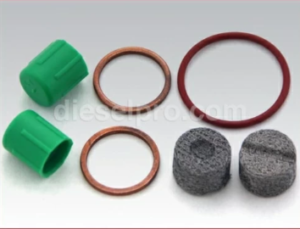
- Why: Worn or damaged seals cause leaks at the base of the injectors.
- Solution:
- Remove the faulty injector using an injector puller tool.
- Replace the injector seals with high-quality replacements, ensuring the correct size and fit.
- Clean the injector bore and reinstall the injector, applying light lubrication to the new seals for proper seating.
- Torque injector fittings to the specified value to prevent leaks under pressure.
2. Tighten Loose Fittings and Connections

- Why: Vibration can loosen fittings, resulting in fuel leaks.
- Solution:
- Inspect all fuel line fittings, injector connections, and banjo bolts for looseness.
- Tighten all fittings to the manufacturer’s torque specifications using a calibrated wrench.
- Avoid overtightening, as this can damage threads or fittings.
3. Repair or Replace Cracked Fuel Lines
- Why: Fuel lines may crack or degrade over time, leading to leaks.
- Solution:
- For rubber fuel lines, replace with high-quality fuel-rated hoses designed for diesel applications. Ensure clamps are properly tightened.
- For metal fuel lines, replace sections showing visible cracks, pinholes, or corrosion. Use pre-formed lines or fabricate new lines to the original dimensions.
- Inspect and replace worn clamps or brackets that may stress the fuel lines during vibration.
4. Replace Damaged Fuel Filters or Seals

- Why: Damaged seals or improper installation of fuel filters can cause leaks.
- Solution:
- Remove the fuel filter and inspect the O-ring or gasket for cracks or wear.
- Clean the filter housing thoroughly and ensure no debris remains.
- Install a new fuel filter and properly seat the O-ring or gasket. Tighten the filter to the manufacturer’s specifications.
5. Address Corroded Fuel Components
- Why: Corrosion in humid or marine environments weakens fuel system components.
- Solution:
- Replace corroded fuel filter housings, injector fittings, or metal fuel lines with durable, corrosion-resistant components.
- Regularly inspect and clean fuel system components to prevent rust or buildup.
5. Preventative Maintenance for Fuel Leaks

Preventing fuel leaks ensures longer engine life, safer operation, and reduced downtime. Follow these preventative steps:
- Regular Fuel System Inspections:
- Check fuel lines, injectors, and connections during routine maintenance intervals.
- Look for early signs of wear, such as cracking, loosening, or discoloration.
- Use High-Quality Replacement Components:
- Opt for premium aftermarket components from trusted suppliers like Diesel Pro Power to ensure durability and reliability.
- Opt for premium aftermarket components from trusted suppliers like Diesel Pro Power to ensure durability and reliability.
- Maintain Proper Torque Specifications:
- Always torque injector fittings, fuel lines, and filters to the specified values to prevent leaks caused by overtightening or under-tightening.
- Always torque injector fittings, fuel lines, and filters to the specified values to prevent leaks caused by overtightening or under-tightening.
- Keep the Fuel System Clean:
- Replace fuel filters regularly to prevent clogs or pressure issues.
- Use clean, high-quality diesel fuel to reduce contaminants in the system.
- Monitor Operating Conditions:
- Engines operating in harsh environments (e.g., marine, agricultural, or dusty areas) require more frequent inspections to prevent fuel leaks caused by vibration or contamination.
By following this detailed troubleshooting guide for fuel leaks, you can quickly identify and resolve leaks in Detroit Diesel V71 engines. Regular inspections, proper repairs, and preventative maintenance are essential for ensuring consistent engine performance, fuel efficiency, and safe operation.
- Engines operating in harsh environments (e.g., marine, agricultural, or dusty areas) require more frequent inspections to prevent fuel leaks caused by vibration or contamination.
Injector & Related Components for Detroit Diesel V71 Series Marine & Industrial Engines
Fuel Pump & Related Components for Detroit Diesel V71 Series Marine & Industrial Engines
Fuel Filter & Related Components for Detroit Diesel V71 Series Marine & Industrial Engines


 Free US Calls: 1-888-433-4735
 International: 305-545-5588
