

 Free US Calls: 1-888-433-4735
 International: 305-545-5588
Disassembling the Twin Disc MG502 Marine Gear requires precision, preparation, and adherence to safety protocols. The process involves meticulous planning, step-by-step actions, and detailed inspections to ensure that each component is handled correctly. Incorrect disassembly can lead to damage, safety hazards, or faulty reassembly, which can compromise the entire transmission system. This detailed guide provides an in-depth overview of how to properly disassemble the Twin Disc MG502 Marine Gear. It covers preparation, step-by-step disassembly procedures, identifying wear and tear components, and best practices for handling and storing parts during the process.
Preparation for Disassembly of Twin Disc MG502 Marine Gear
Proper preparation ensures that the disassembly process is efficient, safe, and effective. Skipping preparatory steps can lead to mistakes, unsafe work environments, and component damage.
Parts Catalog for Twin Disc MG502 Marine Transmissions
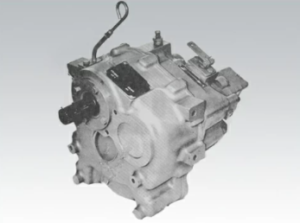
Rebuilt Twin Disc MG502 Marine Transmissions
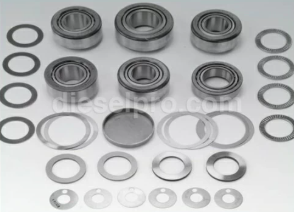
Bearings For Twin Disc MG502 Marine Transmissions
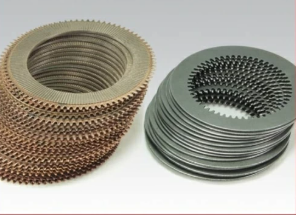
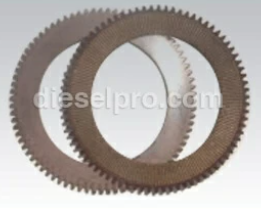
Plate Kit For Twin Disc MG502 Marine Transmission
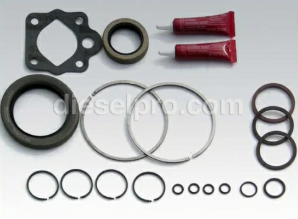
Gasket Kits For Twin Disc MG502 Marine Transmission
1. Gather Required Tools and Materials
Before starting, ensure all necessary tools, safety gear, and storage containers are ready. Here’s a comprehensive checklist:
- Hand Tools: Wrenches, sockets, screwdrivers, pliers, and torque wrenches.
- Specialized Tools: Gear pullers, seal pullers, hydraulic pressure gauges, and alignment tools.
- Cleaning Supplies: Degreasers, lint-free cloths, and oil absorbers.
- Safety Gear: Gloves, goggles, coveralls, and steel-toe boots.
- Component Storage: Labelled containers for storing parts.
- Documentation Tools: Camera and notepad for documenting each step.
2. Safety Precautions Before Disassembly
- Power Off Systems: Ensure the engine and all associated systems are completely shut off.
- Release Hydraulic Pressure: Safely release any hydraulic pressure from the system.
- Isolate Power Sources: Disconnect batteries and power supplies.
- Secure the Work Area: Make sure the area is clean, dry, and well-ventilated.
- Protect Against Oil Spills: Lay down absorbent mats or trays to catch any oil or fluid.
3. Document Component Positions
- Photograph Components: Take pictures of the assembly from multiple angles.
- Label Parts: Use tags or markers to label components during removal.
- Create a Disassembly Log: Document the sequence of component removal for easier reassembly.
4. Initial Inspection Before Disassembly
- Check for External Leaks: Identify any oil or hydraulic fluid leaks.
- Assess Component Alignment: Note any visible misalignments or damage.
- Identify Wear Indicators: Look for excessive rust, corrosion, or worn fasteners.
Step-by-Step Disassembly Process for Twin Disc MG502 Marine Gear
Following a structured disassembly process ensures efficiency and prevents damage to components. Here is a detailed, step-by-step guide.
Step 1: Remove External Components
- Drain Fluids: Remove the drain plugs and allow the oil and hydraulic fluid to drain completely. Dispose of the fluids according to local regulations.
- Disconnect Hydraulic Lines: Carefully disconnect hydraulic hoses and fittings. Label each hose for proper reassembly.
- Detach Electrical Components: Disconnect any sensors, electrical cables, or control systems connected to the gear.
- Remove Oil Cooler: Detach the oil cooler and drain any residual oil.
Step 2: Dismantle the Housing Covers
- Remove Bolts: Use the appropriate socket tools to remove the bolts securing the gearbox housing.
- Separate the Covers: Gently tap the covers with a rubber mallet to loosen them, taking care not to damage the gasket surfaces.
- Inspect Gaskets: Remove old gaskets and inspect for wear or damage. Replace if necessary.
Step 3: Extract the Input Shaft
- Remove the Retaining Nuts: Loosen and remove the retaining nuts that secure the input shaft.
- Extract the Shaft: Use a gear puller to carefully extract the input shaft. Take care not to damage the shaft or surrounding components.
- Inspect Bearings and Seals: Examine the shaft bearings and seals for any signs of wear, damage, or leakage.
Step 4: Remove the Output Shaft
- Loosen Fasteners: Remove the fasteners securing the output shaft assembly.
- Use Alignment Tools: Employ alignment tools to maintain shaft alignment during removal.
- Withdraw the Output Shaft: Carefully remove the shaft, supporting its weight to prevent bending or dropping.
Step 5: Disassemble the Clutch System
- Drain Hydraulic Fluid: If not already drained, release any remaining hydraulic pressure and fluid.
- Remove Clutch Cover: Detach the clutch cover using a socket wrench and puller.
- Disassemble Clutch Plates: Carefully remove the clutch plates and inspect for scoring, burning, or warping.
- Inspect Hydraulic Cylinders: Check for leaks or damage to hydraulic cylinders and seals.
Step 6: Extract Gear Sets
- Loosen and Remove Gear Retainers: Use a socket wrench to remove gear retainers and fasteners.
- Pull Gears Using a Gear Puller: Attach the gear puller and slowly remove the gears, ensuring you don’t damage the teeth or shaft.
- Inspect Gears for Wear: Check for pitting, cracks, or irregular wear patterns.
Step 7: Remove Bearings and Seals
- Detach Bearings Using a Bearing Puller: Carefully remove bearings to avoid damaging the shafts.
- Extract Seals: Use a seal puller to extract seals without scratching the housing.
- Document Bearing Types: Record the bearing types and positions for easier replacement during reassembly.
Identifying Wear and Tear Components in Twin Disc MG502 Marine Gear
During disassembly, it’s crucial to identify components that show signs of wear and tear. Catching these issues early can prevent future failures.
1. Bearings
- Check for Noise and Vibration: Spin the bearings to check for roughness or unusual noises.
- Inspect for Discoloration: Any dark or discolored patches may indicate overheating.
- Look for Deformation: Inspect for misshapen races or pitted surfaces.
2. Gears
- Inspect Teeth for Pitting or Chips: Pitted or cracked teeth can lead to inefficient power transfer.
- Check for Excessive Wear: Uneven wear patterns indicate alignment or lubrication issues.
- Measure Backlash: Verify that gear backlash is within acceptable limits.
3. Seals and Gaskets
- Inspect for Cracking or Shrinkage: Old seals often show signs of hardening or cracking.
- Check for Oil Residue: Oil leakage around seals suggests poor sealing effectiveness.
- Measure Gasket Integrity: Worn or compressed gaskets should be replaced.
4. Clutch Plates
- Look for Warping or Cracks: Warped plates can cause uneven engagement.
- Check for Burn Marks: Discoloration indicates excessive heat or slipping.
- Measure Thickness: If plates are thinner than manufacturer specifications, they require replacement.
5. Shafts
- Inspect for Scoring or Wear: Check for any surface damage along the shaft.
- Check for Bending: Roll the shaft on a flat surface to identify any bends.
- Evaluate Fitment Areas: Worn areas where gears or bearings fit may lead to improper alignment.
Handling and Storing Components for Twin Disc MG502 Marine Gear

Proper handling and storage of components during disassembly is critical to prevent contamination, damage, and confusion during reassembly.
1. Cleaning Components
- Degrease Parts: Use a degreaser to clean oil and debris from components.
- Dry Components Thoroughly: Moisture can lead to corrosion. Ensure all parts are completely dry.
- Wipe with Lint-Free Cloths: To avoid introducing contaminants during cleaning.
2. Storing Components Safely
- Label Parts Clearly: Use tags to identify each component and its position.
- Use Separate Containers: Store bearings, gears, and seals separately to avoid cross-contamination.
- Keep in a Dry, Clean Area: Moisture and dirt can compromise components. Use airtight containers if possible.
- Lay Out in Disassembly Order: Organizing parts according to the disassembly sequence will simplify reassembly.
3. Protecting Sensitive Components
- Wrap Delicate Parts: Use protective wrapping for gears and bearings to prevent scratches.
- Use Oil Coating: Lightly coat metal parts with protective oil to prevent rust.
- Store in Elevated Areas: Avoid placing parts on the floor where they can gather dust or moisture.
Conclusion
Disassembling the Twin Disc MG502 Marine Gear is a detailed process that requires proper preparation, the right tools, and careful attention to component handling. By adhering to a structured process, technicians can ensure that components are removed safely, identified for wear, and stored correctly for future reassembly. This thorough approach not only extends the lifespan of the MG502 but also ensures optimal performance once reassembled. For more complex service tasks or component replacements, always consult with experienced marine gear specialists.

Rebuilt Twin Disc MG502 Marine Transmissions
Bearings For Twin Disc MG502 Marine Transmissions
Plate Kit For Twin Disc MG502 Marine Transmission
Gasket Kits For Twin Disc MG502 Marine Transmission
Videos About Twin Disc Transmissions
6 Reasons Your Twin Disc Transmission Has Low Oil Pressure
7 Reasons Your Twin Disc Transmission Is Overheating
3 Reasons Your Clutch Plates in Your Twin Disc Transmission Are Making Excessive Noise
Bull Gear On A Twin Disc Transmission
Rebuilt Twin Disc Transmissions