

 Free US Calls: 1-888-433-4735
 International: 305-545-5588
When it comes to extending the service life of your Twin Disc MG520 Marine Gear, nothing is more important than a thorough and methodical inspection of the internal components. These components work under continuous load, high heat, and harsh conditions—making them subject to wear, degradation, and mechanical failure if not routinely assessed and serviced.
This comprehensive guide will walk you through how to inspect the most critical internals of the MG520, including bearings and shafts, the clutch pack, and seals and gaskets. By learning to recognize wear patterns, failure signs, and proper inspection methods, you’ll prevent small issues from turning into catastrophic failures at sea.
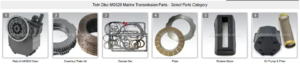
Parts Catalog for Twin Disc MG520 Marine Transmissions
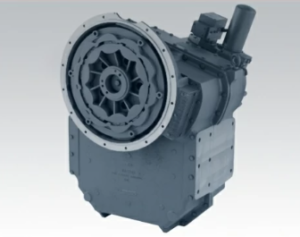
Rebuilt Twin Disc MG520 Marine Transmissions
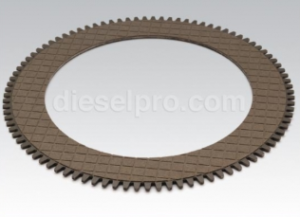
Plate Kit For Twin Disc MG520 Marine Transmission
Gasket Kits For Twin Disc MG520 Marine Transmission
Bearings and Shafts For Twin Disc MG520 Marine Gears
Bearings and shafts form the structural and rotational backbone of the MG520. Their condition directly impacts torque delivery, alignment, clutch actuation, and long-term performance. One failed bearing or one misaligned shaft can take down the entire gear—which is why their inspection should be meticulous.
Wear Patterns and Failure , Signs
Common Bearing Issues
- Pitting (Surface Fatigue):
Small craters in the raceway or rollers, caused by cyclic loading. A leading sign of bearing fatigue, especially under constant or misaligned loads.
- Spalling:
Flaking of the surface layer of the bearing. Often a result of advanced pitting, where the bearing surface can no longer support the load.
- Brinelling (Indentation Damage):
Depressions in the bearing race caused by impact loads—common when the unit is dropped or subjected to shock during removal or transport.
- Overheating Discoloration:
Blue, black, or dark brown staining on the race or rolling elements. Indicates lubricant failure, excessive preload, or restricted cooling.
- Corrosion or Rusting:
Often caused by water contamination from the oil cooler or prolonged exposure to moisture during vessel layup. Corroded bearings should be discarded immediately.
- Roller Flattening or Scuffing:
Irregular wear on the rolling elements due to improper lubrication, incorrect preload, or skewed shaft alignment.
Common Shaft Issues
- Scoring and Grooving:
Longitudinal scratches typically caused by particle contamination or insufficient lubrication. Can lead to seal failure and further shaft damage.
- Fretting Corrosion:
Occurs at the interface of two tight-fitting surfaces (like couplings and keyways). Appears as reddish-brown deposits and is usually a result of micro-motion under torque.
- Shaft Runout (Bend or Warp):
Deviations from true rotation measured with a dial indicator. Excessive runout causes bearing failure and clutch misalignment.
- Twist or Torsional Shear:
Most common in high-horsepower applications under overload. Detected by spline deformation or failure at the root.
- Worn Keyways or Splines:
Look for elongation, burrs, or uneven wear in coupling areas. Loose key fits can cause vibration and torque loss.
Proper Inspection Methods
Tools You’ll Need:
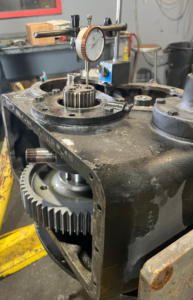
Technician uses a starrett dial indicator to measure the backlash between the gears on a Detroit Diesel engine.
- Dial Indicator with Magnetic Base
- Micrometer or Caliper (0.0001” precision preferred)
- V-blocks for shaft straightness checks
- Feeler gauges
- Thread pitch gauges
- High-intensity flashlight and inspection mirror
- Solvent and lint-free cloths
Bearing Inspection Process:
- Clean the Bearing
Use solvent to remove all grease and oil. Allow to dry completely.
- Spin the Bearing
Manually rotate the bearing. Feel for rough spots, binding, or vibration. Any non-smooth motion is a sign of damage.
- Check Surface Finish
Examine all races and rollers under light. Any visible marks, pitting, or staining calls for replacement.
- Measure Tolerances
Use a micrometer to measure bore and outer diameter. Compare with OEM service limits.
- Preload Verification
When installed, use a spring scale or torque wrench to confirm resistance to rotation. Deviations may indicate improper shim thickness or bearing seat wear.
Shaft Inspection Process:
- Visual Inspection
Look for discoloration, heat marks, or scoring along the journals and spline ends.
- Straightness Check
Mount the shaft on V-blocks and place a dial indicator near the center. Rotate slowly and note maximum deflection. MG520 shafts should have less than 0.002” total runout (check OEM manual for exact spec).
- Diameter and Wear Checks
Use calipers or a micrometer to measure shaft diameters and compare with bearing inner diameters. Look for any tapering, which indicates uneven wear.
- Keyway Fitment Test
Insert the key into its slot and observe the fit. It should be snug but removable by hand. Excessive play may require shaft or key replacement.
Clutch Pack For Twin Disc MG520 Marine Gear
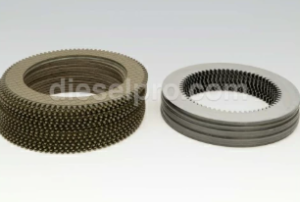
The clutch pack is the torque-transfer center of the MG520. Without it functioning perfectly, the transmission cannot shift or hold load reliably. Its inspection is especially important during overhauls or whenever slipping or delayed engagement is reported.
Friction Plate Wear and Replacement Guidelines
What You’re Looking For:
- Thickness Measurement
Use a micrometer to measure each friction plate. If any are below the OEM minimum (usually 0.070″–0.080″), replace the entire set.
- Surface Glazing
A smooth, glassy appearance indicates overheating from slipping. Glazed plates cannot grip effectively and should be replaced.
- Burnt Edges or Warping
Excessive heat may cause discoloration or deformation. A warped plate will lead to chatter or inconsistent engagement.
- Delamination or Cracks
Look at the edges—any sign of material separation is unacceptable.
Replacement Best Practices:
- Always replace all friction plates together. Even if only one is worn, the friction coefficients change when mixing old and new, leading to poor clutch performance.
- Replace the steel separator plates if any are scratched, discolored, or warped.
- Use OEM or high-quality aftermarket kits (like those from Diesel Pro Power) with matched friction and steel sets for guaranteed compatibility.
Pressure Plate Inspection
The pressure plate applies the force necessary to compress the clutch pack and transmit torque. Its failure can mimic clutch wear or actuation issues.
Inspection Steps:
- Surface Flatness
Lay a straightedge across multiple diameters of the plate. Use a feeler gauge to check for warping. Anything over 0.003″ deviation across the plate warrants resurfacing or replacement.
- Surface Condition
Look for burn marks, scoring, or glazing. Minor imperfections can sometimes be corrected with light machining—but deep grooves are a replacement trigger.
- Crack Detection
Perform a dye penetrant test or use a magnifying glass under bright light. Any cracking, even hairline, disqualifies the plate from reuse.
- Thickness Check
Compare thickness to OEM minimums. Plates worn beyond this spec cannot generate adequate clamping force.
Return Spring and Piston Inspection
If you’re going deeper into the clutch drum assembly:
- Inspect piston seals for nicks, flattening, or hardening.
- Check return springs for breakage or sag.
- Look for wear in the drum grooves where plates ride. Scoring can lead to sticking or uneven actuation.
Seals and Gaskets For Twin Disc MG520 Marine Gear
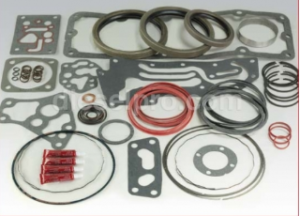
One of the most overlooked yet most common sources of failure in marine gears is seal and gasket degradation. Whether internal hydraulic seals or external flange gaskets, these components prevent oil loss, maintain pressure, and keep contaminants out.
Identifying Common Leak Points
1. Input Shaft Seal
- Leaks here often drip into the bell housing.
- May appear as engine rear main seal leaks—check carefully.
- Replace if oil is found in the flywheel housing or on the engine coupling.
2. Output Shaft Seal
- Located behind the output flange.
- Leaks may not be visible until the prop shaft is removed.
- Look for oil lines on the propeller shaft or inside the coupling cavity.
3. Valve Body and Cover Gaskets
- Leaks in the control section may cause internal pressure loss without external oil traces.
- Look for low shifting pressure or slow gear engagement.
4. Oil Cooler Line Fittings
- Prone to vibration-related loosening or cracking.
- Check for weeping at banjo bolts, hose clamps, or quick-connects.
5. Inspection and Access Covers
- Leaks may develop over time due to over-torque or gasket compression set.
- Always recheck torque and gasket condition after major temperature cycles.
Replacement Best Practices
Use the Right Materials
- Viton or Nitrile (NBR) seals are recommended for marine oil temperatures.
- Avoid generic rubber seals not rated for high-temp or marine environments.
Always Replace When Opened
- Never reuse old gaskets or seals—even if they “look fine.”
- Reinstalling compressed or brittle gaskets will almost always result in leaks later.
Surface Prep Is Key
- Use non-marring gasket scrapers.
- Clean with acetone or brake cleaner.
- Avoid gouging aluminum or cast iron surfaces.
Install With Care
- Use proper seal drivers for shaft seals.
- Lightly oil lip seals to avoid dry startup wear.
- Apply thread sealer only where specified—typically on cooler fittings or inspection plugs.
Torque Correctly
- Uneven gasket clamping is a top cause of post-service leaks.
- Use a torque wrench and follow a crisscross pattern.
- Re-torque bolts if the gasket compresses after heat cycling.
Conclusion: Precision Inspection = Lasting Performance For Twin Disc MG520 Marine Gear
The internal inspection of your Twin Disc MG520 is more than a technical checklist—it’s the moment you determine whether your gear is going to perform like new or fail before its time. Bearings, shafts, clutch packs, seals, and gaskets each play a vital role in system performance.
By applying professional-grade inspection techniques, documenting findings, and replacing components where needed, you’ll not only restore your MG520 but upgrade its reliability and safety for years to come.
Need premium parts to complete your rebuild? Diesel Pro Power offers complete clutch kits, seal and gasket sets, bearings, and more, all engineered to meet or exceed OEM specs.
Rebuilt Twin Disc MG520 Marine Transmissions
Plate Kit For Twin Disc MG520 Marine Transmission
Gasket Kits For Twin Disc MG520 Marine Transmission
Videos About Twin Disc Transmissions
6 Reasons Your Twin Disc Transmission Has Low Oil Pressure
7 Reasons Your Twin Disc Transmission Is Overheating
3 Reasons Your Clutch Plates in Your Twin Disc Transmission Are Making Excessive Noise
Bull Gear On A Twin Disc Transmission
Rebuilt Twin Disc Transmissions