

 Free US Calls: 1-888-433-4735
 International: 305-545-5588
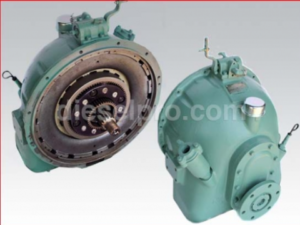
Allison M Rebuilt Marine Transmission
Overhaul Kit & Related Components For Allison M
Allison M Seals
Allison M Clutch Plates
Allison M Hydraulic Pump
Allison M Selector Valve & Related Components
Allison M Bearings & Related Components
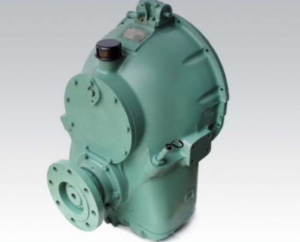
Allison MH Rebuilt Transmission
Allison MH Overhaul Kit & Related Components
Allison MH Seals
Allison MH Clutch Plates & Related Components
Allison MH Hydraulic Pump
Allison MH Selector Valve
Allison MH Bearings & Related Components
Pre-Installation Checklist for Allison M & MH Marine Transmissions
Installing an Allison M or MH marine transmission is a precise operation that demands preparation, accuracy, and adherence to technical best practices. Marine environments leave little margin for error—an improperly installed gearbox can lead to premature failure, loss of vessel control, or dangerous operating conditions at sea.
This section provides a thorough checklist to follow before beginning the installation process:
1. Confirm Model Compatibility
Before mounting the transmission, ensure that the unit is compatible with your engine and propeller specifications:
- Confirm the model number, gear ratio, and rotation direction stamped on the transmission case.
- Match these specs to the engine horsepower and torque curve, and the required propeller RPM.
- If replacing an old gearbox, make sure the new transmission’s shaft dimensions, bell housing, and output flange match the existing driveline.
2. Inspect the Transmission
Whether new, rebuilt, or removed from storage, every transmission should be visually inspected:
- Check the input and output shafts for nicks, rust, or pitting.
- Rotate the shafts manually to verify smooth movement and absence of internal binding.
- Examine the exterior for signs of cracks or corrosion.
- Confirm that all mounting holes are clean and undamaged.
3. Gather Necessary Tools and Materials
Prepare all the tools and components you’ll need:
- Torque wrenches with proper SAE calibration
- Thread locker (medium strength)
- Engine alignment tool or dial indicator
- Fresh mounting gaskets or sealant
- Hoist or crane rated for lifting 500+ lbs
- Shop rags and non-chlorinated degreaser
4. Prepare the Workspace
- Clean the engine room or machinery space thoroughly.
- Ensure lighting is sufficient and there’s enough clearance to maneuver the transmission into place.
- If indoors, ventilate the area due to solvent and oil fumes.
Mounting Procedures for Allison M & MH Marine Transmissions
Proper mounting is essential for vibration control, shaft alignment, and long-term operation. Both the M and MH transmissions are designed with SAE-standard bell housings and foot mounting configurations that simplify installation when done correctly.
1. Lifting the Transmission
- Always use a lifting sling or spreader bar attached to the transmission’s designated lifting eyes.
- If lifting manually, use a hoist or hydraulic jack and ensure the unit is balanced.
- Never lift the transmission by its input or output shafts.
2. Engine Coupling
- Position the transmission close to the engine bell housing.
- Align the input shaft splines or pilot shaft with the engine flywheel.
- Some installations require a flex plate or dampener coupling—ensure it is the correct model and torque rating.
Gently push the transmission into place without forcing. If the unit doesn’t seat fully, remove it and check for interference.
3. Mounting the Transmission
- Lower the transmission into its engine bed or base mounts.
- Insert grade 8 or marine-rated stainless steel bolts into each mounting hole.
- Use flat washers and lock washers to ensure security under vibration.
- Do not fully torque the bolts until shaft alignment is confirmed.
4. Foot Mount Adjustments (if applicable)
- Some MH transmissions include adjustable foot mounts—tighten them in stages after verifying level and centerline alignment with the engine and output shaft.
Alignment With Engine and Shaft for Allison M & MH Marine Transmissions
Shaft misalignment is one of the top causes of marine transmission failure. Both radial and angular misalignment can cause bearing wear, seal leaks, and gear noise. It is critical to achieve proper alignment between the engine, transmission, and propeller shaft.
1. Initial Engine-to-Transmission Alignment
- Using an engine alignment bar or laser alignment tool, verify the transmission is centered on the engine crankshaft.
- Place feeler gauges around the bell housing mating surfaces to check for even spacing.
- Rotate the engine crankshaft slowly and watch for changes in gap spacing.
Correct any discrepancies using engine mount shims or adjusting feet before tightening transmission bolts.
2. Propeller Shaft Alignment
- With the transmission output flange installed, check alignment with the shaft coupling.
- Use a dial indicator to measure runout between the shaft and transmission flange.
- Acceptable misalignment is typically less than 0.003 inches.
- If alignment is off, adjust the shaft strut or intermediate bearing supports.
3. Confirming Parallelism and Angular Alignment
- Use a feeler gauge at four clock positions on the shaft coupling.
- Any gaps should be less than 0.004 inches.
- Use shims under the transmission feet if necessary to correct angular tilt.
4. Final Tightening
- Once alignment is confirmed, torque all engine-to-transmission and transmission-to-base bolts to manufacturer specifications.
- Recheck alignment after torqueing.
Fastener Torque Specifications for Allison M & MH Marine Transmissions
Correct torque values are essential for sealing, structural integrity, and component longevity. Over-tightening can warp housings or crack cast iron components, while under-tightening leads to leaks and loosening under vibration.
While exact torque specs can vary slightly by model and fastener size, the following general guidelines apply to most Allison M & MH marine transmissions:
Bell Housing Bolts (Grade 8 Bolts)
- 7/16″-14 UNC bolts: 55–65 ft-lbs
- 1/2″-13 UNC bolts: 70–80 ft-lbs
- 9/16″-12 UNC bolts: 90–110 ft-lbs
Use anti-seize compound or blue thread locker on bell housing bolts to prevent corrosion and backing out.
Output Coupling Bolts
- 5/8″-11 UNC bolts: 110–125 ft-lbs
- Use hardened washers and recheck torque after first engine run.
Transmission Mounting Bolts to Base
- 1/2″ bolts: 75 ft-lbs (dry)
- Ensure vibration dampers are seated flat against the mounting pads.
Oil Pan or Filt
er Housing Bolts
- 1/4″ to 5/16″ bolts: 7–12 ft-lbs
- Always tighten in a crisscross pattern to prevent warping the sealing surface.
Note: Refer to the OEM service manual for model-specific torque specs or contact Diesel Pro Power for compatibility support.
Sealing Surfaces and Gasket Preparation for Allison M & MH Marine Transmissions
Leaks in marine transmissions are not just inconvenient—they are dangerous. A loss of hydraulic pressure or fluid level can cause slippage, overheating, or complete failure. The key to avoiding leaks is proper prep of gaskets and sealing surfaces.
1. Clean All Sealing Surfaces
- Use a plastic scraper to remove any old gasket material or RTV.
- Avoid metal tools that can scratch machined surfaces.
- Wipe with lint-free rags and non-chlorinated brake cleaner.
2. Inspect for Damage
- Look for pits, nicks, or grooves on mating surfaces.
- Flatness can be checked with a straight edge.
- Any damage deeper than 0.005 inches should be repaired or the housing replaced.
3. Selecting Gaskets and Sealants
- Use OEM-style or premium aftermarket gaskets made for marine environments.
- For paper or cork gaskets, use a thin coat of aviation sealant or Permatex non-hardening compound.
- For metal-to-metal joints without gaskets, use RTV silicone rated for oil resistance and heat up to 500°F.
4. Sealing Threaded Connections
- Apply pipe thread sealant or Teflon tape to all fluid line fittings and temperature sensor threads.
- Be cautious with Teflon tape near pressure sensors—it can cause false readings if shredded inside the port.
5. Oil Seals and Shaft Seals
- Grease lip seals with marine-grade lithium or synthetic grease before installation.
- Always press-fit using a seal driver, not a hammer or punch.
- Replace any worn or hardened shaft seals during installation.
6. Leak Testing
- Once assembled and filled with oil, check for leaks by:
- Pressurizing the case to 5–10 psi with a hand pump and checking for seepage.
- Running the engine at idle and inspecting all sealing points.
- Wiping all surfaces dry before testing to ensure accurate leak detection.
Final Notes on Installation for Allison M & MH Marine Transmissions
A properly installed transmission means more than just bolting it in. It reflects a systematic approach to marine engineering:
- Alignment is critical: even the best parts fail under misalignment.
- Cleanliness prevents leaks and contamination.
- Torque specs and mounting procedures safeguard long-term performance.
At Diesel Pro Power, we supply everything you need for installation:
- Rebuilt Allison M & MH transmissions
- Premium gasket and seal kits
- Flexible engine couplings and alignment tools
- Technical support for torque specs and part compatibility
Allison M Rebuilt Marine Transmission
Overhaul Kit & Related Components For Allison M
Allison M Seals
Allison M Clutch Plates
Allison M Hydraulic Pump
Allison M Selector Valve & Related Components
Allison M Bearings & Related Components
Allison MH Rebuilt Transmission
Allison MH Overhaul Kit & Related Components
Allison MH Seals
Allison MH Clutch Plates & Related Components
Allison MH Hydraulic Pump
Allison MH Selector Valve
Allison MH Bearings & Related Components