

 Free US Calls: 1-888-433-4735
 International: 305-545-5588

Proper installation of the Twin Disc MG507 Marine Gear is critical to ensure reliable performance, optimal efficiency, and long-term durability. Whether you’re an experienced marine mechanic or a boat owner handling installation, following the correct procedures will minimize potential issues and extend the life of the transmission.
This comprehensive guide covers the pre-installation checklist, essential tools and equipment, a detailed step-by-step installation process, and precise setup and alignment procedures to guarantee a seamless installation.
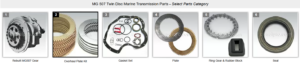
Parts Catalog for Twin Disc MG507 Marine Transmissions
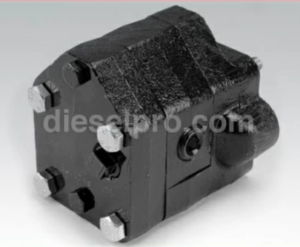
Rebuilt Twin Disc MG507 Marine Transmissions
Plate Kit For Twin Disc MG507 Marine Transmission
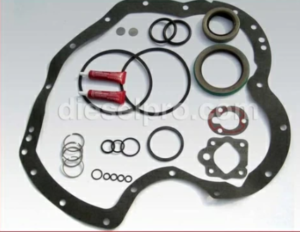
Gasket Kits For Twin Disc MG507 Marine Transmission
Pre-Installation Checklist for Twin Disc MG507 Marine Gear
Before beginning the installation process, it’s essential to conduct thorough preparation. This ensures that you have the necessary parts, tools, and information to avoid mistakes and ensure a safe, efficient installation.
1. Inspect the Marine Gear and Components
- Visual Inspection: Examine the MG507 for any visible damage, such as cracks, dents, or deformations. Shipping damage can occur, and it’s better to identify these issues before proceeding.
- Check All Seals and Gaskets: Ensure that the seals, O-rings, and gaskets are intact and free from defects. Damaged seals can lead to leaks after installation.
- Verify Serial Numbers and Part Compatibility: Confirm that the gear ratio and specifications of the MG507 match the engine and vessel requirements. If replacing an old unit, confirm compatibility by cross-checking serial numbers.
2. Review the Vessel’s Engine Specifications
- Alignment Check: Ensure the engine mounts are correctly aligned and secure. Poor alignment can lead to vibrations and premature wear.
- Assess the Propeller Shaft: Inspect the shaft for wear or misalignment. Any issues with the shaft can directly affect the performance of the marine gear.
- Check Engine Power Ratings: Verify that the engine’s horsepower and torque ratings match the capacity of the MG507.
3. Prepare the Installation Environment
- Clean and Organized Work Area: Ensure that the workspace is clean, dry, and free of obstructions. Contaminants can interfere with installation.
- Safety Precautions: Wear proper PPE (Personal Protective Equipment), including gloves and eye protection. Ensure fire safety protocols are in place, especially when working with lubricants or fuel.
4. Verify Necessary Parts and Accessories
Before proceeding, ensure that the following parts and accessories are available:
- Mounting bolts and washers
- Coupling hardware for the engine and propeller shaft
- Gasket and seal kits (ensure these match your MG507 model)
- Lubricating oil (verify viscosity and quantity)
- Cooling hoses and fittings for the heat exchanger
- Alignment tools (dial indicator, straight edge)
- Hydraulic lines and fittings (if replacing existing ones)
5. Plan for Lifting and Positioning
- Engine Hoist or Crane: Ensure an engine hoist or crane is available to lift and position the MG507 safely.
- Lifting Straps or Chains: Use certified lifting gear to avoid accidents. Ensure that the center of gravity is balanced to prevent tipping.
Tools and Equipment Required for Twin Disc MG507 Installation
Proper tools and equipment are essential for a safe and successful installation. Here’s what you’ll need:
1. Lifting Equipment
- Engine hoist, gantry crane, or overhead crane
- Heavy-duty lifting straps or chains
- Load spreader to balance the gear during lifting
2. Hand Tools

- Standard and metric socket sets
- Torque wrench (to ensure bolts are tightened to the correct specifications)
- Hex and Allen wrenches
- Adjustable wrenches
- Flathead and Phillips screwdrivers
- Pliers and needle-nose pliers
3. Precision Tools
- Dial indicator for alignment checks
- Feeler gauges
- Straight edge for measuring shaft alignment
- Leveling device or laser alignment tool
4. Cleaning and Lubrication Tools
- Clean rags and lint-free cloths
- Degreaser or solvent for cleaning mating surfaces
- Lubricating oil (as specified for the MG507)
- Anti-seize compound for threaded fasteners
5. Safety Equipment

- PPE (gloves, safety goggles, steel-toed boots)
- Fire extinguisher (if working in enclosed spaces)
- First-aid kit
- Ventilation system if working in an engine room
6. Other Essential Equipment
- Hydraulic hose tools for fitting and securing connections
- Coolant hose clamps and fittings
- Sealant and gasket adhesive
- Manual hoist or jacks for precise positioning
- Work light or headlamp for improved visibility
Step-by-Step Installation Process for Twin Disc MG507 Marine Gear
A structured approach is essential for correctly installing the Twin Disc MG507 Marine Gear. Here’s a detailed step-by-step process:
Step 1: Prepare the Work Area and Inspect Components
- Ensure that the workspace is clean, dry, and well-lit.
- Inspect the MG507 marine gear for any shipping damage.
- Confirm all necessary parts, gaskets, and tools are readily available.
- Clean the mating surfaces to remove any dirt, oil, or contaminants.
Step 2: Position the MG507 for Installation
- Secure the MG507 with lifting straps. Attach the straps to designated lifting points.
- Carefully lift the marine gear using an engine hoist or crane.
- Slowly lower the MG507 into the vessel’s engine compartment.
- Position the gear close to its final placement but allow enough space for precise alignment.
Step 3: Align the Marine Gear with the Engine
- Ensure that the engine’s output flange and the MG507’s input flange are correctly aligned.
- Use an alignment tool to measure axial and radial misalignments.
- If adjustments are needed, use shims under the engine mounts or reposition the gear.
Step 4: Secure the Gear to the Engine
- Apply anti-seize compound to the bolts.
- Attach the MG507 to the engine bell housing using the provided mounting bolts.
- Tighten the bolts in a crisscross pattern to avoid uneven pressure.
- Use a torque wrench to tighten the bolts to the manufacturer’s recommended specifications.
Step 5: Install the Coupling
- Position the propeller shaft coupling and align it with the MG507’s output flange.
- Insert the coupling bolts and tighten them gradually.
- Perform a final alignment check to ensure the coupling is free of vibration and misalignment.
Step 6: Connect the Hydraulic and Cooling Systems
- Attach hydraulic hoses to the gear, ensuring a tight and secure connection.
- Connect the oil-to-water heat exchanger hoses.
- Check for any potential kinks or bends in the hoses that could restrict flow.
Step 7: Fill with Lubricating Oil
- Remove the oil fill plug and slowly add the manufacturer-recommended oil.
- Check the oil level using the dipstick. Add oil until it reaches the optimal mark.
- Inspect for leaks around seals and fittings.
Step 8: Initial System Testing
- Rotate the propeller shaft by hand to ensure it moves smoothly.
- Start the engine and engage the gear at idle speed.
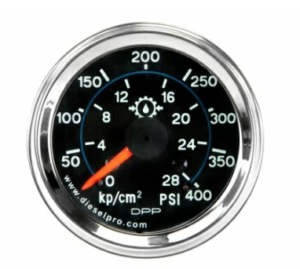
- Monitor hydraulic pressures, oil temperatures, and vibration levels.
- Check for unusual noises or excessive heat during this test.
Initial Setup and Alignment Procedures for Twin Disc MG507
Proper setup and alignment are critical for the MG507 to function efficiently and avoid premature wear. Here are key procedures:
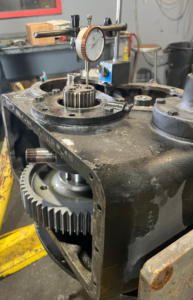
1. Aligning the Propeller Shaft
- Use a dial indicator to check for runout or misalignment.
- Ensure that both axial and radial alignment are within acceptable tolerances (as specified in the service manual).
- Adjust engine mounts or add shims if necessary.
2. Checking Coupling Alignment
- Use a straight edge to verify that coupling faces are flush and parallel.
- Measure the gap around the circumference of the coupling to ensure uniform spacing.
- Tighten coupling bolts to the specified torque settings.
3. Verifying Hydraulic Connections
- Inspect hydraulic lines for leaks.
- Ensure all fittings are tight and correctly installed.
- Check the hydraulic reservoir to confirm the oil level is adequate.
4. Final Testing and Calibration
- Perform a full system test by engaging the gear at various speeds.
- Check for smooth and noise-free engagement.
- Inspect all systems for leaks, vibrations, and abnormal noise.
- Re-check torque values on all bolts after the initial test.
Final Thoughts on Installation
Installing the Twin Disc MG507 Marine Gear requires careful preparation, the right tools, and adherence to precise alignment procedures. Mistakes during installation can result in premature wear, reduced efficiency, and costly repairs.
Pro Tips:
- Always double-check alignment measurements.
- Don’t rush the hydraulic connection process; ensure every fitting is leak-free.
- Keep a record of torque values and alignment readings for future maintenance.
Disclaimer
For more detailed specifications, diagrams, and advanced repair techniques, always refer to the OEM service manual.
Rebuilt Twin Disc MG507 Marine Transmissions
Plate Kit For Twin Disc MG507 Marine Transmission
Gasket Kits For Twin Disc MG507 Marine Transmission
Videos About Twin Disc Transmissions
6 Reasons Your Twin Disc Transmission Has Low Oil Pressure
7 Reasons Your Twin Disc Transmission Is Overheating
3 Reasons Your Clutch Plates in Your Twin Disc Transmission Are Making Excessive Noise
Bull Gear On A Twin Disc Transmission
Rebuilt Twin Disc Transmissions