

 Free US Calls: 1-888-433-4735
 International: 305-545-5588
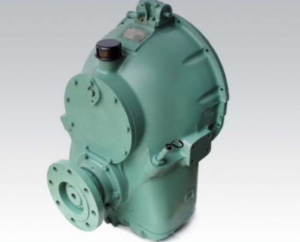
Allison M Rebuilt Marine Transmission
Overhaul Kit & Related Components For Allison M
Allison M Seals
Allison M Clutch Plates
Allison M Hydraulic Pump
Allison M Selector Valve & Related Components
Allison M Bearings & Related Components
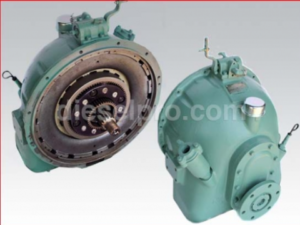
Allison MH Rebuilt Transmission
Allison MH Overhaul Kit & Related Components
Allison MH Seals
Allison MH Clutch Plates & Related Components
Allison MH Hydraulic Pump
Allison MH Selector Valve
Allison MH Bearings & Related Components
Identifying Symptoms of Oil Pump Failure
The oil pump in an Allison M or MH marine transmission plays a central role in delivering pressurized lubrication to critical components, including the planetary gearset, clutches, and bearings. Recognizing early symptoms of oil pump failure is essential to prevent catastrophic damage, vessel downtime, or complete transmission failure.
Common Symptoms of Oil Pump Issues:
- Low or fluctuating oil pressure: Normal operating pressures are 130 psi (896 kPa) at 1800 RPM in forward and 110 psi (758 kPa) at 1500 RPM in reverse. Any reading significantly below these values may indicate a failing pump or internal leakage.
- Overheating transmission: Inadequate lubrication can cause elevated temperatures (above the standard 180–200°F range), which leads to varnishing, clutch slippage, or thermal degradation of oil.
- Clutch engagement problems: Delayed or erratic clutch application—particularly during shifting—could result from low hydraulic pressure due to a weak or damaged oil pump.
- Noise and vibration: A failing oil pump might produce whining, rattling, or other abnormal sounds due to internal wear, cavitation, or entrained air in the oil supply.
- Metal shavings in oil filter or sump: These may indicate rotor or housing wear, or a more widespread issue within the lubrication circuit affecting the pump and driven components.
Routine pressure testing should be part of preventive maintenance. Should any of these symptoms appear, an immediate inspection and testing procedure should follow to confirm oil pump condition.
Accessing and Removing the Oil Pump
Before accessing the oil pump, ensure the vessel is secure and the transmission has cooled to a safe handling temperature. All oil must be drained from the system to avoid spills and contamination. Always follow standard safety practices—use appropriate PPE, ensure the vessel is powered down, and the transmission is disengaged.
Step-by-Step Removal:
- Drain the Transmission:
- Remove the sump drain plugs and oil filter drain plugs.
- Allow all residual oil to drain into a clean, approved container. Dispose of or recycle according to local regulations.
- Remove External Components:
- Detach the oil cooler lines, temperature sensor wires, and pressure sensor wiring from the transmission housing.
- Carefully remove the selector linkage to gain unimpeded access.
- Access the Pump Housing:
- On M and MH transmissions, the oil pump is typically located on the front end of the transmission assembly, bolted into the reduction gear housing.
- Refer to foldouts or diagrams to identify the correct fasteners for the pump housing.
- Remove Mounting Bolts:
- Unbolt the oil pump housing. There may be 6–8 bolts depending on the transmission variant. These should be removed in a criss-cross pattern to prevent warping.
- Unbolt the oil pump housing. There may be 6–8 bolts depending on the transmission variant. These should be removed in a criss-cross pattern to prevent warping.
- Withdraw the Pump Assembly:
- Carefully extract the oil pump assembly, which consists of the housing, rotor, and driven gear set. If the pump is seized or difficult to remove, apply gentle persuasion with a rubber mallet. Avoid prying or using force on machined surfaces.
- Carefully extract the oil pump assembly, which consists of the housing, rotor, and driven gear set. If the pump is seized or difficult to remove, apply gentle persuasion with a rubber mallet. Avoid prying or using force on machined surfaces.
- Inspect and Set Aside:
- Once removed, place the pump on a clean workbench and prepare for inspection.
Rotor and Housing Wear Inspection
Inspection of the rotor and housing is a critical step in evaluating whether the oil pump can be reused or needs replacement. Tolerances are tight in marine applications, and even minor wear can drastically affect performance.
Key Inspection Points:
- Rotor-to-Housing Clearance:
- Using a feeler gauge, measure radial clearance between the outer rotor and the pump housing. Any value outside manufacturer specifications (typically <0.005″) indicates wear.
- Inspect the depth of scoring in the housing bore—deep grooves mean the rotor has lost alignment or debris has circulated through the pump.
- Rotor Teeth:
- Look for rounding or pitting at the tips and root of each rotor tooth. Pitting, cracking, or excessive erosion suggests cavitation or contamination.
- Look for rounding or pitting at the tips and root of each rotor tooth. Pitting, cracking, or excessive erosion suggests cavitation or contamination.
- Drive Gear Spline Fit:
- Check the input shaft drive gear splines for wear or deformation. Excessive play could lead to slippage or uneven pump rotation.
- Check the input shaft drive gear splines for wear or deformation. Excessive play could lead to slippage or uneven pump rotation.
- End Clearance:
- Measure endplay between the pump rotor faces and the cover plate using a dial indicator. Excessive end clearance (>0.006″) can result in low oil pressure output.
- Measure endplay between the pump rotor faces and the cover plate using a dial indicator. Excessive end clearance (>0.006″) can result in low oil pressure output.
- Shaft Wear and Runout:
- Check shaft concentricity using a dial indicator mounted on V-blocks. Radial runout above 0.002″ may mean the shaft is bent or worn and must be replaced.
- Check shaft concentricity using a dial indicator mounted on V-blocks. Radial runout above 0.002″ may mean the shaft is bent or worn and must be replaced.
Visual Inspection Tips:
- Use a bright light and magnification if needed.
- Dark discoloration or burnt marks indicate excessive heat from friction or lack of lubrication.
- Aluminum or steel fragments found inside the pump typically point to a prior internal failure elsewhere in the system.
If more than one of the above symptoms is found, replacing the oil pump is recommended. Minimal wear or only cosmetic issues might be addressed by cleaning and lapping with fine abrasive compound—only if within factory limits.
Replacing or Rebuilding Components
Depending on inspection results and the availability of components, you can either rebuild the oil pump using a service kit or replace it entirely. Diesel Pro Power offers replacement pumps and kits compatible with Allison M and MH marine transmission models.
Rebuild Steps:
- Disassemble the Pump:
- Remove retaining pins, circlips, or retaining bolts to separate the inner and outer rotor from the housing.
- Remove retaining pins, circlips, or retaining bolts to separate the inner and outer rotor from the housing.
- Clean Thoroughly:
- Use mineral spirits and lint-free rags to clean all parts.
- Do not spin bearings or rotors with compressed air.
- Replace Internal Components:
- Install new rotors, shaft, bushings, and seals as supplied in the rebuild kit.
- Use assembly lubricant on all moving parts during installation.
- Re-check Tolerances:
- Measure all clearances again once reassembled. If any are out of tolerance, repeat the rebuild or replace the pump.
- Measure all clearances again once reassembled. If any are out of tolerance, repeat the rebuild or replace the pump.
- Install New Gaskets:
- Use fresh gasket material or O-rings on mating surfaces. Ensure surfaces are flat and free of burrs before applying.
- Use fresh gasket material or O-rings on mating surfaces. Ensure surfaces are flat and free of burrs before applying.
Replace with New Pump:
- Select Correct Part Number:
- Refer to your transmission model and serial number when ordering. For example, Allison P/N 5140373 is suitable for A/B in-line 71 or V-71 engines, while P/N 5141732 is used on C/D in-line variantsM MH Series.
- Refer to your transmission model and serial number when ordering. For example, Allison P/N 5140373 is suitable for A/B in-line 71 or V-71 engines, while P/N 5141732 is used on C/D in-line variantsM MH Series.
- Compare Components:
- Before installation, verify the new pump matches in all dimensions, mounting holes, shaft alignment, and spline orientation.
- Before installation, verify the new pump matches in all dimensions, mounting holes, shaft alignment, and spline orientation.
Reinstallation and Priming
Proper reinstallation and system priming are essential for successful oil pump function. Improper sealing or lack of prime can cause immediate and catastrophic damage upon engine startup.
Reinstallation Procedure:
- Prepare Mating Surfaces:
- Clean the mounting surface on the transmission housing.
- Inspect bolt threads and apply thread locker as needed.
- Install Pump Assembly:
- Carefully align the oil pump drive gear with the input shaft spline.
- Use torque specs recommended in the OEM service manual—typically 25–35 ft-lbs for M/MH oil pump bolts.
- Reconnect External Lines:
- Reattach all oil lines, pressure sensors, and temperature gauges.
- Confirm the orientation of flow and the cleanliness of connections.
- Replace Filters:
- Install new oil filters to protect the freshly installed pump and prevent circulating contaminants.
Priming the Oil System:
- Manual Priming:
- Fill the transmission through the breather tube or fill port until the level reaches the FULL mark on the dipstick.
- Rotate the input shaft manually or engage the starter motor without firing the engine to build initial pressure.
- Monitor oil pressure gauge for movement—expect pressure within 10–15 seconds of cranking.
- Pre-Fill With External Pump (Optional):
- For larger systems, connect an external priming pump to an oil galley and circulate fluid for several minutes before running the engine.
- For larger systems, connect an external priming pump to an oil galley and circulate fluid for several minutes before running the engine.
- Final Inspection:
- After startup, monitor pressure and temperature gauges.
- Check for leaks at all fittings, and recheck oil level once operating temperature is reached.
Final Notes on Oil Pump Service
- Allison marine transmissions are highly sensitive to oil system integrity. A failing or improperly serviced oil pump can jeopardize the entire drivetrain.
- Always follow precise tolerances and verify lubrication flow paths during any service.
- If you’re in doubt about oil system conditions, it’s safer to install a new unit than risk operational failure.
Parts Available From Diesel Pro Power
For those seeking aftermarket parts and components that match or exceed OEM quality, Diesel Pro Power offers the following for Allison M & MH marine transmissions:
- Complete oil pump replacements
- Rebuild kits with rotors, seals, shafts
- Transmission oil filters and gaskets
- Full overhaul kits for Allison M/MH models
Benefits:
- Ready-to-ship from warehouse
- Compatibility verified by transmission model
- Backed by warranty and technical support
FAQ
Q: How do I know if I need to replace the oil pump vs. rebuild it?
A: Replace the oil pump if clearances exceed tolerance, if rotor housing is scored, or if the shaft shows excessive runout. Rebuilds are ideal when components are within limits and a rebuild kit is available.
Q: What oil should I use after servicing the oil pump?
A: Use the same SAE-grade engine oil used in your Detroit Diesel engine, but do not use C-3 oil. Refer to DDA spec 7SE 270 for guidance.
Q: Can I clean and reuse the oil cooler if the oil pump fails?
A: No. If metal contamination is present, the cooler must be replaced to prevent debris from re-entering the system.
Q: How often should I inspect or replace the oil pump?
A: During every major transmission overhaul or if pressure drops, noise develops, or fluid shows metal particles.
Allison M Rebuilt Marine Transmission
Overhaul Kit & Related Components For Allison M
Allison M Seals
Allison M Clutch Plates
Allison M Hydraulic Pump
Allison M Selector Valve & Related Components
Allison M Bearings & Related Components
Allison MH Rebuilt Transmission
Allison MH Overhaul Kit & Related Components
Allison MH Seals
Allison MH Clutch Plates & Related Components
Allison MH Hydraulic Pump
Allison MH Selector Valve
Allison MH Bearings & Related Components