

 Free US Calls: 1-888-433-4735
 International: 305-545-5588

Introduction
The Cummins C Series engines—comprising the 6C, 6CT, and 6CTA models—are renowned for their reliability, durability, and high-performance capabilities. Despite their robust design, these engines are not immune to mechanical issues, especially as they accumulate hours of operation or face challenging environments. Understanding how to troubleshoot common problems effectively can significantly reduce downtime, improve fuel efficiency, and extend the lifespan of your engine.
Parts Catalog for Cummins 6C Marine Engine
Parts Catalog for Cummins 6CT Marine Engine
Parts Catalog for Cummins 6CTA Marine Engine
This comprehensive guide covers:
- Identifying Common Problems (e.g., overheating, oil leaks)
- Using Diagnostic Tools for Quick Resolution
- Proactive Tips to Prevent Frequent Issues
By following these troubleshooting strategies, operators and mechanics can maintain optimal engine performance while minimizing costly repairs.
1. Identifying Common Problems
Diesel engines like the Cummins C Series face several recurring issues that can affect performance. Identifying these problems early is key to preventing more severe damage.
A. Overheating Issues
Symptoms:
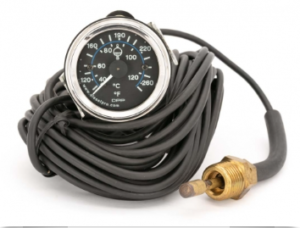
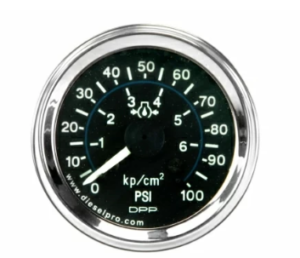
- Rising coolant temperature gauge
- Steam from the radiator
- Coolant loss or boiling in the overflow tank
- Engine derating (power reduction)
Common Causes:
1. Low Coolant Levels:
- Caused by leaks in hoses, radiator, or water pump.
- Check for coolant puddles, inspect hoses for cracks, and ensure the radiator cap is sealed properly.
2. Faulty Thermostat:
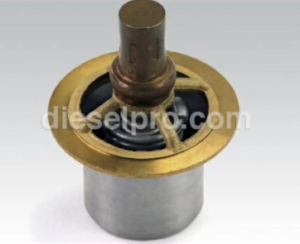
New thermostat, for Cummins 6C, 6CT and 6CTA engines.
- A stuck thermostat can prevent coolant from circulating, causing overheating.
- Remove and test the thermostat in hot water to confirm proper operation.
3. Clogged Radiator:

Radiator cleaner for Radiator cleaner for Cummins.
- Debris, dirt, or corrosion inside the radiator reduces cooling efficiency.
- Clean the radiator externally with water and internally with a flushing agent.
4. Water Pump Failure:
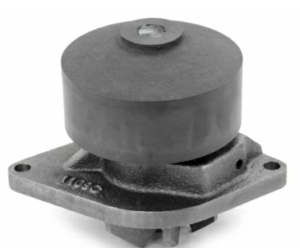
Fresh Water Pump for Cummins ISB 6.7, QSB 6.7, 6C, 6CT, 6CTA Engines
- A failing pump may have worn impellers or leaks, leading to insufficient coolant flow.
- Listen for grinding noises or check for coolant leaks around the pump.
5. Airlocks in the Cooling System:
- Air trapped in the system disrupts coolant circulation.
- Bleed the system by running the engine with the radiator cap off until air bubbles disappear.
B. Oil Leaks
Symptoms:
- Oil puddles under the engine
- Burning oil smell
- Low oil pressure warning on the dashboard
Common Causes:
1. Worn Gaskets and Seals:
- Over time, gaskets (e.g., valve cover, oil pan) degrade, causing leaks.
- Visually inspect for oil seepage around gasket joints.
2. Loose or Damaged Drain Plug:
- Improper torque or a damaged thread can lead to leaks.
- Check the oil drain plug and replace the gasket if necessary.
3. Cracked Oil Pan:
- Impact damage or corrosion can crack the oil pan.
- Inspect the oil pan for visible damage and repair or replace as needed.
4. Faulty Oil Cooler or Oil Filter:
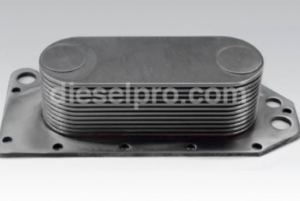
Cummins Oil Cooler for 6C, 6CT, 6CTA, ISC
- Leaks around the oil filter or cooler connections may indicate improper installation or gasket failure.
- Tighten or replace components as necessary.
C. Hard Starting or No Start Conditions

Symptoms:
- Engine cranks but doesn’t start
- Clicking sounds without engine turnover
- Requires excessive cranking to start
Common Causes:
1. Weak Battery or Poor Electrical Connections
- A weak battery cannot provide sufficient power to the starter.
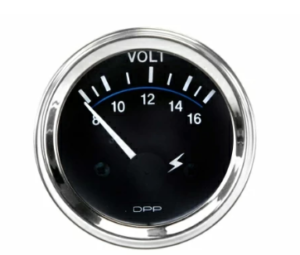
- Test battery voltage (should be >12.6V) and check terminals for corrosion.
2. Faulty Starter Motor or Solenoid
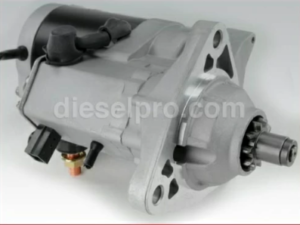
New starter for Cummins 6C, 6CT and 6CTA8.3 engines
- A worn-out starter may fail to engage properly.
- Perform a voltage drop test on the starter circuit.
3. Air in the Fuel System
- Air bubbles disrupt fuel delivery to the injectors.
- Bleed the fuel system to remove trapped air.
4. Faulty Fuel Injectors or Low Fuel Pressure

Mechanical Injector for cummins 6C, 6CT and 6CTA engines
- Clogged injectors or a failing fuel pump can prevent fuel from reaching the combustion chamber.
- Use a fuel pressure gauge to verify proper fuel pressure.
D. Excessive Exhaust Smoke
Symptoms:
- Black smoke: Indicates unburned fuel
- White smoke: Suggests coolant or fuel not burning properly
- Blue smoke: Sign of oil burning in the combustion chamber
Common Causes:
- Caused by a rich fuel mixture, often due to a clogged air filter, faulty injectors, or over-fueling.
- Clean the air filter and inspect the fuel system.
2. White Smoke
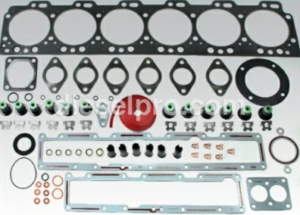
New upper gasket set, for Cummins C, ISC, ISL engines
- Often indicates coolant leakage into the combustion chamber (blown head gasket) or faulty injectors.
- Perform a compression test and inspect the cooling system.
3. Blue Smoke
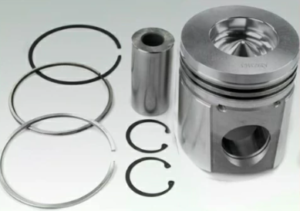
New piston kit, for use with Cummins 6C 8.3, 6CT 8.3 and 6CTA 8.3 engines.
- Caused by oil burning, often due to worn piston rings or valve seals.
- Check for oil in the intake system and inspect internal engine components.
E. Low Oil Pressure
Symptoms:
- Oil pressure warning light activation
- Engine knocking noises
- Excessive engine heat
Common Causes:
- Low Oil Level:
- Check the dipstick and add oil as needed.
2. Clogged Oil Filter:
- Replace the oil filter regularly to ensure proper flow.
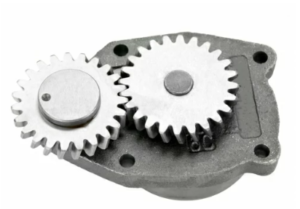
Worn Bearings or Oil Pump Failure:
- Inspect bearings for wear and check oil pump performance.
3. Oil Viscosity Issues:
- Using incorrect oil viscosity can lead to pressure problems.
- Ensure the oil meets Cummins specifications (e.g., SAE 15W-40).
2. Using Diagnostic Tools for Quick Resolution
Effective troubleshooting often requires specialized diagnostic tools. These tools help pinpoint problems quickly, reducing downtime and minimizing the risk of unnecessary repairs.
A. Basic Diagnostic Tools
1. Multimeter:
- Measures voltage, current, and resistance for electrical diagnostics.
- Used for testing batteries, alternators, and wiring continuity.
2. Compression Tester:
- Checks cylinder compression to identify issues with piston rings, valves, or head gaskets.
3. Fuel Pressure Gauge:
- Measures fuel system pressure to ensure proper delivery to injectors.
4. Infrared Thermometer:
- Measures surface temperatures to diagnose overheating issues quickly.
5. Scan Tool or Diagnostic Software (e.g., Cummins INSITE):
- Connects to the engine’s Electronic Control Module (ECM) to read fault codes and monitor real-time data.
B. Advanced Diagnostic Procedures
- ECM Fault Code Retrieval:
- Use Cummins INSITE to access stored fault codes in the ECM.
- Codes can indicate issues like sensor failures, fuel delivery problems, or turbocharger faults.
2. Blow-by Test:
- Measures the amount of combustion gases escaping past the piston rings into the crankcase.
- High blow-by levels indicate worn rings or cylinders.
3. Leak-Down Test:
- Identifies where pressure is escaping in the combustion chamber (e.g., valves, head gasket, piston rings).
4. Oscilloscope Testing:
- Analyzes electronic signals from sensors and actuators for advanced diagnostics.
3. Proactive Tips to Prevent Frequent Issues
Preventing issues before they occur is the most effective way to maintain engine performance and reduce repair costs. Here are key proactive maintenance tips:
A. Regular Maintenance Schedule
- Follow Manufacturer Guidelines:
- Adhere to Cummins’ recommended service intervals for oil changes, filter replacements, and inspections.
- Keep Maintenance Logs:
- Track all maintenance activities to identify recurring issues and predict future service needs.
B. Monitor Engine Performance
- Daily Inspections:
- Check fluid levels, belts, hoses, and for signs of leaks or unusual noises.
- Use Engine Monitoring Systems:
- Install sensors that monitor oil pressure, coolant temperature, and turbo boost pressure.
C. Fuel System Care

- Use High-Quality Diesel Fuel:
- Prevent injector clogging and fuel contamination.
- Drain Water Separators Regularly:
- Water in diesel fuel can cause corrosion and injector damage.
D. Cooling System Management

- Flush Coolant System Periodically:
- Prevent corrosion and scaling inside the radiator and engine block.
- Inspect Hoses and Clamps:
- Replace worn or brittle hoses to prevent coolant leaks.
E. Electrical System Maintenance
- Clean Battery Terminals:
- Prevent corrosion that can cause starting issues.
- Check Ground Connections:
- Loose or corroded grounds can lead to intermittent electrical problems.
F. Turbocharger Care
- Allow Turbo to Cool After Heavy Load:
- Idle the engine for a few minutes before shutdown to prevent oil coking.
- Inspect Turbocharger Regularly:
- Check for shaft play, oil leaks, and unusual noises.
Conclusion
Troubleshooting the Cummins C Series engines (6C, 6CT, 6CTA) requires a systematic approach that combines knowledge of common issues, effective diagnostic tools, and proactive maintenance practices. By identifying problems early, using the right tools for diagnostics, and implementing preventive measures, operators can ensure their engines run efficiently, reliably, and with minimal downtime.
Whether you’re managing a fleet of trucks, maintaining marine engines, or operating heavy machinery, this guide provides the essential knowledge needed to keep your Cummins engine performing at its best.
Parts Catalog for Cummins 6C Marine Engine
Parts Catalog for Cummins 6CT Marine Engine
Parts Catalog for Cummins 6CTA Marine Engine