

 Free US Calls: 1-888-433-4735
 International: 305-545-5588
Introduction: What You Need to Know About Cummins 6CT Sea Water Pumps
For Cummins engines, the sea water pump is an essential marine engine part that is designed to keep your engine from overheating by bringing in sea water to cool the engine. Whether you’re a boat owner or a professional marine mechanic, understanding how to install and maintain Cummins 6CT sea water pumps is essential for keeping your vessel in top condition. In this article, we’ll explain the basics of a Cummins 6CT sea water pump installation, as well as provide tips on how to ensure that your pump runs effectively and safely.
1. Preparing the Installation (Site and Materials)
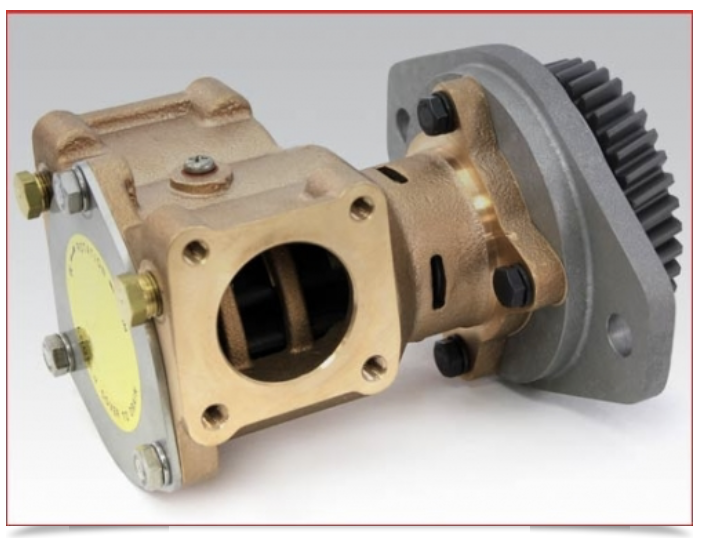
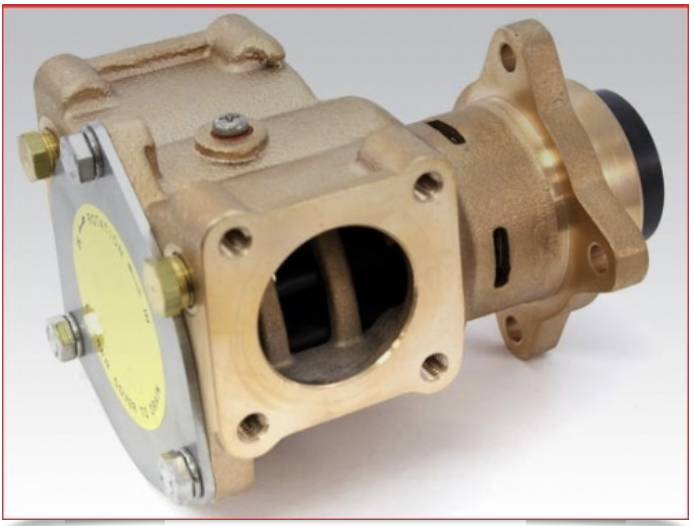
Installing a new sea water pump or replacing an existing one is a simple process. You will need to look at your old sea water pump when selecting a pump for your Cummins 6CT as there are three styles. As shown below.
- Sea Water Pump For Cummins 6CT Mounting Holes are 11° offset from the center of the Drive Gear Shaft this pump needs the mounting gasket and inlet and outlet port seals.
-
Sea Water Pump For Cummins 6CT mounting holes 16° off the center shaft this pump needs the mounting gasket and inlet and outlet port seals.

- Sea Water Pump For Cummins 6CT Bidirectional Pump (It Turns Right or Left) this pumps needs inlet and outlet port seals.
To install you will use the bolts from your old water pump and you will need a socket wrench.
2. Installing the Sea Water Pump on the Engine Block
Installing a sea water pump on a Cummins engine block is a critical task in maintaining the engine’s cooling system. The pump is responsible for drawing in cool seawater, circulating it through the heat exchanger, and preventing the engine from overheating. A correct installation not only ensures reliable operation but also helps protect the engine from premature wear or costly damage caused by overheating or water leaks.
The process involves carefully removing the old pump, preparing the mounting surface, installing the new unit, and making sure all connections are properly sealed and secure. It is essential to follow the manufacturer’s instructions step by step to ensure proper fitment and long service life. Using the correct tools, high-quality gaskets or O-rings, and marine-grade sealants where recommended can prevent problems such as leaks or premature bearing failure.
Proper preparation is key. Before beginning, have all the required tools ready, including wrenches, screwdrivers, marine-grade grease or anti-seize for bolts, and fresh gaskets or seals. If you’re replacing the pump as part of scheduled maintenance, it’s a good idea to inspect the condition of the hoses and clamps and replace them if they show signs of wear.
Some basic steps include:
-
Shut off the sea water pump inlet valves
Close the seacock or sea water intake valves to prevent water from entering the system while you work.
-
Remove the hoses from the inlet and outlet and drain the sea water pump
Loosen hose clamps, carefully disconnect the hoses, and allow any remaining seawater to drain into a bucket or bilge area. Keep rags or absorbent pads handy to control spills.
-
Remove the old water pump
Unbolt the pump from the engine block, taking care not to damage the mounting surface. Inspect the old gasket or O-ring and clean the mating surface thoroughly to ensure the new pump seals properly.
-
Install the new water pump
Position the new pump on the cleaned surface. Install new gaskets or O-rings as recommended, and tighten the mounting bolts evenly to avoid distortion. A light application of marine grease or anti-seize on the bolts can make future service easier.
-
Reconnect the inlet and outlet hoses
Slide hoses onto the pump fittings, tighten clamps securely, and check their condition to avoid future leaks.
-
Reopen the seawater inlet valves
Slowly open the valves to allow water flow back into the pump and the rest of the cooling system.
-
Operate the engine and check for leaks
Start the engine and run it at idle while inspecting the pump, hose connections, and mounting area for any signs of water seepage. Verify that water flow is steady at the discharge point (exhaust or outlet) and that the engine is cooling properly.
Taking your time with each step, using the proper materials, and double-checking all connections will help ensure a smooth installation and long-lasting performance from your new sea water pump.
3. Testing the Performance of Your Cummins 6CT Sea Water Pump System
Testing the performance of your Cummins 6CT sea Water Pump System is essential for ensuring that your vessel is functioning properly. A sea water pressure test and a sea trial performance test can help you determine if your system is working as expected, and make sure that it will be able to handle the conditions it will be exposed to during its operation.