

 Free US Calls: 1-888-433-4735
 International: 305-545-5588
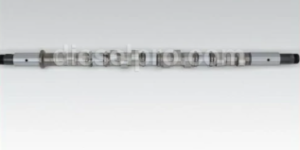
Camshaft Function and Purpose
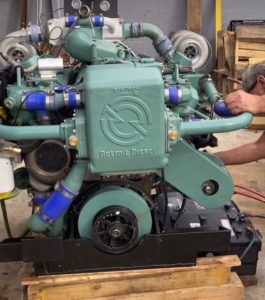
The camshaft in the Detroit Diesel 92 Series engines plays a vital role in ensuring precise timing and operation of key engine components, making it one of the most crucial elements in the engine’s valve train. It is responsible for actuating the valve and injector rocker arms, controlling both the fuel injection timing and exhaust valve operation. The precise coordination of these actions is essential for efficient combustion, power generation, and exhaust expulsion.
A properly functioning cams+haft helps maintain engine efficiency, fuel economy, and emissions compliance, while a worn or improperly timed camshaft can lead to loss of power, incomplete combustion, excessive smoke, and even potential engine damage. Because of its direct impact on engine timing and performance, the camshaft must be regularly inspected and maintained to ensure it operates within the manufacturer’s specified tolerances.
The camshaft in the Detroit Diesel 92 Series is gear-driven, meaning it is mechanically linked to the crankshaft via a gear train located at the rear of the engine. It rotates at exactly half the speed of the crankshaft, following the fundamental principles of a two-stroke diesel engine, where every piston cycle involves both power and exhaust strokes within a single crankshaft revolution. This gearing arrangement ensures that the camshaft synchronizes the valve and injector timing with the movement of the pistons, maximizing engine efficiency and power output.
Camshaft & Related Components for 6V92 Detroit Diesel Non – Turbo Engines
Camshaft & Related Components for 6V92 Detroit Diesel Turbo Engines
Camshaft & Related Components for 8V92 Detroit Diesel Non – Turbo Engines
Camshaft & Related Components for 8V92 Detroit Diesel Turbo Engines
Camshaft & Related Components for 12V92 Detroit Diesel Non- Turbo Engines
Camshaft & Related Components for 12V92 Detroit Diesel Turbo Engines
Camshaft & Related Components for 16V92 Detroit Diesel Non – Turbo Engines
Camshaft & Related Components for 16V92 Detroit Diesel Turbo Engines
What the Camshaft Drives
The camshaft not only regulates valve and injector timing but also drives various critical components within the Detroit Diesel 92 Series engines, depending on the specific configuration.
-
Exhaust Valves: The camshaft controls the precise timing of exhaust gas expulsion, ensuring that spent combustion gases exit the cylinder at the correct moment. This allows fresh air to enter for the next power cycle, improving scavenging efficiency.
-
Injectors: The camshaft operates the mechanical unit injectors, ensuring the proper delivery of fuel into the combustion chamber at the correct timing and pressure. This timing is crucial for optimal power generation, reduced fuel consumption, and lower emissions.
-
Water Pump (Some Configurations): In specific Detroit Diesel 92 Series applications, the camshaft also powers the water pump through a gear system. This helps circulate coolant throughout the engine, preventing overheating and maintaining optimal operating temperatures. Ensuring proper camshaft function is vital for maintaining engine cooling efficiency, particularly in heavy-duty, marine, and industrial applications.
A well-maintained camshaft is essential for ensuring synchronized engine operation, prolonged engine life, and optimal fuel efficiency in the Detroit Diesel 92 Series. Regular inspections and maintenance can help prevent timing-related issues, reduce wear on other components, and enhance overall engine reliability.
Camshaft Bearings and Lubrication
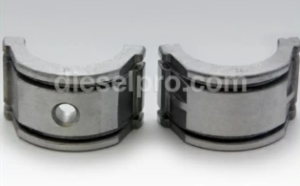
The camshaft bearings in the Detroit Diesel 92 Series engines play a crucial role in supporting the camshaft and ensuring its smooth, efficient rotation within the engine block. These bearings help to minimize friction and wearbetween the rotating camshaft and the stationary engine block, allowing the camshaft to function properly without generating excessive heat or resistance. Any issues with these bearings can lead to poor valve timing, injector misfires, and potential damage to the engine’s valve train components.
The camshaft bearings are pressure-lubricated via a network of oil passages integrated into the engine block, ensuring that a constant flow of oil reaches them during operation. The oil supply originates from the main oil gallery, where it is distributed through strategically positioned passages to keep the bearings lubricated at all times. Proper lubrication is essential in preventing premature wear, excessive heat buildup, and potential engine failure due to friction-related damage.
Key Points for Proper Camshaft Bearing Maintenance:
- The bearings are seated in the camshaft saddles within the engine block and are precision-machined for a tight, secure fit.
- Lubrication is provided from the main oil gallery, ensuring a continuous flow of clean oil to reduce friction and wear.
- Worn or damaged bearings can lead to misalignment of the camshaft, resulting in improper valve timing and injector performance, ultimately reducing engine efficiency.
- Regular oil changes with the manufacturer-recommended viscosity of lubricating oil help to ensure that the oil passages remain clear, preventing oil starvation to the bearings.
- If camshaft bearings show signs of scoring, pitting, or excessive wear, they should be replaced immediately to prevent further engine damage.
- A drop in oil pressure, increased engine noise, or excessive valve train movement may indicate insufficient lubrication or failing camshaft bearings, requiring immediate inspection and maintenance.
By maintaining a clean oil system, using the correct oil type, and routinely inspecting the camshaft bearings, operators can prolong the lifespan of the camshaft and ensure peak engine performance in Detroit Diesel 92 Series engines.
Camshaft Removal and Inspection
Removal Procedure
Proper removal of the camshaft in the Detroit Diesel 92 Series engines requires a careful and methodical approach to avoid damage to surrounding components. Because the camshaft is deeply integrated into the engine’s structure, several other parts must be removed first to access it safely. Follow the steps below to remove the camshaft without causing unnecessary wear or misalignment to critical engine parts.
-
Drain Engine Oil:
- Before starting, completely drain the engine oil to prevent contamination and spills when removing internal components.
- Inspect the drained oil for any metal shavings or debris, which may indicate excessive camshaft or bearing wear.
-
Remove Valve Rocker Covers and Rocker Assemblies:
- Carefully unbolt and remove the rocker covers, exposing the valve train.
- Remove the rocker arm assemblies, which sit directly above the camshaft followers and obstruct access to the camshaft.
- Store the rocker arms and pushrods in an organized manner to ensure correct reinstallation later.
-
Remove Fuel Injectors and Exhaust Valve Assemblies:
- Since the camshaft drives the injectors, all fuel injectors must be carefully removed before proceeding.
- Remove the exhaust valve assemblies, ensuring that all components are stored in a clean, safe location.
-
Detach Camshaft Gear Cover and Retaining Bolts:
- The camshaft gear cover must be removed to expose the camshaft gear assembly.
- Carefully unbolt the camshaft gear retaining bolts while preventing the gear from rotating out of alignment.
-
Withdraw the Camshaft:
- With all obstructing components removed, the camshaft can be carefully slid out of the block.
- Ensure that the camshaft does not come into contact with engine block surfaces, bearings, or lobes, as improper handling can cause scoring and damage.
- If resistance is encountered, check for any missed fasteners or components still attached before forcing removal.
Inspection Criteria
Once the camshaft is removed, a thorough inspection should be performed to determine its condition, wear level, and overall usability. A worn or damaged camshaft can severely affect engine performance and should be replaced if it does not meet the specifications outlined in the service manual.
-
Check Lobes for Wear:
- Inspect each camshaft lobe for pitting, scoring, or uneven wear patterns.
- Camshaft lobes should have a smooth, uniform surface with no flat spots or excessive wear.
- If any lobes appear worn down or excessively rough, the camshaft must be replaced to maintain proper valve and injector operation.
-
Inspect Camshaft Bearings:
- Look for scoring, pitting, or excessive clearance in the camshaft bearings.
- Measure the bearing clearance using precision tools such as a dial bore gauge to ensure they are within factory specifications.
- If any bearings are excessively worn, replace them immediately to prevent further engine damage.
-
Examine Camshaft Gear Teeth:
- Carefully inspect the camshaft gear teeth for signs of chipping, cracking, or excessive wear.
- Worn gear teeth can lead to incorrect timing, which will impact engine performance and potentially cause internal damage.
- If the gear teeth are damaged or excessively worn, replace the camshaft gear before reinstalling the camshaft.
-
Measure Camshaft Runout:
- Using a dial indicator, check for bending or warping in the camshaft.
- Excessive runout (out-of-roundness) can lead to uneven valve timing and injector performance, causing power loss and engine inefficiency.
- If runout exceeds manufacturer specifications, the camshaft should be replaced to maintain proper operation.
By following a detailed inspection process, operators can identify potential issues early, preventing engine damage and costly repairs. Properly servicing and maintaining the camshaft ensures optimal performance, efficiency, and longevity for Detroit Diesel 92 Series engines.
Camshaft Installation Procedure
Installing the camshaft in the Detroit Diesel 92 Series engines requires precision, proper alignment, and careful handling to ensure optimal engine performance. The camshaft is responsible for actuating the valve train and fuel injectors, and improper installation can lead to poor engine timing, excessive wear, and potential engine failure. Following the correct procedure helps ensure smooth operation, longevity, and reliability.
Step 1: Lubricate Bearings and Camshaft Lobes
- Before installing the camshaft, thoroughly clean the camshaft journals and lobes to remove any contaminants or debris.
- Apply assembly lube or clean engine oil to the camshaft bearings, journals, and lobes to reduce friction during initial startup.
- Ensure the camshaft oil passages are clear and free of blockages, allowing proper oil flow for lubrication.
- Lubrication helps prevent dry starts, which can cause premature wear and damage to the camshaft and bearings.
Step 2: Align Camshaft Timing Marks
- The camshaft gear must be properly aligned with the crankshaft and idler gear to maintain the correct valve and injector timing.
- Locate the timing marks on the camshaft gear, idler gear, and crankshaft gear.
- Carefully rotate the crankshaft until it reaches top dead center (TDC) on cylinder #1.
- Align the camshaft gear timing mark with the corresponding marks on the idler and crankshaft gears to ensure proper synchronization.
- Failure to align the camshaft correctly can result in timing issues, loss of power, and inefficient combustion.
Step 3: Carefully Insert the Camshaft
- Handle the camshaft with care to avoid damaging the bearing surfaces, lobes, or gear teeth.
- Slowly slide the camshaft into the engine block, ensuring it moves freely and smoothly through the bearing journals.
- Do not force the camshaft into place, as this may cause bearing misalignment, scoring, or damage to the camshaft lobes.
- Rotate the camshaft slightly while inserting it to help seat it properly in the bearings and gear mesh.
- Double-check that the lubrication is evenly distributed along the camshaft to prevent dry spots that could cause excessive wear during engine startup.
Step 4: Reinstall Retaining Bolts and Gear Cover
- Once the camshaft is seated properly, secure it in place using the camshaft retaining bolts.
- Apply a small amount of thread locker to the bolts to prevent loosening due to vibrations.
- Torque the camshaft retaining bolts to the manufacturer’s specifications using a calibrated torque wrench.
- Install the camshaft gear cover to protect the gear assembly from contaminants, oil leaks, and external debris.
- Ensure the cover seals properly, preventing oil leaks that could affect lubrication and lead to premature camshaft wear.
Step 5: Reassemble Injectors, Rockers, and Valve Covers
- Reinstall the injectors, ensuring they are properly seated and torqued to manufacturer specifications.
- Reassemble the rocker arm assemblies, making sure they are correctly positioned over the valve and injector lobes.
- Adjust the valve lash and injector timing to factory specifications, ensuring smooth operation.
- Apply a thin layer of sealant or gasket material to the valve covers before reinstalling them to prevent oil leaks.
- Secure the valve covers with their fasteners, making sure they are evenly torqued to avoid warping or improper sealing.
Final Checks Before Engine Startup
- Manually rotate the engine a few revolutions to verify that the camshaft, valves, and injectors operate smoothly without interference.
- Check for any binding, unusual resistance, or misalignment in the camshaft assembly.
- Verify that the timing marks remain correctly aligned after rotating the engine.
- Inspect for oil leaks around the camshaft gear cover and valve covers.
- Once everything is properly installed and checked, start the engine and monitor oil pressure, noise levels, and smoothness of operation.
By following this expanded camshaft installation procedure, you ensure that the Detroit Diesel 92 Series engineoperates with optimal efficiency, performance, and reliability. Proper lubrication, alignment, and torquing are essential for prolonging camshaft life and preventing engine damage.
Camshaft Timing and Adjustment
Correct camshaft timing is one of the most crucial aspects of engine performance, as it directly affects the valve operation, injector timing, and overall combustion efficiency. If the camshaft is not properly aligned with the crankshaft and idler gears, it can lead to poor fuel injection timing, loss of power, increased fuel consumption, and potential internal damage. Proper timing ensures that the exhaust valves open and close at the right moment, allowing for complete combustion and optimal airflow through the engine.
Misalignment can result in:
- Delayed or advanced valve operation, leading to inefficient combustion.
- Injector misfires, affecting fuel delivery and performance.
- Excessive engine noise due to improper synchronization of rotating components.
- Increased wear on the camshaft lobes, rocker arms, and timing gears.
To avoid these issues, follow a precise timing procedure when installing or adjusting the camshaft in Detroit Diesel 92 Series engines.
Steps for Proper Timing
-
Rotate the Engine to Top Dead Center (TDC) of Cylinder #1
- Using a crankshaft barring tool or breaker bar, rotate the crankshaft clockwise until cylinder #1 reaches TDC on the compression stroke.
- Confirm that both the intake and exhaust valves on cylinder #1 are fully closed—this ensures you are on the correct stroke.
- Use a dial indicator or timing marks on the flywheel to verify precise TDC positioning.
-
Align the Camshaft Gear Timing Mark with the Corresponding Mark on the Idler Gear
- The camshaft gear has a factory-etched timing mark that must align perfectly with the idler gear timing mark.
- If misaligned, rotate the camshaft slightly until the marks are in perfect alignment.
- Proper alignment ensures the camshaft and crankshaft operate in perfect synchronization, preventing timing errors.
-
Ensure the Crankshaft and Camshaft Timing Marks Are Properly Meshed
- The crankshaft gear, idler gear, and camshaft gear all have corresponding timing marks that must be properly meshed to maintain correct synchronization.
- Rotate the gears slightly if necessary to achieve perfect engagement between all gears.
- Failure to align these marks accurately will result in incorrect valve and injector timing, causing performance issues.
-
Torque Camshaft Gear Bolts to the Manufacturer’s Specifications
- Using a calibrated torque wrench, tighten the camshaft gear retaining bolts to the specified torque values:
- 6V & 8V engines: 407-441 Nm (300-325 lb-ft)
- 12V & 16V engines: Same torque applies
- Apply a thread-locking compound to the bolts before installation to prevent them from loosening due to vibrations.
- Double-check that the gear teeth are fully seated and aligned, ensuring smooth operation.
- Using a calibrated torque wrench, tighten the camshaft gear retaining bolts to the specified torque values:
Additional Timing Considerations
- Rechecking After Rotation: After setting the camshaft timing, manually rotate the crankshaft two full revolutionsand check that the timing marks realign at TDC of cylinder #1.
- Verifying Injector Timing: If the injector timing is off, the engine may experience hard starting, misfires, or reduced power output.
- Checking for Excessive Gear Backlash: Measure the gear backlash between the camshaft, idler, and crankshaft gears—excessive play can lead to timing instability and premature gear wear.
- Ensuring Lubrication: Before finalizing the timing process, apply a light coating of assembly lube or engine oilon the camshaft gear teeth to reduce initial startup wear.
By following these detailed timing steps, you ensure that the Detroit Diesel 92 Series engine operates at peak performance, maximizing fuel efficiency, power output, and component longevity.
Common Camshaft Issues and Troubleshooting
1. Excessive Wear on Lobes
- Cause: Insufficient lubrication or contaminated oil.
- Solution: Check oil supply, replace worn camshaft.
2. Noisy Valve Train
- Cause: Worn cam lobes or followers.
- Solution: Inspect camshaft and valve components, replace as needed.
3. Engine Misfires
- Cause: Incorrect injector timing due to camshaft wear.
- Solution: Check camshaft lobes and adjust injector timing.
4. Metal Shavings in Oil
- Cause: Camshaft bearing wear or failure.
- Solution: Inspect bearings and replace if necessary.
Preventive Maintenance for Camshafts
- Regular Oil Changes: Use manufacturer-recommended oil grades.
- Periodic Valve and Injector Adjustments: Maintain proper engine timing.
- Routine Inspections: Check for wear or damage every 1,000 operating hours.
- Keep Cooling System in Good Condition: Prevents overheating, which can affect camshaft performance.
Camshaft & Related Components for 6V92 Detroit Diesel Non – Turbo Engines
Camshaft & Related Components for 6V92 Detroit Diesel Turbo Engines
Camshaft & Related Components for 8V92 Detroit Diesel Non – Turbo Engines
Camshaft & Related Components for 8V92 Detroit Diesel Turbo Engines
Camshaft & Related Components for 12V92 Detroit Diesel Non- Turbo Engines
Camshaft & Related Components for 12V92 Detroit Diesel Turbo Engines
Camshaft & Related Components for 16V92 Detroit Diesel Non – Turbo Engines
Camshaft & Related Components for 16V92 Detroit Diesel Turbo Engines