

 Free US Calls: 1-888-433-4735
 International: 305-545-5588


Parts For Detroit Diesel 8V92 Non-Turbo - Camshaft Section
 Loading...
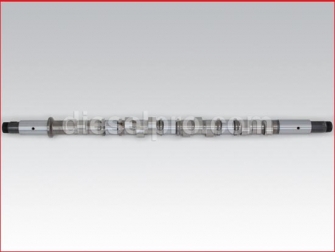


Detroit Diesel 8V92 Turbo — Camshaft & Related Components Catalog
Welcome to the dedicated camshaft section for the Detroit Diesel 8V92 Turbo. This page is engineered for owners, fleet managers, and rebuilders who need a clear, reliable source for camshafts and every supporting component that keeps the 8V92 valvetrain synchronized, lubricated, and running at peak efficiency. While some service parts may also be compatible across other V-series and 92-series engines, everything below is organized and explained with the 8V92 Turbo in mind.
How the 8V92 Turbo Camshaft System Works (At a Glance)
The 8V92 Turbo is a turbocharged, two-stroke V-8 from Detroit Diesel’s legendary 92-series family. Its camshaft system is tasked with:
-
Timing the unit injectors and valve events so air handling, fuel delivery, and scavenging stay in lockstep.
-
Driving valvetrain motion through cam followers, push rods, rocker arms, and bridges.
-
Absorbing and controlling torsional vibration through a dedicated camshaft damper and keyed, locked, and retained drive interfaces.
-
Maintaining stable axial and radial support via bearings, bearing shells, thrust hardware, and precision fasteners.
Because the 8V92 Turbo is a high-output, boosted two-stroke, proper cam timing and rigid mechanical support are critical. Any deviation—from a leaking seal to a worn follower—can cascade into rough running, smoke, injector imbalance, or accelerated wear. This catalog section gives you every part you need to build a tight, leak-free, correctly timed camtrain.
Primary Camshafts for the 8V92 Turbo
Camshaft — Left Bank (Right-Hand Rotation Engine)
For right-hand rotation 8V92 Turbo engines, the left-bank camshaft (driver’s side when viewed from the flywheel, depending on installation) is machined with lobes and indexing specific to bank orientation and rotation. It is typically supplied rebuilt and sold on a core-exchange basis.
When to choose this cam:
-
Your left-bank lobes show pitting, spalling, or measurable loss of lift.
-
A prior oiling issue left visible blueing, scoring, or taper wear.
-
You’re correcting chronic injector timing drift on cylinders located on the left bank.
Installation notes:
-
Always verify engine rotation and bank orientation before ordering.
-
Use fresh cam bearings, new shell set, and correct sealant/gasket stack-up during install.
-
Pre-lube lobes and followers. After installation, set cam/injector/valve lash per OEM sequence.
Core deposit:
Rebuilt camshafts are sold with a refundable core deposit. Returning a serviceable core promptly ensures quick credit and supports sustainable reman cycles.
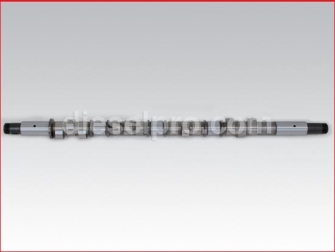
Camshaft — Right Bank (Right-Hand Rotation Engine)
The right-bank camshaft mirrors the left bank in function but is cut for the complementary bank geometry and timing. This unit is also typically supplied rebuilt with a core deposit.
Select this cam if:
-
Right-bank cylinders show injector mis-timing symptoms not present on the left bank.
-
You observe localized lobe wear that correlates with rocker travel limits on that bank.
-
A prior failure (e.g., cam follower collapse) damaged multiple right-bank lobes.
Pro tip: Always examine the cam followers and push rods from the affected bank. Replacing a cam without addressing a flat-spotted follower or bent push rod can shorten the life of your new camshaft.
Bearings, Shells & Retention Hardware
Camshaft Shell Set (Bearing Shells)
Purpose-built shells provide the oil film and running clearance between the cam journal and the block/bearing housings. Replacing the shells whenever the cam is serviced is the cheapest insurance you can buy for correct oil wedge formation and long bearing life.
What to look for:
-
Flaking overlay, copper exposure, or edge-loading patterns.
-
Flattened oil-feed dimples or blocked oil holes.
-
Any scratch or embedded debris that can score a new cam journal.
Best practice: Plastigage or mic dim-checks during assembly, verify housing alignment, and confirm oil feed paths are clean.
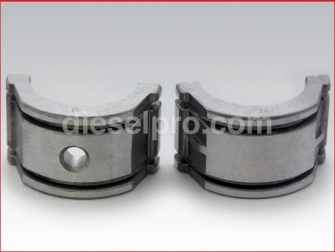
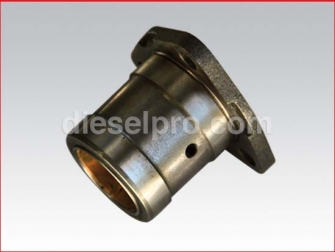
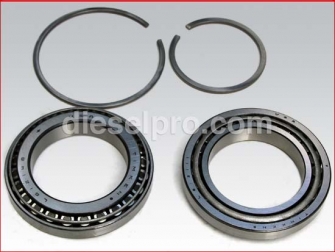
Camshaft Bearing (Front & Rear Options)
The 8V92 uses dedicated bearings to locate and support the camshaft at critical points, controlling runout and thrust. Front and rear bearings are commonly replaced during overhaul; some applications use a combined front-rear service bearing and a specific front bearing variant.
Symptoms of bearing wear:
-
Telltale metallic fuzz in the oil filter, especially after cold starts.
-
Noisy valvetrain, injector timing wander, or cam gear noise.
-
Low oil pressure at idle coupled with valvetrain chatter.
Install tips:
-
Align oil feeds precisely.
-
Use proper drivers and press tools; never score the bearing face.
-
Verify axial endplay after final torque.
Camshaft Bearing Bolt (Intermediate)
Intermediate bearing locations rely on precise clamping load. Always replace stretch-critical fasteners and any bolt that shows thread galling or corrosion.
Assembly guidance:
-
Clean threads and use the correct anaerobic sealant or threadlocker where specified.
-
Torque in sequence to avoid bore distortion.
A fresh bearing washer ensures the clamping stack maintains design thickness and distributes load evenly. Reuse can lead to creep or settlement that alters bearing crush.
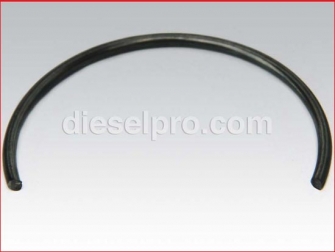
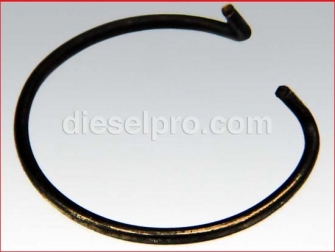
This small but essential component prevents axial migration. Inspect grooves and mating faces and renew the ring whenever the cam or bearing shells are changed.
Seals, Keys, Nuts & Retainers
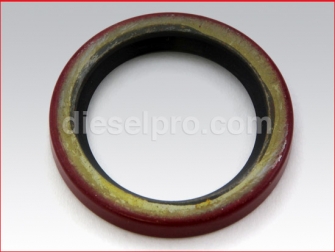
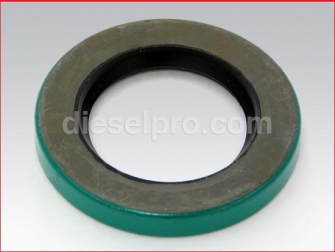
A new seal keeps pressurized oil in and airborne contaminants out. Cam seals on two-stroke Detroits endure constant splash and crankcase pressure pulses—replace them at any sign of weep or during any cam-out procedure.
Signs of failure: Damp front cover, belt/pulley slinging oil, or a developing drip at the front of the engine.
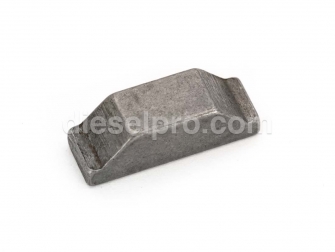
Key for Camshaft (Woodruff Key)
The woodruff key locks the cam drive relationship to gears or hubs. Any fretting or peening on the key or keyway is grounds for replacement.
Pro tip: If you see red dust (fretting corrosion) on the old key, inspect the mating bore/hub thoroughly—micro-movement may have been present.
Nut for Camshaft & Retainer for Camshaft Gear Nut
These two components work together to maintain torque and prevent gear walk or nut back-off. Always install with the correct seating depth and verify the retainer is undamaged and properly indexed.
Why it matters: Even a slight loss of clamp load can shift injection timing and valve events, leading to smoke, heat, and power loss.
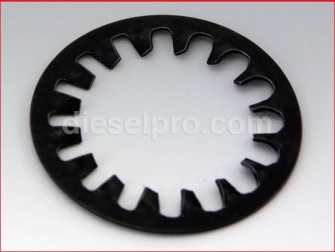
A fresh lockwasher provides one more layer of security for high-vibration diesel service. Do not flatten and reuse—replace at each major service.
Pulleys, Spacers, Hubs & Front Cover Interfaces
Spacer — Front Camshaft Pulley
The front pulley spacer ensures belt alignment for accessories and maintains the cam drive stack-up height. If you see belt edge wear or the pulley sits proud/shallow after service, verify spacer spec and condition.
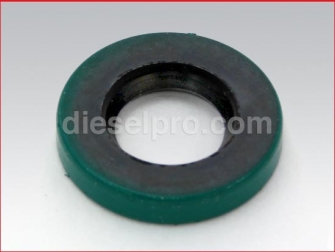
This seal controls oil transfer at the hub interface. Replace if any radial groove is felt on the mating surface or if oil tracks are visible behind the pulley.
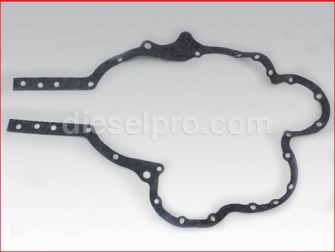
Gasket — Crankshaft Front Cover (8V92 Application)
The front cover gasket sits at the interface that houses the cam seal and drive stack. On the 8V92 Turbo, it’s common to pair a new cam seal with a fresh front cover gasket to prevent chronic weeping.
Install reminder: Clean all mating faces to bare metal, chase bolt holes, and use correct torque and pattern. Avoid over-sealant that can migrate into oil galleries.
Idler Drive, Gear Train & Followers
Idler Gear Bearing & Idler Gear Bolt
The idler gear transfers motion within the timing gear train. Its bearing and mounting bolt are high-load parts that must be pristine.
Replace and inspect if:
-
You detect gear whine, lash you can feel by hand, or uneven tooth patterns.
-
The idler bolt shows stretch, pitting, or blackened heat marks.
Tip: Replace all six idler bolts per engine where applicable—mixed fasteners or uneven stretch can offset gear mesh.
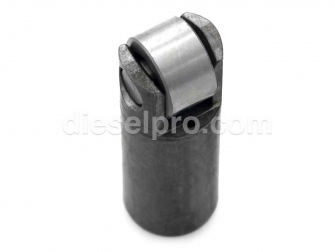
Followers translate cam lobe shape into linear motion. On a two-stroke 8V92, the follower/injector relationship is particularly sensitive.
Failure clues:
-
Audible ticking not cured by lash adjustment.
-
Witness marks, flaking on the roller, or a flat rail.
-
Uneven injector response across cylinders.
Always pair with:
-
Fresh guide (where used), inspected or new push rods, and clean rocker assemblies.
Guide — Cam Follower
Guides maintain lateral stability for the follower. A worn guide will allow skewed loading, which quickly ruins even a brand-new cam lobe.
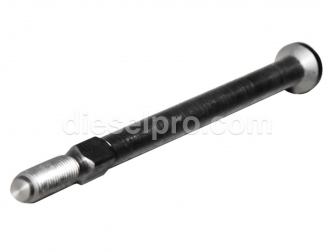
Push Rod for Cam Follower & Push Rod Retainer
Push rods must be dead-straight, with clean ball ends. Any mushrooming, bending, or pitting justifies replacement. The retainer keeps the system sequenced during assembly and operation.
Simple test: Roll the push rod on a flat glass surface. Any wobble indicates a bend.
Rear Structure, Flywheel Housing & Balance Weight Interfaces
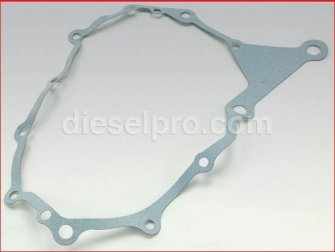
Flywheel Housing Gasket (V-Series Application)
This gasket seals the joint between the end plate and the flywheel housing. A good seal reduces the “mystery mist” that can accumulate around the rear structure on high-hour engines.
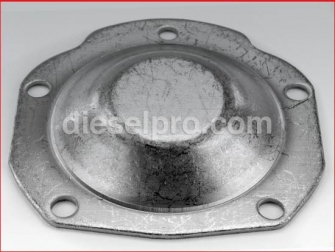
Flywheel Housing Cover (Large Cover)
The rear cover provides service access. Replace its gasket any time the cover is off. Make sure the sealing surface is free from gouges or prior scraper damage.
The balance weight cover gasket seals a high-vibration interface. If the cover is removed for inspection, always re-gasket on reassembly.
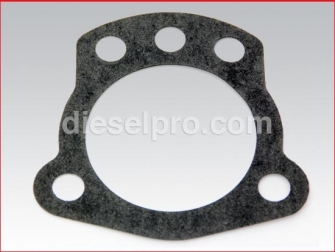
Gasket — Flywheel to Salt Water Pump (Marine Installs)
Marine 8V92 Turbo installations often mount a seawater pump off the flywheel housing. This dedicated gasket keeps the interface tight under vibration, thermal cycling, and salt-environment corrosion.
Marine tip: Freshwater rinse points and anti-corrosion sprays around the housing help extend gasket life between services.
Tachometer & Auxiliary Drive Sealing
A small leak at the tach drive cover can coat belts and alternators over time. Renew the seal with any front cover or accessory service to prevent “mystery oil haze” under the hatch.
This seal prevents seepage at the accessory pulley shaft. Any belt slippage due to oil contamination is a sign to inspect and replace.
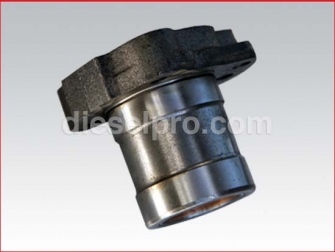
Vibration Control
The camshaft damper is your first defense against torsional spikes that come from injector loads and valve events. On aging engines, the elastomer can harden or delaminate, reducing its ability to control twist.
Replace if:
-
You hear intermittent clatter at certain RPM bands that disappears off-load.
-
A strobe or handheld tach reveals timing jitter.
-
The damper shows cracking or bulging.
Benefit: A healthy damper extends cam gear, follower, and injector life while smoothing idle quality.
Troubleshooting the 8V92 Turbo Valvetrain (Camshaft-Centric)
Hard start with white smoke:
-
Check cam timing integrity (nut, retainer, lockwasher), injector lash, and follower condition.
-
Inspect the cam seal area for oil contamination of belts or sensors that could affect cranking speed.
Mid-range rattle/whine:
-
Use a mechanic’s stethoscope near front cover; gear whine may indicate idler bearing wear or improper gear lash.
-
Verify damper condition and hub key integrity.
Uneven cylinder temps or EGT:
-
Perform a rack/injector timing check; lobe wear or follower flat-spotting can alter fuel delivery.
-
Compare push rod straightness between the cool and hot cylinders.
Oil weep at the front cover:
-
Replace cam seal and front cover gasket together.
-
Confirm spacer height and pulley alignment to reduce side-load on the seal lip.
Chronic gasket compression set:
-
Inspect mating faces for flatness and remove old sealant fully.
-
Replace fasteners if they bottom before clamping, and torque per procedure.
Installation Best Practices (8V92 Turbo)
-
Identify rotation and bank before ordering camshafts. The 8V92 Turbo right-hand rotation configuration uses bank-specific cams; mixing will cause timing errors.
-
Pre-clean oil galleries and blow out with lint-free swabs. Cam bearings and shells demand clean, uninterrupted oil flow.
-
Dry fit, then measure. Check journal sizes, housing bores, and endplay. Confirm cam spins freely after each bearing is installed—not just at the end.
-
Use assembly lube generously on lobes, journals, and follower rollers. Prime the oil system prior to first start.
-
Set lash by the book. Complete injector height and valve lash to spec and re-verify hot. A brief post-install recheck catches early bedding-in.
-
Record torque and sequence. Cam gear nuts, idler bolts, and bearing fasteners must be torqued in pattern. Replace any torque-to-yield hardware.
-
Finish with a clean run-in. On first fire: monitor oil pressure, listen for gear noise, scan for leaks at seals and covers, and re-inspect after the first heat cycle.
Maintenance Tips to Extend Camshaft Life
-
Oil quality & intervals: Two-stroke Detroits are unforgiving of neglected oil. Fresh, correct-spec oil preserves the hydrodynamic film at bearings and followers.
-
Filter discipline: Use quality filters and cut them open at interval—metallic fines or rubber shards (damper) are early warnings.
-
Belt alignment: Misalignment can side-load the cam seal and pulley hub, causing premature leaks.
-
Ventilation & crankcase pressure: A restricted breather elevates crankcase pressure and pushes oil past seals. Keep it clear.
-
Fuel injector health: A dragging or over-pressured injector can hammer the follower and cam lobe. Regularly verify injector condition and calibration.
Parts Catalog — 8V92 Turbo Camshaft Section (What You’ll Find Here)
-
Left-Bank Camshaft (Right-Hand Rotation) — rebuilt, core-exchange
-
Right-Bank Camshaft (Right-Hand Rotation) — rebuilt, core-exchange
-
Camshaft Shell Set (Bearing Shells)
-
Camshaft Bearings — front & rear styles for V-applications
-
Camshaft Bearing Bolt — intermediate support fastener
-
Camshaft Bearing Washer
-
Ring Lock for Cam Bearing
-
Camshaft Seal
-
Camshaft Key (Woodruff Key)
-
Camshaft Nut & Retainer for Gear Nut
-
Lockwasher — Camshaft
-
Front Pulley Spacer (Cam Drive Stack-Up)
-
Seal — Drive Pulley Hub
-
Gasket — Front Cover (front structure sealing)
-
Idler Gear Bearing & Idler Gear Bolt
-
Seal — Tachometer Drive Cover
-
Seal — Pulley Drive Shaft
-
Cam Follower (Assembly)
-
Guide — Cam Follower
-
Push Rod for Cam Follower & Retainer
-
Flywheel Housing Gasket
-
Flywheel Housing Cover (Large)
-
Gasket — Balance Weight Cover
-
Gasket — Flywheel to Salt Water Pump (marine installs)
Note: Specific items may also list broader 71/92-series compatibility, but we curate and categorize here specifically for 8V92 Turbo owners so you can shop with confidence.
Why Buy Your 8V92 Turbo Camshaft & Valvetrain Parts from Diesel Pro Power
Engine-Specific Cataloging:
We structure this section around the 8V92 Turbo so you don’t have to sift through generic V-series lists. Bank orientation, rotation, and marine vs. land-based notes are highlighted to reduce ordering errors.
Quality You Can Trust:
From rebuilt camshafts supplied on straightforward core exchange terms to new bearings, shells, and seals, every component is vetted for fit and durability. Our camtrain parts are sourced to meet or exceed OEM performance—because injector timing and valvetrain geometry leave no margin for second-best.
Expert, Human Support:
Need help confirming rotation, bank orientation, or choosing between bearing options? Our team deals with Detroit Diesel valvetrains every day and can walk you through the selection and install details that matter.
Fast, Reliable Fulfillment:
We stock the items 8V92 owners actually need—seals, gaskets, followers, keys, retainers, and more—so you can complete the job in one shipment instead of waiting on backorders.
Clear Core Policy for Rebuilt Cams:
Rebuilt left-bank and right-bank cams include a refundable core deposit. Ship your core back in serviceable condition and we process your credit promptly—no guesswork.
Proven Track Record:
Diesel Pro Power has served 40,000+ satisfied customers, from commercial fleets and shipyards to independent rebuilders who count on parts that fit and ship when promised.
Ordering & Identification Checklist (Save Time at the Counter)
-
Confirm rotation (right-hand rotation for the cams listed here).
-
Identify bank (left or right) before you select a camshaft.
-
List companion parts you’ll replace at the same time: shell set, seal, nut, retainer, lockwasher, key, bearings, and followers.
-
Note marine accessories (flywheel-mounted seawater pump gasket) if applicable.
-
Decide on preventive replacements (idler bolts, follower guides, hub seals) while the front cover is open.
-
Plan your core return (keep the cam in the shipping cradle; protect journals and lobes).
Common 8V92 Turbo Camshaft Questions (Quick Answers)
Do I have to replace followers when I replace a cam?
You don’t have to, but it’s highly recommended to inspect and renew any follower that shows flat-spotting or roller roughness. A damaged follower can ruin a new cam quickly.
What if my engine shows only minor weeping at the front cover?
A cam seal and front cover gasket refresh usually solves it. Also check pulley alignment and the condition of the hub seal.
Can I reuse my camshaft nut and lock components?
Replace the lockwasher and retainer every time you remove the nut. If the nut faces or threads show wear, replace the nut as well.
How do I know my damper is failing?
Look for cracking or bulging on the elastomer, timing jitter, or a narrow RPM band with noticeable gear noise. Replacing the damper protects the entire cam train.
Are bank-specific cams interchangeable?
No. The left-bank and right-bank cams for right-hand rotation engines are not interchangeable. Order the correct bank.
Installation Sequence (Condensed Field Guide)
-
Disconnect batteries; drain coolant to below front cover level if required.
-
Remove belts, accessories, and front cover hardware; mark pulley positions.
-
Support gear train as specified; remove retainers, nut, and lock hardware.
-
Extract the old cam carefully; capture followers per OEM method to prevent damage.
-
Inspect guides, push rods, and rocker tips; replace any questionable parts.
-
Install new bearings/shells, aligning oil feeds; verify crush and clearance.
-
Fit the cam with assembly lube; verify smooth rotation through two full turns.
-
Reinstall drive stack: key, hub, gear, nut, retainer, lockwasher—torque in sequence.
-
Renew seals and gaskets (front cover, hub, tach drive, pulley shaft).
-
Set injector and valve lash to spec; prime oil system; initial start and leak check.
-
Re-check lash hot, inspect for noise or seepage after the first heat cycle.
Add-On Items Often Purchased Together
-
Complete gasket refresh around the front structure (front cover, hub, tach drive, pulley shaft).
-
Follower set/guide set to complement a new camshaft.
-
Idler gear bearing and fresh idler bolts to quiet the gear train and stabilize lash.
-
Camshaft damper for engines showing vibration blocks or age-hardened elastomer.
-
Flywheel housing gaskets and large rear cover gasket (handy if you’re chasing end leaks).


