The cooling system in Cummins ISB and QSB engines plays a vital role in maintaining optimal engine temperatures for efficient performance. It prevents the engine from overheating, which can lead to catastrophic damage such as warped cylinder heads, blown head gaskets, and even engine failure. This comprehensive guide will cover essential cooling system troubleshooting techniques, focusing on recognizing overheating symptoms, checking for coolant leaks, and conducting thorough radiator and water pump inspections.
Parts Catalog Main Page for Cummins ISB Marine Engine
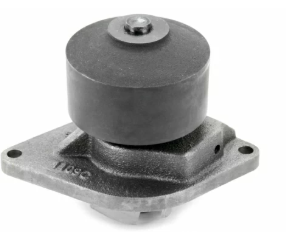
Fresh Water Pump & Related Components for Cummins ISB 4.5 Engine
Fresh Water Pump& Related Components for Cummins ISB 5.9 Engine
Fresh Water Pump & Related Components for Cummins ISB 6.7 Engine
Parts Catalog Main page for Cummins QSB Marine Engine
Fresh Water Pump & Related Components for Cummins QSB 4.5 Engine
Fresh Water Pump & Related Components for Cummins QSB 5.9 Engine
Fresh Water Pump & Related Components for Cummins QSB 6.7 Engine
Fresh Water Pump & Related Components for Cummins QSB 7.0 Engine

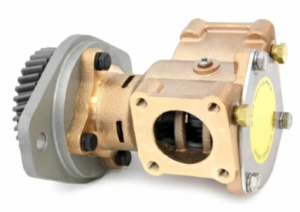
Raw Water Pump & Related Components for Cummins QSB 5.9 Engine
Raw Water Pump & Related Components for Cummins QSB 6.7 Engine
Raw Water Pump & Related Components for Cummins QSB 7.0 Engine
1. Recognizing Overheating Symptoms

Why Overheating Is a Serious Issue
Overheating is one of the most dangerous conditions an engine can experience. When an engine runs hotter than its designed operating range (typically between 180°F and 210°F for Cummins engines), it can cause thermal expansion, leading to metal fatigue, gasket failures, and internal damage. Recognizing the early signs of overheating can prevent costly repairs and minimize downtime.
Common Symptoms of Engine Overheating
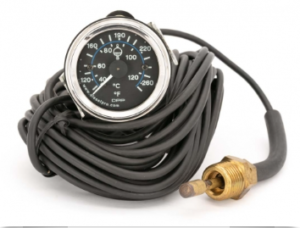
A. High Temperature Gauge Reading
- What to Look For: Most vehicles and equipment have a temperature gauge on the dashboard. A reading consistently above the normal operating range is a clear indicator of overheating.
- Immediate Action: If the gauge enters the red zone, stop the engine immediately to prevent damage.
B. Coolant Boiling or Steam Emission
- Visible Signs: Steam rising from under the hood, especially around the radiator or coolant reservoir, is a clear sign that the coolant is boiling due to excessive heat.
- Potential Risks: Boiling coolant can cause sudden pressure spikes, leading to burst hoses or radiator damage.
C. Loss of Engine Power
- Why It Happens: As the engine overheats, its efficiency drops, causing noticeable power loss, sluggish acceleration, and rough operation.
- Indicator: If the engine struggles under load or stalls unexpectedly, overheating may be the cause.
D. Unusual Noises
- Sounds to Watch For: A knocking or pinging noise can occur due to pre-ignition or detonation caused by high combustion temperatures.
- Warning: Continuous operation under these conditions can lead to piston damage and valve failure.
E. Sweet Smell from Engine Bay
- What It Indicates: A sweet, syrup-like odor often signifies a coolant leak or overheating issue, as coolant contains ethylene glycol, which emits this smell when it evaporates.
F. Warning Lights and Error Codes
- Dashboard Alerts: Modern Cummins engines are equipped with sensors that trigger warning lights for high coolant temperature, low coolant level, or engine derating to prevent damage.
- DTC Codes: Diagnostic Trouble Codes (DTCs) related to coolant temperature sensors can provide specific clues when scanned with a diagnostic tool.
Immediate Actions if Overheating Occurs
- Turn Off the Engine
To prevent further damage, shut off the engine as soon as it’s safe to do so.
- Allow the Engine to Cool
Never attempt to open the radiator cap while the engine is hot, as pressurized steam can cause severe burns.
- Check Coolant Levels
Once the engine has cooled, inspect the coolant reservoir for adequate fluid levels.
- Inspect for Leaks
Look for visible signs of coolant leaks around hoses, the radiator, and the water pump.
- Seek Professional Assistance
If you’re unable to identify the cause, consult a qualified technician to avoid exacerbating the problem.
2. Checking for Coolant Leaks

The Importance of Coolant in Engine Performance
Coolant (a mixture of water and antifreeze) circulates through the engine, absorbing excess heat and transferring it to the radiator, where it dissipates. Coolant leaks can compromise this process, leading to insufficient cooling, overheating, and internal engine damage.
Common Causes of Coolant Leaks
A. Damaged Hoses and Clamps
- Symptoms: Cracks, bulges, or soft spots in hoses, along with loose or corroded clamps, can cause coolant to leak.
- Areas to Check: Radiator hoses, heater hoses, and bypass hoses are common failure points.
B. Radiator Leaks
- Potential Issues: Radiator leaks often occur at the seams, core, or around the cap.
- Visual Signs: Look for green, orange, or pink residue (depending on coolant type) on the radiator or pooling beneath the vehicle.
C. Failing Water Pump
- Cause: The water pump’s seals can wear out, allowing coolant to seep from the weep hole—a small hole designed to indicate pump failure.
- Indicators: Coolant stains or moisture near the pump and high-pitched noises during operation.
D. Blown Head Gasket
- Serious Concern: A blown head gasket can allow coolant to leak internally into the combustion chamber or externally down the engine block.
- Warning Signs: White smoke from the exhaust, milky oil (coolant mixing with oil), or unexplained coolant loss.
E. Heater Core Leaks
- Hidden Danger: Leaks in the heater core can cause coolant to enter the vehicle’s cabin, often detected by a sweet smell or foggy windows.
Symptoms of Coolant Leaks
- Low Coolant Levels
Regularly needing to top off the coolant is a red flag.
- Visible Coolant Puddles
Coolant often leaves colored stains where it leaks.
- Overheating
Loss of coolant reduces the system’s ability to regulate temperature.
- Bubbling in the Radiator or Reservoir
Indicates air entering the system due to a leak.
How to Detect Coolant Leaks
Step 1: Visual Inspection
- Check the Radiator and Hoses
Look for wet spots, discoloration, or crusty residue around joints and clamps.
- Inspect the Engine Bay
Examine the water pump, thermostat housing, and cylinder head for signs of leakage.
Step 2: Cooling System Pressure Test
- Procedure: Use a cooling system pressure tester to pressurize the system and identify leaks under controlled conditions.
- Result: Watch for pressure drops on the gauge, indicating a leak.
Step 3: UV Dye Test
- How It Works: Add UV-reactive dye to the coolant and run the engine. Use a UV light to spot leaks, as the dye glows bright under ultraviolet light.
Step 4: Combustion Leak Test (Head Gasket Check)
- Tool: A combustion leak tester detects exhaust gases in the coolant, indicating a blown head gasket or cracked cylinder head.
Fixing Coolant Leaks
- Replace Damaged Components
Install new hoses, clamps, gaskets, or radiators if they show signs of wear.
- Seal Minor Leaks
Temporary radiator sealants can be used in emergencies but should not replace proper repairs.
- Repair Head Gasket Issues
Blown head gaskets require professional disassembly and repair.
- Flush the Cooling System
After repairs, flush the system to remove any debris or contaminants that may have entered.
3. Radiator and Water Pump Inspection

The Role of the Radiator and Water Pump
The radiator dissipates heat from the coolant, while the water pump circulates coolant throughout the engine and radiator. Both components are essential for maintaining optimal engine temperatures. Failure in either system can result in overheating, reduced performance, and engine damage.
Radiator Inspection and Troubleshooting
Common Radiator Issues
- Clogged Fins or Tubes
Dirt, debris, and corrosion reduce cooling efficiency.
- Leaking Radiator Core
Cracks or corrosion in the core can cause coolant leaks.
- Faulty Radiator Cap
A worn-out cap may fail to maintain proper pressure, leading to boiling coolant.
Symptoms of a Failing Radiator
- Frequent Overheating
Inadequate heat dissipation causes the engine to overheat quickly.
- Coolant Leaks
Puddles under the vehicle or residue around the radiator.
- Low Coolant Levels
Caused by slow leaks from the radiator.
- Visible Corrosion
Rusty or green deposits indicate internal corrosion.
Radiator Troubleshooting Steps
- Visual Inspection: Check for bent fins, corrosion, or debris blocking airflow.
- Coolant Flow Test: Remove the radiator cap (when cool) and start the engine. Look for coolant flow once the thermostat opens.
- Radiator Pressure Test: Apply pressure using a pressure tester to check for leaks.
- Thermal Imaging: A thermal camera can detect cold spots in the radiator, indicating blockages.
Radiator Maintenance Tips
- Flush the Cooling System
Recommended every 30,000 to 50,000 miles or per Cummins guidelines.
- Inspect for Debris
Clean the radiator exterior to ensure unobstructed airflow.
- Replace Worn Caps
Radiator caps are inexpensive but crucial for maintaining proper pressure.
Water Pump Inspection and Troubleshooting
Common Water Pump Issues
- Leaking Seals
Coolant leaking from the weep hole indicates a failing seal.
- Bearing Failure
Causes a grinding or whining noise while the engine runs.
- Impeller Damage
Corroded or broken impellers reduce coolant circulation.
Symptoms of a Failing Water Pump
- Coolant Leaks Near the Pump
Puddles under the front of the engine may indicate seal failure.
- Engine Overheating
Inefficient coolant circulation causes rapid temperature spikes.
- Unusual Noises
Squealing or grinding noises from the front of the engine suggest bearing issues.
- Steam from Radiator
If the pump fails completely, the engine may overheat quickly, causing steam to escape from the cooling system.
Water Pump Troubleshooting Steps
- Inspect for Leaks: Look around the pump housing and weep hole for coolant stains or drips.
- Check for Play in the Pulley: With the engine off, wiggle the water pump pulley. Excessive movement indicates worn bearings.
- Listen for Noises: Run the engine and listen for unusual squealing or grinding sounds.
- Coolant Flow Test: Check if coolant circulates properly when the thermostat opens.
Water Pump Maintenance and Replacement
- Replace Faulty Pumps
If the pump shows signs of wear or leakage, it should be replaced immediately.
- Inspect Drive Belts
Ensure the belt driving the water pump is tight and free from cracks.
- Flush Coolant Regularly
Dirty or contaminated coolant can damage water pump seals and impellers.
Preventive Cooling System Maintenance
To avoid overheating issues and prolong the life of your Cummins ISB or QSB engine, follow these preventive maintenance tips:
- Check Coolant Levels Regularly
Ensure the reservoir is filled to the correct level.
- Inspect Hoses and Belts
Look for signs of wear, cracks, or leaks.
- Flush the Cooling System
Replace coolant as per Cummins’ recommendations to prevent corrosion and scale buildup.
- Test the Thermostat
Ensure it opens and closes correctly to regulate coolant flow.
- Clean the Radiator Fins
Remove debris that could block airflow.
- Use the Correct Coolant
Follow Cummins specifications for coolant type and mixture ratios.
Conclusion
Maintaining the cooling system in Cummins ISB and QSB engines is crucial for preventing overheating, ensuring engine efficiency, and extending the lifespan of critical components. By recognizing early symptoms of overheating, effectively checking for coolant leaks, and conducting regular radiator and water pump inspections, operators can prevent costly repairs and minimize downtime. Always refer to Cummins’ service manuals and guidelines for specific procedures and maintenance schedules to keep your engine performing at its best.
Parts Catalog Main Page for Cummins ISB Marine Engine
Fresh Water Pump & Related Components for Cummins ISB 4.5 Engine
Fresh Water Pump& Related Components for Cummins ISB 5.9 Engine
Fresh Water Pump & Related Components for Cummins ISB 6.7 Engine
Parts Catalog Main page for Cummins QSB Marine Engine
Fresh Water Pump & Related Components for Cummins QSB 4.5 Engine
Fresh Water Pump & Related Components for Cummins QSB 5.9 Engine
Fresh Water Pump & Related Components for Cummins QSB 6.7 Engine
Fresh Water Pump & Related Components for Cummins QSB 7.0 Engine

Raw Water Pump & Related Components for Cummins QSB 5.9 Engine
Raw Water Pump & Related Components for Cummins QSB 6.7 Engine
Raw Water Pump & Related Components for Cummins QSB 7.0 Engine


 Free US Calls: 1-888-433-4735
 International: 305-545-5588