Introduction
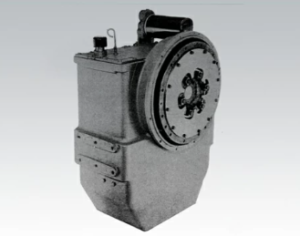
The Twin Disc MG516 and MG5161 marine transmissions are high-torque, hydraulically actuated gearboxes used in some of the most demanding marine environments in the world—from tugboats and offshore support vessels to commercial fishing fleets. To maintain their performance, one of the most critical routine tasks is draining and refilling the transmission oil at scheduled intervals.
Transmission oil in the MG516 serves a dual purpose: it both lubricates the mechanical gears and clutches and powers the hydraulic control system for gear engagement. Allowing the oil to degrade or become contaminated risks poor shifting performance, internal wear, overheating, and ultimately, failure of the marine gear.
This comprehensive guide walks you through the complete draining and refilling procedures, including prep, safety steps, proper disposal, refill best practices, and troubleshooting tips.
Disclaimer: Always consult the OEM Twin Disc service manual for exact torque values, oil capacity, filter compatibility, and service limits. This guide is designed for general maintenance knowledge and may not replace vessel-specific requirements.
Parts Catalog for Twin Disc MG516 Marine Transmissions
Rebuilt Twin Disc MG516 Marine Transmissions
Plate Kit For Twin Disc MG516 Marine Transmission
Gasket Kits For Twin Disc MG516 Marine Transmission
Draining Procedures for Twin Disc MG516 Marine Gear
Draining used transmission oil is the first step in any fluid service. Done improperly, this can result in environmental spills, personal injury, or damage to the drain plug threads. Here’s how to do it right.
Tools and Supplies You’ll Need
- Oil catch pan with 20+ quart capacity
- PPE: gloves, goggles, oil-resistant clothing
- Box wrench or socket set (check your plug size)
- Magnetic plug removal tool (if needed)
- New sealing washer or gasket
- Rags and degreaser
- Disposal-grade funnel and waste drum
- Flashlight or inspection mirror
Oil Capacity Note: The MG516 holds approximately 18 to 22 quarts (17 to 21 liters) depending on gear ratio and housing configuration. Always verify the exact volume for your serial number.
Step-by-Step Draining Instructions
1. Warm Up the Transmission
- Run the engine with transmission in neutral for 10–15 minutes to bring oil to operating temperature (160°F–200°F).
- This reduces viscosity and allows the oil to flow more freely, carrying more contaminants out of the system.
Safety Reminder: Never open or drain the system when it’s pressurized or if the engine is still running.
2. Locate the Drain Plug
- Typically positioned on the bottom or low point of the transmission housing.
- It may be recessed behind protective shielding or beneath mounting brackets, depending on vessel layout.
- Use a mirror and flashlight if space is tight.
If your MG516 is mounted low in the bilge, you may need a suction pump or remote drain line adapter.
3. Position the Catch Pan
- Center a wide oil catch pan below the plug.
- Elevate or secure it to match the drain height if needed.
- Be prepared for hot oil, so don’t place your hand directly under the plug.
4. Loosen and Remove the Drain Plug
- Use a properly sized wrench or socket. Avoid adjustable wrenches to prevent stripping.
- Loosen slowly to let pressure equalize.
- Remove by hand and step back to avoid splashback.
Inspect the drain plug threads—damaged threads should be corrected with a thread chaser before reinstalling.
5. Inspect the Magnetic Drain Plug
- Most MG516 units have a magnetized plug to collect ferrous debris.
- A light coating of gray “mud” is normal.
- Large metal chunks, bronze flakes, or shiny shavings may indicate clutch wear or gear damage.
If excessive debris is present, consider oil analysis and pressure testing after refill.
6. Allow the System to Fully Drain
- Let the oil flow for at least 15 minutes to ensure full evacuation.
- Rock the transmission slightly if mounted on soft mounts to release trapped oil.
7. Clean the Drain Port and Surrounding Area
- Wipe with a lint-free rag.
- Use degreaser to remove oil residue to prevent drips or tracking into the bilge.
8. Install a New Sealing Washer or Gasket
- Reuse of crush washers is not recommended.
- Always install a new copper or aluminum washer of the correct ID/OD.
- If a gasket is used, inspect for compatibility with marine oil.
9. Reinstall the Drain Plug
- Tighten to OEM torque spec (usually around 30–50 ft-lbs, verify with manual).
- Use a torque wrench for precision.
- Do not overtighten—this can crack the housing or warp the mating surface.
10. Dispose of Used Oil Properly
- Transfer oil to a sealed waste drum or take to a certified marine recycling center.
- Never dump in the bilge, ocean, or drains.

Refilling Procedures for Twin Disc MG516 Marine Gear
Once your oil has been drained and the plug reinstalled, it’s time to refill with fresh transmission oil. This process is just as critical as draining—overfilling, underfilling, or using the wrong oil type can all cause major problems.
Recommended Oil Type
Twin Disc recommends the following based on ambient temperatures and application:
| Oil Type | Conditions |
| SAE 30 ND | Standard temperate climates |
| SAE 40 ND | High-load or high-heat use |
| SAE 10W30 or 15W40 | Cold-weather or northern operations |
ND = Non-detergent. Do not use detergent motor oils or ATFs unless authorized by Twin Disc. Use oils with anti-wear additives like zinc and phosphorus.
Step-by-Step Refilling Instructions
1. Verify You’re Using the Correct Oil
- Double-check label for viscosity, type, and additive package.
- Do not mix old and new oils unless using the exact same type.
2. Locate the Fill Port or Dipstick Tube
- Typically on top or side of the transmission housing.
- Some models use a dipstick/fill combo tube, others have a threaded fill plug.
3. Insert Funnel or Transfer Pump
- Use a long-neck funnel with splash guard.
- Or attach an oil transfer pump with a clean hose directly into the fill port.
- Avoid spills—transmission oil is sticky and difficult to clean off painted surfaces.
4. Add Oil Slowly in Stages
- Add oil in 2-quart increments, pausing between each fill.
- Allow time for oil to settle internally—gearboxes have internal baffles and clutch packs that trap fluid temporarily.
5. Check the Oil Level
- Use the dipstick (threaded or press-fit style).
- Read only when fully inserted and with transmission level (not tilted).
- The level should be at the “Full” or “Max” mark, but never above it.
6. Run the Engine for Circulation
- Start the engine and allow the transmission to run in neutral for 5–10 minutes.
- This circulates oil through the cooler and fills clutch passages.
7. Shift Through Forward and Reverse
- With the vessel secure, slowly engage forward and reverse gears to cycle oil through the entire clutch system.
- Return to neutral.
8. Shut Down and Recheck the Level
- Wait 3–5 minutes for oil to settle.
- Check the level again on the dipstick and top off if needed.
9. Inspect for Leaks
- Inspect the drain plug, filter base, hoses, and cooler lines.
- Run fingers along fittings and look for drips or sheen.
- Use a paper towel underneath suspected areas if needed.
10. Log the Service
- Record date, hours, oil type and quantity, and technician initials in the maintenance log.
- Note any unusual findings (shavings, foam, leaks, etc.).
Troubleshooting Refill Problems

Even experienced mechanics run into snags during oil service. Here are common issues and how to fix them:
⚠️ Overfilled Oil
Symptoms:
- Foaming
- Leaks from breather or seals
- Clutch engagement delays
Fix:
- Drain excess until level returns to Full mark
- If foaming occurred, allow system to rest and recheck level
⚠️ Underfilled Oil
Symptoms:
- Poor gear engagement
- Overheating
- Unusual whining noise
Fix:
- Top off immediately
- Check for internal air locks or clogged cooler
⚠️ Milky or Cloudy Oil
Symptoms:
- Water contamination (bilge ingress, cooler failure)
Fix:
- Drain completely, flush with fresh oil, inspect cooler for leaks
⚠️ Foamy Oil
Symptoms:
- Aeration due to incorrect fill process or air intake
Fix:
- Check for suction-side leaks in oil cooler lines
- Allow oil to degas, refill carefully
Safety Tips and Best Practices
✅ Use PPE—hot oil can cause second-degree burns
✅ Label all oil containers clearly to prevent cross-contamination
✅ Never leave fill port open during engine operation
✅ Always clean dipstick before checking
✅ Only use marine-grade funnel and hose materials (avoid rubber hoses that degrade in oil)
Maintenance Enhancements
Want to go beyond basic drain/refill? Consider these upgrades:
- Magnetic Filter Element: Adds extra protection against fine wear particles
- Sight Glass Installation: Easily inspect oil condition at a glance
- Oil Sampling Port: For sending samples to oil analysis labs
- Remote Drain Kit: Makes future services faster and cleaner in tight engine rooms
Environmental Responsibility
Marine oil service comes with environmental risks. Follow these guidelines to protect waterways and comply with regulations:
- Use oil absorbent mats and drip trays
- Clean all spills with marine-safe degreasers
- Dispose of oil, filters, and rags at certified waste centers
- Document disposal with receipts or manifests (important for fleet compliance)
Summary: Drain and Refill for Long-Term Reliability
The Twin Disc MG516 Marine Gear is designed to perform under the most demanding commercial conditions—but only if it receives proper care. Following precise draining and refilling protocols protects your transmission against:
- Gear damage
- Clutch slippage
- Overheating
- Hydraulic failure
By mastering this maintenance procedure, you ensure:
- Smooth hydraulic shifting
- Consistent pressure
- Extended component life
- Safer and more reliable vessel operation
For high-quality aftermarket parts for Twin Disc MG516, visit Diesel Pro Power’s Twin Disc Parts section.

Rebuilt Twin Disc MG516 Marine Transmissions
Plate Kit For Twin Disc MG516 Marine Transmission
Gasket Kits For Twin Disc MG516 Marine Transmission
Videos About Twin Disc Transmissions
6 Reasons Your Twin Disc Transmission Has Low Oil Pressure
7 Reasons Your Twin Disc Transmission Is Overheating
3 Reasons Your Clutch Plates in Your Twin Disc Transmission Are Making Excessive Noise
Bull Gear On A Twin Disc Transmission
Rebuilt Twin Disc Transmissions


 Free US Calls: 1-888-433-4735
 International: 305-545-5588