

 Free US Calls: 1-888-433-4735
 International: 305-545-5588
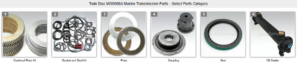
Parts Catalog for Twin Disc MG5090A Marine Transmissions
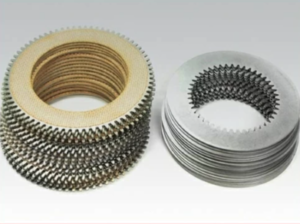
Overhaul Plate Kit For Twin Disc MG5090A Marine Transmission
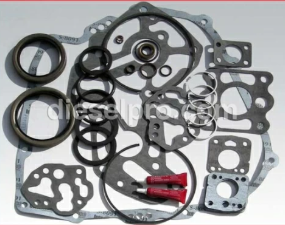
Gasket Kits For Twin Disc MG5090A Marine Transmission
Introduction: Why Oil Filter Replacement Matters for the Twin Disc MG-5090A Marine Gear
One of the most critical yet often overlooked maintenance tasks for the Twin Disc MG-5090A marine transmission is oil filter replacement. The oil filter plays a central role in protecting the internal components of the marine gear—including clutch packs, gears, and bearings—by removing contaminants from the circulating hydraulic oil. Clean oil ensures proper clutch engagement, efficient gear lubrication, and extended equipment life.
This guide provides a comprehensive breakdown of the MG-5090A’s filter replacement procedure, including tools, troubleshooting, inspection tips, and sourcing options. Whether you’re maintaining a commercial workboat or a private yacht, understanding the importance and process of filter changes will help prevent failures and maintain top-tier performance.
The Function of the Oil Filter in the MG-5090A Marine Transmission

In hydraulic marine gears like the MG-5090A, the oil doesn’t just lubricate—it also provides the hydraulic pressure necessary for shifting. Contaminated oil can damage delicate internal components such as:
- Friction plates in the clutch pack
- Hydraulic control valves and pistons
- Planetary gears and roller bearings
The oil filter is your first line of defense against:
- Metal particles from gear or bearing wear
- Clutch material residue
- Seal and gasket fragments
- Water emulsions and oxidized oil deposits
Without effective filtration, these contaminants would circulate continuously through the system, accelerating wear and reducing service life.
Recommended Filter Replacement Interval for Twin Disc MG-5090A Marine Gear
Twin Disc recommends replacing the oil filter every:
- 1,000 hours of operation
- OR once every 12 months, whichever comes first
Adjustments for Harsh Conditions:
If your vessel operates in high-temperature conditions, heavy loads, or in debris-prone environments (such as dredging or near shore operations), consider shortening this interval to 750 hours or every 6 months.
Neglecting timely filter replacement can lead to:
- Reduced clutch engagement pressure
- Overheated or aerated oil
- Early wear of the oil pump
- Transmission slippage or hard shifting
Filter Type and Location in the MG-5090A Marine Gear
Filter Type:
The MG-5090A typically uses a spin-on, canister-style oil filter designed for marine-grade hydraulic applications. This filter is designed to:
- Capture particles down to 10–25 microns
- Withstand high-pressure marine hydraulic systems
- Handle elevated flow rates without bypass
Location:
The filter is usually mounted near the top or side of the transmission housing, typically:
- On or adjacent to the oil pump output line
- Near the oil fill cap or sight glass
- Accessible from the engine room access hatch
Note: Always verify the location using your specific model’s Twin Disc MG-5090A service manual or diagram.
Tools and Supplies Required for Filter Replacement on the MG-5090A
Before you begin, gather the following:
Tools:
- Oil filter wrench (claw-type, strap-type, or cup-style)
- Clean rags or shop towels
- Socket set or adjustable wrench (for surrounding components)
- Torque wrench (if specified by manual)
- Funnel (for top-up after filter change)
Supplies:
- Replacement oil filter (OEM or aftermarket)
- Clean transmission oil (for topping up)
- Parts cleaner or degreaser
- New drain plug washer (if performing a full oil change)
- Thread sealant (only if specified for any oil system fittings)
Filter Source Recommendation:
Diesel Pro Power offers premium aftermarket oil filter elements for the Twin Disc MG-5090A that meet or exceed OEM specifications.
Step-by-Step Oil Filter Replacement Procedure for Twin Disc MG-5090A Marine Gear
Step 1: Warm the Oil and Shut Down the Engine
Run the engine briefly—5 to 10 minutes—to bring the transmission oil to operating temperature. This reduces oil viscosity, allowing for more complete drainage of the filter housing.
Then:
- Shift into neutral
- Shut off the engine
- Allow oil to settle for 3–5 minutes
Safety Tip: Secure the vessel and disable engine restart systems (lockout/tagout) if available.
Step 2: Locate the Filter and Prepare the Area
Find the spin-on oil filter, typically mounted vertically or horizontally on the transmission housing. If necessary, clear any surrounding hoses or brackets for better access.
Preparation Tips:
- Place rags or an oil-absorbing mat under the filter to catch any spill.
- Ensure your oil drain container is nearby if you’re replacing the oil at the same time.
Step 3: Remove the Old Filter
Using your oil filter wrench:
- Turn the filter counterclockwise
- Loosen until oil begins to drip
- Allow oil to drain from the filter housing into the rag or pan
- Remove the filter completely and set aside
Important:
Check the filter base—make sure the old rubber gasket is not stuck to the housing. Double-gasketing is a common cause of oil leaks and pressure loss.
Step 4: Inspect and Clean the Filter Mounting Surface
Once the old filter is off:
- Clean the sealing surface on the transmission housing with a lint-free rag
- Remove any oil residue, sludge, or gasket fragments
- Visually inspect the threaded stud for damage or corrosion
Optional: Use parts cleaner to degrease the area if there was significant buildup.
Step 5: Prepare the New Oil Filter
Unpack the new filter and inspect it:
- Check for shipping damage or seal defects
- Apply a thin layer of clean transmission oil to the rubber gasket on the filter’s base—this ensures proper sealing and easier removal during the next change
Tip: Fill the filter with a small amount of oil (if mounted upright) to reduce the time it takes to pressurize after restart.
Step 6: Install the New Filter
- Thread the filter onto the housing by hand
- Tighten until the gasket contacts the base, then give it an additional ¾ turn by hand
Do not use a wrench to over-tighten. Excessive torque can warp the gasket, damage the sealing surface, or crack the filter base.
Step 7: Restart the Engine and Inspect for Leaks
- Start the engine and let it idle in neutral
- Monitor the oil filter and surrounding area for leaks
Watch for:
- Seepage or dripping from filter base
- Sudden pressure loss on any connected gauges
- Warning lights or alarms (if integrated with monitoring system)
Let the engine run for 5–10 minutes, then shut it down and re-check the filter by touch (ensure it hasn’t loosened or shifted).
Step 8: Check and Adjust Oil Level
After filter replacement, the oil level may drop slightly:
- Check the dipstick with the engine running in neutral
- Top off with approved transmission oil if needed
- Do not exceed the “Full” mark—overfilling causes foaming and pressure instability
Tip: Run the engine in both forward and reverse for 5 seconds to circulate oil before the final check.
Troubleshooting Filter Installation Issues
Oil Leak Around New Filter:
Cause: Double gasket, over-tightening, or damaged filter
Fix: Remove the filter, clean the surface, inspect both old and new gaskets, reinstall with proper torque.
Oil Pressure Drop After Filter Change:
Cause: Air pocket, faulty filter, incorrect oil level
Fix: Verify oil level, cycle transmission, bleed air if needed. Use OEM-grade filter to ensure compatibility.
Filter Won’t Come Off:
Cause: Overtightened or corroded threads
Fix: Use a stronger strap wrench or claw-type remover. If damaged, inspect the housing threads carefully before reinstalling a new filter.
Advanced Filter Inspection and Oil Analysis
If performing a major service or diagnosing internal wear, consider cutting open the old filter for a visual inspection.
What to Look For:
- Metallic shavings or flakes: Indicates gear or bearing damage
- Black debris: Clutch friction material
- Sticky sludge: Degraded oil or excessive heat
Optional: Send an oil sample to a lab for a full spectroscopic analysis, which can detect:
- Wear metals
- Oxidation
- Coolant or water contamination
- Viscosity changes
Sourcing Filters and Gaskets from Diesel Pro Power
At Diesel Pro Power, we stock aftermarket oil filters and seal kits that meet or exceed Twin Disc MG-5090A standards. These filters are:
- Pressure-tested for marine hydraulic systems
- Built to OEM thread pitch and sealing tolerances
- Available with fast shipping and global delivery
Filter Compatibility:
- Confirm your model and serial number if unsure
- Our support team can cross-reference filters by application, dimensions, or OEM part numbers
Professional Tips for Long-Term Filter Maintenance Success
- Label the Filter: Use a permanent marker to write the installation date and hours on the filter body.
- Keep a Spare: Always have a backup filter onboard for emergency replacements.
- Track Maintenance: Use a digital or physical logbook to document each filter change.
- Inspect During Each Oil Change: Even if oil isn’t due, inspect the filter base for leaks or corrosion.
- Bundle With Oil Service: Replace the filter every time you change oil—it’s the most efficient approach.
Summary: Clean Filtration = Clean Operation for the MG-5090A
Replacing the oil filter on your Twin Disc MG-5090A marine transmission is simple, fast, and absolutely vital to long-term performance. A clogged or neglected filter can reduce pressure, increase wear, and shorten the lifespan of critical components. By following the proper procedure and using compatible, high-quality filters—like those available from Diesel Pro Power—you ensure your gear stays healthy and responsive through every voyage.
Quick Reference Checklist for Filter Replacement:
Step |
Action Summary |
| Warm Up Engine | Run briefly to heat oil for easier drain |
| Shut Down Engine | Idle in neutral, allow oil to settle |
| Locate Filter | Top or side of housing, check access |
| Remove Old Filter | Use wrench, drain residual oil carefully |
| Clean Sealing Surface | Wipe thoroughly, inspect gasket surface |
| Prepare New Filter | Oil the gasket, prefill if upright installation |
| Install Filter | Hand-tighten until contact, then ¾ turn more |
| Start and Inspect | Run engine, check for leaks |
| Check Oil Level | Adjust oil with engine idling in neutral |
| Document Service | Record date, engine hours, filter part number |
Overhaul Plate Kit For Twin Disc MG5090A Marine Transmission
Gasket Kits For Twin Disc MG5090A Marine Transmission
Videos About Twin Disc Transmissions
6 Reasons Your Twin Disc Transmission Has Low Oil Pressure
7 Reasons Your Twin Disc Transmission Is Overheating
3 Reasons Your Clutch Plates in Your Twin Disc Transmission Are Making Excessive Noise
Bull Gear On A Twin Disc Transmission
Rebuilt Twin Disc Transmissions