

 Free US Calls: 1-888-433-4735
 International: 305-545-5588

Proper maintenance of critical engine components is essential for ensuring the longevity, efficiency, and performance of Cummins ISB and QSB engines. Regular inspection, timely troubleshooting, and preventative maintenance can prevent minor issues from escalating into costly repairs. This comprehensive guide focuses on three major systems—the Fuel System, Cooling System, and Lubrication System—detailing common problems, troubleshooting steps, and essential maintenance practices.
Parts Catalog Main Page for Cummins ISB Marine Engine
Cummins ISB 4.5 & Related Components
Cummins ISB 5.9 & Related components
Cummins ISB 6.7 & Related Components
Parts Catalog Main page for Cummins QSB Marine Engine
Cummins QSB 4.5 & Related Components
Cummins QSB 5.9 & Related Components
Cummins QSB 6.7 & Related Components
Cummins QSB 7.0 & Related Components
Fuel System Troubleshooting

The fuel system in Cummins ISB and QSB engines is a complex network designed to deliver the right amount of fuel at the correct pressure and timing for optimal combustion. Issues within the fuel system can lead to poor engine performance, starting difficulties, reduced fuel efficiency, and increased emissions.
1. Diagnosing Fuel Pressure Issues
Proper fuel pressure is critical for maintaining engine performance. Low or inconsistent fuel pressure can result in hard starting, stalling, rough idling, and loss of power.
Common Causes of Fuel Pressure Issues:
- Faulty Fuel Pump: A failing lift pump or high-pressure fuel pump can’t deliver the necessary fuel pressure.
- Clogged Fuel Filter: Restricts fuel flow, causing pressure drops.
- Air in the Fuel System: Air pockets disrupt the continuous flow of fuel, leading to pressure inconsistencies.
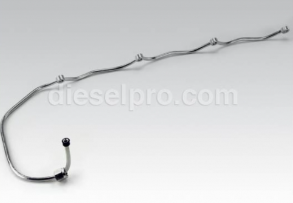
- Fuel Line Leaks: Leaks can cause a drop in pressure and allow air to enter the system.
Troubleshooting Steps:
- Check for DTCs (Diagnostic Trouble Codes): Use a diagnostic tool to identify any related fault codes.
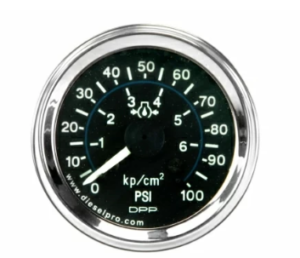
- Test Fuel Pressure: Connect a fuel pressure gauge to the fuel rail and compare readings with Cummins specifications.
- Inspect Fuel Lines: Look for visible signs of damage, leaks, or loose connections.
- Prime the Fuel System: If air is suspected in the system, use the manual priming pump to remove it.
2. Identifying Clogged Fuel Filters
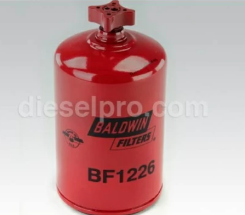
Fuel filters play a vital role in preventing contaminants from entering the fuel injectors and combustion chamber. Over time, these filters can become clogged, restricting fuel flow and causing engine issues.
Symptoms of a Clogged Fuel Filter:
- Hard starting or no-start condition.
- Reduced engine power, especially under load.
- Poor acceleration.
- Engine stalling during operation.
Inspection and Replacement:
- Visual Inspection: Some filters have a clear housing, allowing for easy visual checks. Look for dark discoloration or sediment buildup.
- Pressure Drop Test: Measure the pressure before and after the filter. A significant pressure drop indicates clogging.
- Replacement: Follow Cummins’ recommended intervals for fuel filter replacement—usually every 15,000 to 30,000 miles or as specified for industrial applications.
3. Injector Problems and Solutions
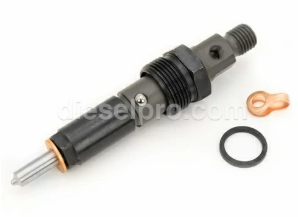
Fuel injectors are responsible for delivering atomized fuel into the combustion chamber. When injectors fail, it affects fuel economy, emissions, and overall engine performance.
Injector & Related Components for Cummins ISB 4.5 Engine
Injector & Fuel Pump Related Components for Cummins ISB 5.9 Engine
Injector & Related Components for Cummins ISB 6.7 Engine
Injector & Fuel Pump Related Components for Cummins QSB 4.5 Engine
Injector & Fuel Pump Related Components for Cummins QSB 5.9 Engine
Injector & Fuel Pump Related Components for Cummins QSB 6.7 Engine
Injector & Fuel Pump Related Components for Cummins QSB 7.0 Engine
Common Injector Issues:
- Clogged Injectors: Deposits from poor-quality fuel can block the injector nozzles.
- Leaking Injectors: Result in unburned fuel, causing excessive smoke and reduced efficiency.
- Faulty Injector Solenoids: Electrical failures can disrupt fuel delivery timing.
Symptoms of Injector Problems:
- Misfiring or rough idling.
- Poor fuel economy.
- Excessive black or white smoke from the exhaust.
- Knocking sounds from the engine.
Troubleshooting and Maintenance:
- Diagnostic Scans: ECMs often log codes related to injector performance.
- Injector Balance Test: Measures the contribution of each cylinder to engine power, identifying weak injectors.
- Cleaning: Use fuel system cleaners or ultrasonic cleaning for minor blockages.
- Replacement: Faulty injectors must be replaced to prevent further engine damage.
Cooling System Troubleshooting
The cooling system in Cummins ISB and QSB engines prevents overheating by regulating the engine’s operating temperature. A malfunctioning cooling system can lead to engine overheating, reduced efficiency, and even catastrophic engine failure.
1. Recognizing Overheating Symptoms
Early detection of overheating is critical to prevent serious engine damage, such as warped cylinder heads, blown head gaskets, and cracked engine blocks.
Common Signs of Overheating:
- High-temperature gauge readings.
- Coolant boiling over or steam from the radiator cap.
- Loss of engine power or automatic shutdown in severe cases.
- Unusual smells, such as sweet coolant odor or burning oil.
Common Causes of Overheating:
- Low Coolant Levels: Due to leaks or evaporation.
- Blocked Radiator: Restricts coolant flow and heat dissipation.
- Faulty Thermostat: Stuck closed, preventing coolant circulation.
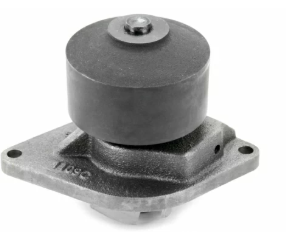
- Water Pump Failure: Inadequate coolant flow due to pump wear or damage.
2. Checking for Coolant Leaks
Coolant leaks can occur in various parts of the cooling system, including hoses, the radiator, water pump, or engine block.
Signs of Coolant Leaks:
- Puddles of coolant under the engine.
- Low coolant levels in the reservoir.
- Visible stains or wet spots on hoses and around the water pump.
- Sweet-smelling vapor around the engine bay.
Troubleshooting Steps:
- Visual Inspection: Check all hoses, clamps, and radiator seams for signs of leakage.
- Pressure Test: Use a cooling system pressure tester to identify leaks under pressurized conditions.
- UV Dye Test: Add fluorescent dye to the coolant and inspect with a UV light to detect small leaks.
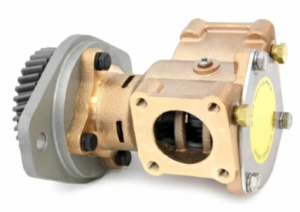
3. Radiator and Water Pump Inspection
Both the radiator and water pump are key components of the cooling system. Any malfunction can severely impact engine performance.
Radiator Issues:
- Clogged Fins or Tubes: Dirt, debris, and corrosion reduce cooling efficiency.
- Leaking Radiator Core: Look for wet spots or corrosion around the seams.
Water Pump Issues:
- Leaking Seals: Coolant dripping from the pump indicates seal failure.
- Noisy Bearings: A whining or grinding noise often signals bearing wear.
Maintenance Tips:
- Flush the Cooling System: Periodically flush old coolant to remove deposits and prevent corrosion.
- Inspect Belts and Pulleys: Ensure proper tension on the water pump belt.
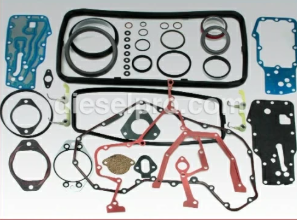
- Replace Worn Components: Address leaks, worn seals, or damaged parts immediately.
Freshwater Pump & Related Components for Cummins ISB 4.5 Engine
Freshwater Pump & Related Components for Cummins ISB 5.9 Engine
Freshwater Pump & Related Components for Cummins ISB 6.7 Engine
Freshwater Pump & Related Components for Cummins QSB 4.5 Engine
Freshwater Pump & Related Components for Cummins QSB 5.9 Engine
Freshwater Pump & Related Components for Cummins QSB 6.7 Engine
Freshwater Pump & Related Components for Cummins QSB 7.0 Engine
Raw Water Pump & Related Components for Cummins QSB 5.9 Engine
Raw Water Pump & Related Components for Cummins QSB 6.7 Engine
Raw Water Pump & Related Components for Cummins QSB 7.0 Engine
Lubrication System Troubleshooting
The lubrication system ensures that all moving parts within the engine are properly lubricated, reducing friction, heat, and wear. Issues within this system can lead to engine seizure, bearing failure, and catastrophic damage if not addressed promptly.
1. Diagnosing Low Oil Pressure
Low oil pressure is a critical issue that can cause severe engine damage if not resolved quickly.
Common Causes of Low Oil Pressure:
- Low Oil Level: Due to leaks or excessive consumption.
- Worn Engine Bearings: Increased clearance reduces oil pressure.
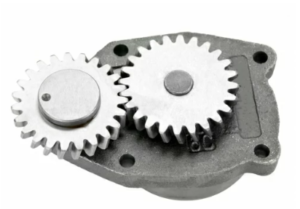
- Faulty Oil Pump: A failing pump cannot maintain adequate pressure.
- Clogged Oil Filter: Restricts flow, causing pressure drops.
Symptoms of Low Oil Pressure:
- Oil Pressure Warning Light: Illuminates on the dashboard.
- Engine Ticking or Knocking: Due to inadequate lubrication.
- Overheating: Lack of oil reduces cooling efficiency.
Troubleshooting Steps:
- Check Oil Level: Refill if low and inspect for leaks.
- Inspect the Oil Filter: Replace if clogged or dirty.
- Mechanical Oil Pressure Test: Use a gauge to verify readings.
- Inspect for Internal Wear: If pressure remains low, internal engine components may be worn.
2. Identifying Oil Leaks
Oil leaks are common in high-mileage engines and can lead to low oil levels, contamination, and fire hazards if left unchecked.
Common Leak Locations:
- Valve Cover Gasket: Often leaks around the top of the engine.
- Oil Pan Gasket: Leaks at the bottom of the engine.
- Crankshaft Seals: Front or rear seals can fail, causing significant leaks.
- Turbocharger Lines: Leaks from oil feed or return lines.
How to Detect Oil Leaks:
- Visual Inspection: Look for fresh oil stains or wet areas.
- UV Dye Test: Add oil dye and inspect under UV light for small leaks.
- Clean and Monitor: Clean the suspected area, run the engine, and observe for fresh leaks.
3. Importance of Regular Oil Changes
Regular oil changes are critical for maintaining engine health. Oil breaks down over time, losing its ability to lubricate effectively.
Benefits of Regular Oil Changes:
- Prevents Engine Wear: Clean oil reduces friction between moving parts.
- Improves Fuel Efficiency: Reduces internal resistance, allowing the engine to run smoothly.
- Controls Engine Temperature: Oil helps dissipate heat.
- Removes Contaminants: Regular changes flush out dirt, metal particles, and sludge.
Oil Change Best Practices:
- Use the Right Oil: Follow Cummins’ recommendations for viscosity and grade.
- Replace Oil Filters: Always change the oil filter with the oil to ensure maximum cleanliness.
- Check for Leaks Post-Change: Ensure the drain plug and filter are properly secured.
Conclusion
Maintaining the fuel, cooling, and lubrication systems of Cummins ISB and QSB engines is vital for long-term performance and reliability. By recognizing symptoms early, following systematic troubleshooting steps, and adhering to preventive maintenance schedules, operators and technicians can avoid costly repairs and keep their engines running smoothly. Always refer to Cummins’ guidelines and service manuals for detailed procedures and specifications.
Parts Catalog Main Page for Cummins ISB Marine Engine
Cummins ISB 4.5 & Related Components
Cummins ISB 5.9 & Related components
Cummins ISB 6.7 & Related Components
Parts Catalog Main page for Cummins QSB Marine Engine
Cummins QSB 4.5 & Related Components
Cummins QSB 5.9 & Related Components
Cummins QSB 6.7 & Related Components
Cummins QSB 7.0 & Related Components