
Preventive maintenance and effective troubleshooting are essential for ensuring the long-term reliability, efficiency, and performance of Detroit Diesel 53 Series engines. Regular maintenance schedules allow operators to stay ahead of wear and tear, reducing the risk of unplanned downtime. Additionally, having a structured approach to diagnosing and resolving common engine issues ensures minimal disruption to operations.
Parts Catalog for 353 Detroit Diesel Marine Engine
Parts Catalog for 453 Detroit Diesel Marine Engine
Parts Catalog for 6V53 Detroit Diesel Marine Engine
Parts Catalog for 8V53 Detroit Diesel Marine Engine
Routine Maintenance Schedules For Detroit Diesel 53 Series Engines (3-53, 453, 6V53, 8V53)
Importance of Preventive Maintenance
- Maximize Engine Life: Regular care minimizes the accumulation of wear and tear on key components, extending the engine’s operational lifespan.
- Improve Reliability: A well-maintained engine is less likely to experience sudden breakdowns or failures.
- Enhance Efficiency: Proper maintenance keeps the engine running at peak performance, reducing fuel consumption and emissions.
- Reduce Costs: Preventive maintenance is significantly cheaper than reactive repairs or complete overhauls caused by neglect.
Key Maintenance Tasks
- Oil Changes
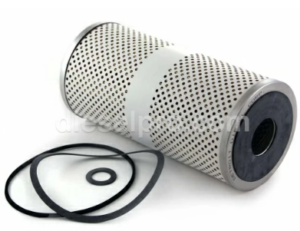
Oil Filter for Detroit Diesel 53 Engines -
Schedule: Every 100-150 operating hours, depending on operating conditions.
- Why It’s Important: Clean oil reduces friction, provides proper lubrication, and carries away heat from critical components.
- Procedure:
-
Drain the old oil completely while the engine is warm.
- Replace the oil filter with a high-quality aftermarket filter.
- Refill with oil meeting Detroit Diesel specifications (e.g., SAE 15W-40).
- Check the oil level and ensure it is within the dipstick range.
-
-
- Coolant System Maintenance

Fresh Water Pump For Detroit Diesel 353 & 453
Schedule: Inspect coolant levels daily; flush and replace coolant every 1,000 operating hours or annually.
-
- Why It’s Important: Proper cooling prevents overheating and ensures consistent operating temperatures.
- Procedure:
-
Check for proper coolant level in the reservoir and refill if necessary.
- Inspect hoses, clamps, and the radiator for leaks or damage.
- Flush the cooling system using a manufacturer-approved solution to remove scale and deposits.
-
- Why It’s Important: Proper cooling prevents overheating and ensures consistent operating temperatures.
- Fuel System Checks
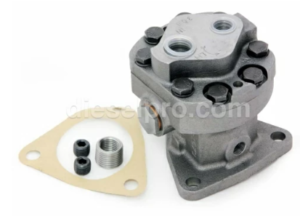
Fuel Pump – Left-Hand for Detroit Diesel 453 -
Schedule: Inspect filters every 100 operating hours; replace filters every 300 hours or as needed.
- Why It’s Important: Clean fuel delivery prevents injector clogging and supports efficient combustion.
- Procedure:
-
Inspect and replace primary and secondary fuel filters.
- Check for air in the fuel system and bleed if necessary.
- Inspect fuel lines and connections for leaks or signs of wear.
-
-
- Air Intake System Maintenance

Blower For Detroit Diesel 4-53 -
Schedule: Check and clean the air filter every 250 operating hours or as indicated by the restriction indicator.
- Why It’s Important: A clean air filter ensures adequate airflow, supporting efficient combustion.
- Procedure:
- Inspect the air filter for dirt, oil, or damage.
- Clean or replace the filter as needed.
- Check for obstructions in the air intake ducts.
-
- Exhaust System Inspection

Exhaust Manifold For Detroit Diesel 4-53 Engine -
Schedule: Inspect every 500 operating hours.
- Why It’s Important: Ensures safe expulsion of exhaust gases and prevents backpressure.
- Procedure:
-
Inspect the exhaust manifold, muffler, and connections for leaks or cracks.
- Remove carbon deposits and ensure unrestricted flow.
-
-
- Belt and Pulley Checks
-
Schedule: Inspect every 100 operating hours.
- Why It’s Important: Prevents loss of power transmission to accessories such as alternators and water pumps.
- Procedure:
-
Check belts for fraying, cracks, or excessive slack.
- Adjust belt tension or replace belts as needed.
-
-
- Electrical System Maintenance
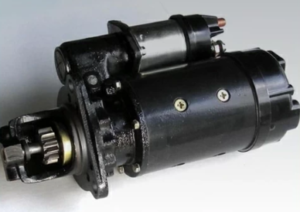
Starter for Detroit Diesel engine 12 volts RH 12 teeth – Specific for Detroit Diesel engines 3-53 and 4-53. -
Schedule: Inspect battery and connections every 50 operating hours.
- Why It’s Important: A reliable electrical system supports starting and overall engine operation.
- Procedure:
-
Ensure battery terminals are clean and secure.
- Test the battery charge and replace if weak.
- Inspect alternator output and wiring connections.
-
-
- Regular Engine Inspections
-
Inspect for oil, coolant, or fuel leaks during every maintenance session.
- Check engine mounts for looseness or damage.
-
Troubleshooting Tips For Detroit Diesel 53 Series Engines (3-53, 4-53, 6V53, 8V53)
Even with a rigorous maintenance schedule, engine issues can arise. This troubleshooting guide provides step-by-step instructions for diagnosing and resolving common problems.
1. Smoke from the Exhaust
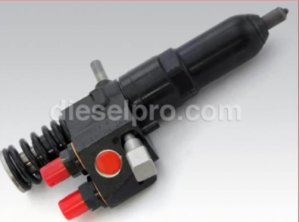
Symptoms:
- Black smoke indicates incomplete combustion or excessive fuel.
- Blue smoke suggests oil burning in the combustion chamber.
- White smoke points to unburned fuel or coolant entering the cylinders.
Troubleshooting Steps:
- Inspect the Fuel System:
- Check for clogged or dirty fuel injectors. Clean or replace as necessary.
- Ensure fuel filters are clean and free of debris.
- Check the Air Intake System:
- Inspect the air filter for clogs or dirt. Replace if needed.
- Look for restrictions in the intake ducts.
- Examine the Cylinder Head:
- Inspect for worn valve seals or guides causing oil to enter the combustion chamber.
- Inspect for worn valve seals or guides causing oil to enter the combustion chamber.
- Coolant Leak:
- White smoke may indicate a head gasket failure. Check coolant levels and inspect for mixing of oil and coolant.
- White smoke may indicate a head gasket failure. Check coolant levels and inspect for mixing of oil and coolant.
2. Overheating

Symptoms:
- High coolant temperature gauge readings.
- Steam from the radiator.
- Loss of power or engine shutdown.
Troubleshooting Steps:
- Check Coolant Levels:
- Refill if necessary and inspect for leaks in hoses, the radiator, or the water pump.
- Refill if necessary and inspect for leaks in hoses, the radiator, or the water pump.
- Inspect the Radiator:
- Check for clogs or damage to the radiator fins. Clean with compressed air or replace if required.
- Check for clogs or damage to the radiator fins. Clean with compressed air or replace if required.
- Verify Thermostat Operation:
- A stuck thermostat can prevent coolant from circulating. Replace if faulty.
- A stuck thermostat can prevent coolant from circulating. Replace if faulty.
- Inspect the Water Pump:
- Ensure the pump is operating correctly and there are no impeller issues.
- Ensure the pump is operating correctly and there are no impeller issues.
- Examine Fan Operation:
- Inspect the fan clutch or belt for proper operation.
- Inspect the fan clutch or belt for proper operation.
3. Loss of Power
Symptoms:
- Reduced acceleration or difficulty maintaining engine speed.
- Increased fuel consumption.
Troubleshooting Steps:
- Fuel System Issues:
- Inspect for air in the fuel lines and bleed the system if necessary.
- Check for clogged fuel filters or malfunctioning injectors.
- Air Intake System:
- Clean or replace a dirty air filter.
- Check for intake manifold leaks or blockages.
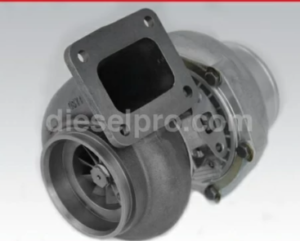
- Turbocharger Problems (if equipped):
- Inspect the turbocharger for excessive play, oil leaks, or damaged blades.
- Inspect the turbocharger for excessive play, oil leaks, or damaged blades.
- Compression Issues:
- Perform a compression test to identify worn piston rings, valves, or head gasket issues.
- Perform a compression test to identify worn piston rings, valves, or head gasket issues.
4. Hard Starting

Symptoms:
- Engine cranks but fails to start.
- Excessive cranking time required to start.
Troubleshooting Steps:
- Check the Battery:
- Ensure the battery is fully charged and terminals are clean.
- Ensure the battery is fully charged and terminals are clean.
- Inspect the Starter:
- Verify proper operation of the starter motor. Replace if sluggish.
- Verify proper operation of the starter motor. Replace if sluggish.
- Fuel Delivery Issues:
- Ensure the fuel shutoff valve is open.
- Check for air in the fuel system and bleed it if required.
- Cold Weather Operation:
- Use an engine block heater or glow plugs to aid starting in cold environments.
- Use an engine block heater or glow plugs to aid starting in cold environments.
Maintenance Log and Record-Keeping
To ensure thorough preventive maintenance and troubleshooting:
- Maintain detailed logs of maintenance activities, including dates, component replacements, and inspections.
- Document troubleshooting steps taken and resolutions achieved.
- Monitor recurring issues to identify potential trends or underlying causes.
By following this preventive maintenance and troubleshooting guide, Detroit Diesel 53 Series engine operators can maximize reliability, minimize downtime, and extend engine life. Regular checks and a proactive approach to problem resolution ensure smooth and efficient operation under all conditions.
Parts Catalog for 353 Detroit Diesel Marine Engine
Parts Catalog for 453 Detroit Diesel Marine Engine
Parts Catalog for 6V53 Detroit Diesel Marine Engine
Parts Catalog for 8V53 Detroit Diesel Marine Engine


 Free US Calls: 1-888-433-4735
 International: 305-545-5588