

 Free US Calls: 1-888-433-4735
 International: 305-545-5588

Introduction
The Caterpillar 3208 marine engine is a robust and reliable powerplant, but its longevity and performance depend on meticulous care and maintenance. Beyond routine servicing, certain special procedures are essential to ensure optimal operation and to identify and prevent potential problems before they escalate. This guide focuses on four key special servicing tasks:
- Priming the fuel system
- Flushing and cleaning the coolant system
- Cleaning and replacing air cleaner elements
- Obtaining engine oil samples for Scheduled Oil Sampling (S.O.S.) analysis
Each procedure is explained in detail, complete with step-by-step instructions, best practices, safety considerations, and troubleshooting tips to help marine engineers, mechanics, and operators perform these tasks confidently and effectively.
Detailed Procedures for Priming the Fuel System on the Caterpillar 3208
Why Priming is Necessary
Air trapped in the fuel system after maintenance or filter replacement can prevent the engine from starting or cause erratic operation. Priming the fuel system removes air pockets and ensures proper fuel delivery to the injectors.
Tools and Materials Needed
- Manual priming pump (typically integrated into the fuel filter assembly)
- Clean rags for catching spills
- Personal protective equipment (gloves, goggles)
Step-by-Step Priming Instructions
- Safety First: Ensure the engine is shut down, battery isolated, and cooled. Wear appropriate protective gear.
- Locate the Priming Pump: Typically mounted near the fuel filter. Identify the bleed screw or valve on the system.
- Operate the Pump: Manually pump the priming handle. You’ll feel resistance as fuel flows through the system.
- Open the Bleed Valve: Slowly open the valve to release trapped air. Keep pumping until fuel flows steadily without bubbles.
- Tighten the Bleed Valve: Once air is expelled and clear fuel flows, tighten the bleed valve securely.
- Check for Leaks: Inspect connections and seals for leaks.
- Final Start-Up: Reconnect battery power and attempt to start the engine. If it doesn’t start immediately, repeat priming.
Best Practices
- Never use high-pressure air or force fuel through the system.
- Perform priming after any fuel system work, including filter changes.
- Monitor for leaks after priming.
Step-by-Step Instructions for Coolant System Flushing and Cleaning
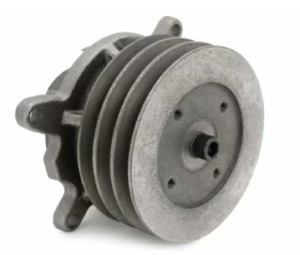
Fresh Water Pump for Caterpillar 3208 Natural and Turbo engines
Why Flushing is Critical
Over time, coolant can degrade, accumulating contaminants, rust, and scale. Flushing ensures the system is clean, preventing blockages, overheating, and damage to key components like cylinder liners, water pumps, and heat exchangers.
Tools and Materials Needed

- Suitable drain containers
- Caterpillar-approved system flush solution or mild detergent
- Distilled or deionized water
- Replacement coolant (ELC or DEAC)
- Replacement gaskets or hoses if needed
- Personal protective equipment
Flushing Procedure
- Preparation: Cool the engine completely, isolate battery power, and wear protective gear.
- Drain Old Coolant: Open drain valves and collect coolant. Dispose of properly.
- Flush with Clean Water: Close drains, fill with clean water, start engine, run to operating temperature, then cool and drain. Repeat until water runs clear.
- Add Cleaning Solution (If Needed): Fill system with water and cleaning solution per manufacturer’s instructions. Run engine as directed, cool, and drain.
- Final Rinse: Repeat flushing with clean water until fully clear.
- Inspect System Components: While system is drained, check hoses, clamps, water pump, and gaskets. Replace any worn parts.
- Refill Coolant: Use Caterpillar-approved coolant mixture, fill slowly, purge air by running engine at idle, top off as needed.
- Check for Leaks: Inspect all connections.
Best Practices
- Avoid tap water to prevent scale.
- Change coolant fully every scheduled interval or if contamination is found.
- Keep detailed records of flushing and coolant changes.
Cleaning and Replacing Air Cleaner Elements with Proper Techniques
Why This Matters
A clean air filter prevents dirt and debris from entering the combustion chambers, ensuring optimal engine performance and longevity.
Tools and Materials Needed
- Replacement air cleaner elements
- Low-pressure compressed air or approved cleaning solution
- Clean workspace and personal protective equipment
Cleaning and Replacement Procedure
- Preparation: Shut down engine, isolate power, and wear protective gear.
- Remove Air Cleaner Element: Open housing, carefully remove element to prevent debris from falling into intake.
- Inspection: Check element for tears, holes, and dirt saturation. If damaged, replace immediately.
- Cleaning:
- For dry-type elements: Use low-pressure air (below 30 psi) from inside out to dislodge dust.
- For oil-bath elements: Clean per manufacturer instructions with solvent, allow to dry, refill with oil to correct level.
- Reinstall or Replace: Ensure the element seats correctly, install housing cover securely.
- Final Check: Inspect housing for sealing integrity.
Best Practices
- Never use high-pressure air; it can damage the filter.
- Replace filters at recommended intervals or when excessively dirty.
- Inspect and clean intake ducts during filter service.
Obtaining Engine Oil Samples for S.O.S. Analysis
Why S.O.S. Analysis is Critical
Scheduled Oil Sampling (S.O.S.) provides vital insights into engine health, identifying wear metals, contaminants, and oil condition before problems become severe.
Tools and Materials Needed
- Caterpillar-approved oil sampling kit
- Clean collection container
- Sampling valve or dipstick access
- Personal protective equipment
Sampling Procedure
- Preparation: Warm the engine to operating temperature to suspend particles. Shut down, wear PPE.
- Access Sampling Point: Use a dedicated sampling valve or, if unavailable, use a clean siphon through dipstick tube.
- Sample Collection:
- Let initial oil flow clear sampling point.
- Collect mid-flow sample in clean container.
- Avoid contamination from dust, hands, or used tools.
- Label Sample: Include date, engine hours, oil type, and engine serial number.
- Send to Laboratory: Deliver to authorized analysis facility.
- Interpret Results: Review reports for indicators like metal content, soot, fuel dilution, and viscosity changes.
Best Practices
- Sample consistently at the same interval for trend analysis.
- Use proper kits to avoid contamination.
- React to elevated metal or contaminant levels promptly.
Conclusion
Performing these special servicing procedures on the Caterpillar 3208 marine engine is not just about compliance—it’s about preserving reliability, efficiency, and longevity. Each procedure outlined here—from priming the fuel system, flushing the coolant system, cleaning air filters, to collecting oil samples for S.O.S. analysis—is a proactive step toward optimal engine performance and reduced downtime.
Follow these procedures meticulously, keep detailed maintenance records, and always refer to Caterpillar’s official Operation & Maintenance Manual for detailed specifications and instructions.
Additional Resources
Practical Guide To Servicing The Caterpillar 3208 Marine Engine
Marine CAT 3208 Component Maintenance Life
Caterpillar 3208 Injectors: High-Quality Aftermarket Options from Diesel Pro Power
The History of the Caterpillar 3208 Engine
Common Applications of the Caterpillar 3208 Engine
Troubleshooting Common Issues with the Caterpillar 3208
Maintenance Tips for Maximizing the Life of Your Caterpillar 3208 Engine
Comparing the Caterpillar 3208 to Other Marine Engines