

 Free US Calls: 1-888-433-4735
 International: 305-545-5588

Proper troubleshooting and preventive maintenance are critical for ensuring the reliable operation and extended lifespan of Detroit Diesel 6V71, 8V71, 12V71, and 16V71 engines. This guide outlines detailed procedures for diagnosing common issues such as loss of power, overheating, and irregular performance. It also highlights the importance of routine inspections, adherence to service schedules, and a comprehensive checklist for preventive maintenance.
Diagnosing Common Issues in Detroit Diesel V71 Engines (6V71, 8V71, 12V71, and 16V71)
Engine issues can often be resolved quickly with accurate troubleshooting. Below are expanded guidelines for identifying and resolving common problems in Detroit Diesel V71 engines.
1. Loss of Power
Symptoms:

- Decreased engine output.
- Sluggish acceleration.
- Inability to maintain speed under load.
Potential Causes:
- Restricted Fuel Flow: Clogged fuel filters, fuel lines, or air intake (Turbo or Blower) obstructions.
- Injector Malfunctions or Improper Timing: Faulty Injectors or incorrect timing settings.
- Insufficient Turbocharger Performance: In turbocharged models, issues such as worn turbo blades, oil leaks, or excessive play.
- Low Compression: Resulting from worn piston rings, cylinder liners, or valves.(See our Rebuild Kits for Detroit Diesel V71 Engines)
- Fuel Contamination: Presence of water or debris in the fuel system.
- Governor Malfunctions: Incorrect governor adjustments affecting fuel delivery.
Troubleshooting Steps:
-
Inspect and Replace Fuel Filters:

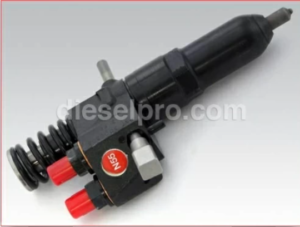
Fuel Filters for Detroit Diesel V71 Engines
- Examine primary and secondary fuel filters for clogging or debris. Replace them if necessary.
- Bleed air from the fuel system to restore proper flow.
-
Check Air Filters for Blockages:
- Remove and inspect the air filters for dirt and obstructions.
- Clean or replace filters to ensure proper airflow.
-
Test Injector Performance and Timing:
- Remove injectors and check for clogging, wear, or improper spray patterns.
- Verify injector timing using manufacturer specifications.
- Replace faulty injectors and adjust timing if necessary.
-
Verify Turbocharger Functionality (if equipped):
- Inspect turbocharger for excessive shaft play, worn blades, and oil leaks.
- Ensure the air intake system is leak-free to maintain turbocharger efficiency.
- Replace the turbocharger if significant defects are detected.
-
Conduct a Compression Test:
- Use a diesel compression tester to check cylinder compression levels.
- Compare readings to standard specifications; low readings may indicate worn piston rings, valves, or liners.
-
Inspect Governor Settings:
- Check for incorrect adjustments or damaged components in the governor.
- Recalibrate as needed for optimal fuel regulation.
-
Check Fuel Quality:
- Drain a sample of the fuel and check for contamination.
- If contamination is present, flush the fuel system and replace with clean diesel fuel.
2. Overheating
Symptoms:
- High temperature readings.
- Coolant boiling over.
- Engine shutdown due to thermal overload.
Potential Causes:
- Low Coolant Levels: Insufficient coolant due to leaks or evaporation.
- Air Pockets in the Cooling System: Incomplete bleeding during coolant replacement.
- Blocked Radiator Fins or Heat Exchanger: Dirt, debris, or scaling obstructing airflow or coolant flow.
- Faulty Water Pump: Reduced coolant circulation due to worn impellers or seals.
- Malfunctioning Thermostat: Incorrect opening temperatures preventing coolant flow.
- Scale Deposits in Cooling System: Mineral buildup reducing cooling efficiency.
- Faulty Fan or Drive Belt: Malfunctioning cooling fan or a worn drive belt affecting fan operation.
Troubleshooting Steps:
-
Check Coolant Levels and Inspect for Leaks:
- Ensure the coolant level meets specifications and top off as needed.
- Check for leaks at hoses, the radiator, water pump, and engine seals.
- Pressure test the cooling system if necessary.
-
Bleed the System to Remove Air Pockets:
- Follow manufacturer-recommended procedures to eliminate trapped air.
- Ensure coolant circulates freely without obstruction.
-
Clean Radiator Fins and Flush Heat Exchanger:
- Remove debris from radiator fins using compressed air or water spray.
- Flush the heat exchanger with a descaling solution to remove mineral buildup.
- Inspect for damage and replace components if necessary.
-
Inspect and Replace the Water Pump:
- Check the water pump for leakage, worn impellers, or bearing noise.
- Replace the pump if defective.
-
Test Thermostat Operation:
- Remove the thermostat and place it in hot water to observe opening temperatures.
- Replace if it opens too early, too late, or remains closed.
-
Check the Cooling Fan and Drive Belt:
- Verify that the fan operates correctly and that the drive belt is in good condition.
- Replace worn belts and faulty fans as needed.
-
Inspect for Internal Blockages:
- Remove coolant hoses and inspect for sediment or obstructions.
- Flush the entire system if blockages are detected.
3. Irregular Performance
Symptoms:
- Rough idling.
- Inconsistent power delivery.
- Unusual engine noise.
Potential Causes:
- Imbalanced Fuel Delivery: Faulty or misadjusted injectors causing uneven fuel flow.
- Misfiring Cylinders: Loss of compression or defective injectors leading to incomplete combustion.
- Loose or Damaged Air Intake or Exhaust Components: Allowing unmetered air into the system or restricting exhaust flow.
- Fuel Pump Malfunctions: Irregular fuel pressure leading to inconsistent performance.
- Air Leaks: Leaks in the intake manifold or turbocharger system reducing efficiency.
- Governor Inconsistencies: Poorly adjusted or malfunctioning governor affecting engine speed.
Troubleshooting Steps:
-
Perform a Compression Test:
- Check each cylinder for compression consistency.
- Repair or replace components as necessary to restore proper compression levels.
-
Inspect and Adjust Injectors for Timing and Spray Patterns:
- Test injector spray patterns to ensure even fuel atomization.
- Re-calibrate or replace injectors that are out of specification.
-
Tighten or Replace Loose Components in the Air Intake or Exhaust System:
- Inspect intake hoses, clamps, and gaskets for leaks or looseness.
- Check the exhaust manifold for cracks or broken studs.
- Replace or tighten components as necessary.
-
Inspect Fuel Pump Operation:
- Measure fuel pressure and compare to specifications.
- Replace faulty fuel pumps if pressure is inconsistent.
-
Check for Air Leaks:
- Spray soapy water on intake connections to detect leaks.
- Replace gaskets and tighten connections as necessary.
-
Examine and Adjust Governor Settings:
- Inspect the governor for proper adjustment.
- Recalibrate if erratic engine speeds are observed.
Maintenance Tips for Preventing Common Issues
-
Regular Fuel Filter Maintenance:
- Replace filters at recommended intervals to avoid restricted fuel flow.
- Replace filters at recommended intervals to avoid restricted fuel flow.
-
Routine Injector Testing:
- Periodically test injectors for consistent spray patterns and replace worn components.
- Periodically test injectors for consistent spray patterns and replace worn components.
-
Cooling System Checks:
- Regularly inspect coolant levels, hoses, and water pump integrity.
- Regularly inspect coolant levels, hoses, and water pump integrity.
-
Consistent Oil Changes:
- Use high-quality lubricants and adhere to service intervals to maintain proper lubrication.
- Use high-quality lubricants and adhere to service intervals to maintain proper lubrication.
-
Air Intake and Exhaust Inspections:
- Check for leaks, blockages, and damaged components to ensure optimal airflow.
- Check for leaks, blockages, and damaged components to ensure optimal airflow.
-
Turbocharger Care:
- Inspect turbochargers for play, leaks, and damage to maintain efficiency.
- Inspect turbochargers for play, leaks, and damage to maintain efficiency.
-
Monitor Engine Parameters:
- Regularly observe temperature, oil pressure, and performance metrics to detect issues early.
- Regularly observe temperature, oil pressure, and performance metrics to detect issues early.
Importance of Routine Inspections and Adherence to Service Schedules
Adhering to a regular maintenance schedule is essential for preventing costly repairs and ensuring consistent engine performance. Routine inspections help identify minor issues before they escalate into major problems. Key benefits include:
-
Enhanced Reliability:
- Detecting worn parts or potential failures early reduces the likelihood of unexpected breakdowns.
- Detecting worn parts or potential failures early reduces the likelihood of unexpected breakdowns.
-
Improved Efficiency:
- Regular maintenance keeps fuel and air systems clean, ensuring optimal combustion and power delivery.
- Regular maintenance keeps fuel and air systems clean, ensuring optimal combustion and power delivery.
-
Extended Engine Lifespan:
- Consistent care and timely replacement of components reduce wear and tear, maximizing engine longevity.
- Consistent care and timely replacement of components reduce wear and tear, maximizing engine longevity.
Recommended Service Intervals
-
Daily:
Check oil and coolant levels, inspect for leaks, and monitor gauge readings during operation.
-
Every 250 Hours:
- Replace fuel and oil filters.
- Inspect belts, hoses, and connections for wear.
- Test electrical components such as alternators and sensors.
-
Annually:
- Flush and refill the cooling system.
- Perform a thorough inspection of the turbocharger, injectors, and governor.
- Conduct a detailed compression test to assess internal engine health.
Checklist for Preventive Maintenance to Extend Engine Life (Detroit Diesel 6V71, 8V71, 12V71, and 16V71 Engines)
A systematic approach to preventive maintenance ensures all critical areas of Detroit Diesel V71 engines are addressed to maximize performance, reduce downtime, and extend engine life. This expanded checklist covers daily, weekly, monthly, and annual tasks for 6V71, 8V71, 12V71, and 16V71 engines.
Daily Maintenance
Perform these tasks daily to ensure reliable engine performance and early detection of potential issues.
Oil System
- Check Oil Level: Verify oil levels using the dipstick and top up with high-quality engine oil if necessary.
- Inspect for Contamination or Leakage: Look for signs of oil contamination, including unusual color, consistency, or odor.
- Check Around Seals and Gaskets: Examine areas around seals, gaskets, and oil lines for leaks or seepage.
- Examine Oil Filter Housing: Look for any leaks around the oil filter base and ensure the filter is properly secured.
Coolant System
- Verify Coolant Level: Inspect the coolant level in the reservoir and top off if low. Use the correct mixture of water and antifreeze as recommended by the manufacturer.
- Inspect for Leaks: Check around radiator hoses, water pump, and coolant reservoir for any leaks or wet spots.
- Check Coolant Condition: Look for signs of rust, sediment, or discoloration that may indicate internal corrosion or contamination.
- Assess Reservoir Cap: Inspect the radiator or reservoir cap for damage or wear and ensure it is sealing properly to maintain pressure.
Visual Inspections
- Check for Loose Belts and Hoses: Inspect belts for proper tension, signs of cracking, fraying, or glazing. Verify hoses are secure and show no signs of bulging or deterioration.
- Inspect Wiring Connections: Ensure all wiring connections are tight and free of corrosion. Pay attention to battery terminals and starter connections.
- Look for Fluid Leaks: Inspect the area beneath the engine for signs of oil, coolant, or fuel leaks.
- Observe Mounting Points: Verify that engine mounts, brackets, and fasteners are secure and free of wear.
Operational Checks
- Monitor Gauges: Check all engine gauges during startup and operation, ensuring oil pressure, temperature, and voltage are within normal ranges.
- Listen for Unusual Noises: Identify and investigate any unfamiliar engine noises that may indicate mechanical issues.
- Check Exhaust Smoke: Observe exhaust emissions for abnormal color, such as black (excess fuel), blue (oil burning), or white (coolant entering combustion).
Weekly Maintenance
In addition to daily checks, weekly maintenance ensures deeper inspections and the functionality of key components.
Filters
- Inspect Air Filters: Remove and inspect the air filter element. Clean if reusable or replace it if clogged or damaged.
- Check Fuel Filters: Inspect fuel filters for signs of water contamination or debris. Replace immediately if contamination is present to prevent injector damage.
- Check Crankcase Breather: Inspect the breather for obstructions or sludge buildup that could hinder proper ventilation.
Battery and Electrical System
- Test Battery Voltage: Use a multimeter to check battery voltage. Ensure it is maintaining a full charge (typically above 12.6 volts).
- Inspect Battery Terminals: Look for corrosion on terminals and apply a protective coating after cleaning.
- Check Cables and Grounds: Ensure cables are tightly connected and grounding points are free from corrosion.
- Verify Functionality of Gauges and Alarms: Test all gauges, warning lights, and alarms to ensure proper operation.
Exhaust System
- Inspect Exhaust Manifold: Look for signs of soot or cracks around manifold joints, indicating possible leaks.
- Check Turbocharger Components (if applicable): Inspect turbocharger for oil leaks and ensure the blades rotate freely. Clean the turbocharger housing to prevent soot accumulation.
- Inspect Mufflers and Pipes: Ensure all clamps and supports are secure and there are no holes or blockages in the exhaust system.
Monthly Maintenance
Monthly checks focus on the core systems that require more thorough inspections and servicing.
Lubrication System
- Replace Oil and Oil Filter: Drain the oil and replace it with fresh, high-quality oil. Install a new oil filter and check for leaks.
- Inspect Oil Cooler: Look for signs of leakage or blockages in the oil cooler. Ensure connections are tight.
- Check Oil Pump Operation: Verify the oil pump is maintaining proper pressure. Listen for unusual noises that could indicate internal damage.
- Inspect Pressure Relief Valve: Ensure the valve opens at the correct pressure and replace if malfunctioning.
Cooling System
- Inspect Radiator and Heat Exchanger: Remove debris from the radiator fins and flush the heat exchanger to prevent overheating.
- Test Coolant Temperature Sensors: Verify sensors are reading correctly to avoid inaccurate dashboard readings.
- Test Thermostat Operation: Remove and test the thermostat in hot water. Replace if it fails to open at the correct temperature.
- Inspect Water Pump: Check for leaks or noise. Replace seals or the entire pump if wear is evident.
Fuel System
- Perform System Bleed: Remove any trapped air in the fuel lines to ensure consistent fuel delivery.
- Check Injector Spray Patterns: Remove and inspect injectors for proper atomization and spray. Replace or service as necessary.
- Test Injector Timing: Ensure injectors are timed correctly to optimize combustion and engine performance.
- Inspect Fuel Pump: Check for consistent operation and replace if it is not maintaining proper pressure.
Annual Maintenance
Annual maintenance involves in-depth inspections and overhauls to ensure the engine remains reliable over the long term.
Engine Components
- Conduct a Compression Test: Test all cylinders to confirm uniform compression. Address any discrepancies by inspecting piston rings, cylinder liners, or valves.
- Inspect Piston Rings and Liners: Check for signs of wear, scoring, or damage. Replace as necessary to restore compression.
- Examine Camshaft and Bearings: Inspect for wear, pitting, or damage. Replace worn parts to prevent operational failures.
- Clean Blower Rotors: Remove deposits and inspect rotors for wear that could affect airflow. Replace or rebuild as necessary.
- Inspect Gaskets and Seals: Check for degradation and replace any gaskets or seals that show signs of wear or leakage.
Turbocharger (if applicable)
- Disassemble and Clean: Remove soot and carbon buildup from blades and the housing.
- Inspect Blades and Bearings: Check for wear, cracks, or excessive play. Replace as needed.
- Replace Seals: Replace worn or damaged seals to prevent oil leaks.
System Flushes
- Flush Cooling System: Use a descaling solution to remove mineral deposits and improve heat transfer.
- Flush Oil System (if necessary): If contamination is detected, perform an oil system flush to eliminate debris.
- Flush Fuel System: Remove water or sediment from the fuel tank and clean fuel lines.
Protective Systems
- Test Alarm and Shutdown Systems: Simulate fault conditions to ensure the alarm and shutdown systems trigger correctly.
- Inspect Sensors: Verify that temperature, pressure, and level sensors are functioning within specifications.
- Replace Fuse Plugs: Check for melted fuse plugs (indicating previous overheating) and replace them.
- Inspect Pressure Relief Valves: Ensure valves open at the correct pressures and replace them if they do not meet specifications.
Examine Control Systems
- Test Governor and Speed Control: Verify that engine speed is consistent and properly regulated.
- Check Throttle Linkage: Lubricate and adjust as needed to ensure smooth operation.
- Review Electronic Control Systems (if applicable): Check for stored error codes and rectify as necessary.
Additional Maintenance Tips
- Record Maintenance History: Keep detailed logs of all maintenance performed, including dates, parts replaced, and issues found.
- Use OEM Matching Parts: Ensure that replacement parts meet or exceed original specifications for durability and performance.
- Monitor Engine Performance: Regularly check for fluctuations in oil pressure, temperature, and other critical readings.
- Stay Ahead of Issues: Address small issues promptly to prevent them from becoming major repairs.
Best Practices for Troubleshooting and Maintenance
- Keep Accurate Records:
- Document all maintenance activities, including dates, performed tasks, and replaced parts.
- Use this history to predict and plan future maintenance needs.
- Use Genuine or Premium Aftermarket Parts:
- High-quality components ensure compatibility and reliability, minimizing premature failures.
- High-quality components ensure compatibility and reliability, minimizing premature failures.
- Monitor Operating Conditions:
- Pay close attention to changes in engine performance, sound, and exhaust smoke to catch potential problems early.
- Pay close attention to changes in engine performance, sound, and exhaust smoke to catch potential problems early.
- Train Personnel:
- Ensure operators and maintenance staff are trained in basic troubleshooting and maintenance procedures.
Parts Catalog for 6V71 Detroit Diesel Marine Engine
Parts Catalog for 8V71 Detroit Diesel Marine Engine
- Ensure operators and maintenance staff are trained in basic troubleshooting and maintenance procedures.