

 Free US Calls: 1-888-433-4735
 International: 305-545-5588

The lubrication system is the lifeblood of any engine, including the Cummins ISB and QSB series. It ensures that all moving parts within the engine are properly lubricated to minimize friction, reduce wear and tear, and maintain optimal operating temperatures. A failure in this system can result in severe engine damage, leading to expensive repairs or complete engine failure. This comprehensive guide covers the essential aspects of lubrication system troubleshooting, focusing on diagnosing low oil pressure, identifying oil leaks, and emphasizing the importance of regular oil changes.
Parts Catalog Main Page for Cummins ISB Marine Engine
Lubrication System & Related Components for Cummins ISB 4.5 Engine
Lubrication System & Related Components for Cummins ISB 5.9 Engine
Lubrication System & Related Components for Cummins ISB 6.7 Engine
Parts Catalog Main page for Cummins QSB Marine Engine
Lubrication System & Related Components for Cummins QSB 4.5 Engine
Lubrication System & Related Components for Cummins QSB 5.9 Engine
Lubrication System & Related Components for Cummins QSB 6.7 Engine
Lubrication System & Related Components for Cummins QSB 7.0 Engine
1. Diagnosing Low Oil Pressure
Why Oil Pressure Is Critical
Oil pressure is crucial because it ensures that engine oil reaches all the necessary components, including the crankshaft, camshaft, bearings, pistons, turbocharger, and valve train. Without adequate oil pressure, these parts experience increased friction, heat buildup, and ultimately, catastrophic failure.
Common Causes of Low Oil Pressure
Low oil pressure can stem from various factors, ranging from simple issues like low oil levels to more complex mechanical failures. Here are the most common causes:
A. Low Oil Level
- Reason: Insufficient oil in the crankcase due to leaks, burning oil, or inadequate maintenance.
- Impact: Without enough oil, the pump can’t maintain the necessary pressure.
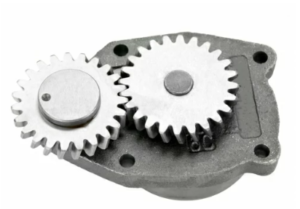
B. Faulty Oil Pump
- Reason: A worn-out or damaged oil pump loses its ability to generate adequate pressure.
- Impact: Reduces oil circulation, leading to overheating and increased engine wear.
C. Worn Engine Bearings
- Reason: Over time, main and rod bearings can wear out, increasing the clearance between moving parts.
- Impact: This causes oil to flow too freely, reducing system pressure.
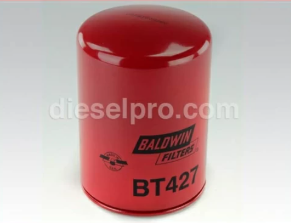
D. Clogged Oil Filter
- Reason: A dirty or clogged oil filter restricts oil flow, dropping pressure downstream.
- Impact: Reduces lubrication efficiency, causing critical engine components to suffer.
E. Faulty Oil Pressure Sensor
- Reason: A malfunctioning oil pressure sensor can give false readings, causing unnecessary concern or failing to trigger a warning.
- Impact: Misleading diagnostic information, leading to improper troubleshooting.
F. Oil Viscosity Issues
- Reason: Using oil with the wrong viscosity for the engine’s operating conditions.
- Impact: Thin oil may not maintain pressure, while overly thick oil can restrict flow, especially in cold temperatures.
G. Internal Oil Leaks
- Reason: Leaks in the oil galleries or cracks in the engine block or cylinder head can cause pressure loss.
- Impact: Inadequate lubrication to key engine parts.
Symptoms of Low Oil Pressure
Recognizing the symptoms of low oil pressure early can prevent severe engine damage:
- Oil Pressure Warning Light: Illuminates on the dashboard if the system detects low pressure.
- Engine Knocking or Ticking: Due to lack of lubrication, metal components collide noisily.
- Loss of Power: The engine may enter a limp mode to protect itself.
- Overheating: Insufficient oil circulation increases engine temperature.
- Poor Engine Performance: Rough idling, hesitation, and stalling may occur.
- Increased Exhaust Smoke: Excessive friction can lead to burning oil.
How to Diagnose Low Oil Pressure
Step 1: Check the Oil Level
- Action: Use the dipstick to check the oil level. Add oil if it’s below the recommended level.
- Tip: Check the oil on level ground after the engine has been off for a few minutes.
Step 2: Inspect for Oil Leaks
- Look under the vehicle and around the engine for signs of oil pooling or drips.
Step 3: Verify the Oil Pressure Sensor
- Action: Use a diagnostic tool to check for error codes related to the oil pressure sensor.
- Alternative Test: Replace the sensor with a known good one to rule out sensor issues.
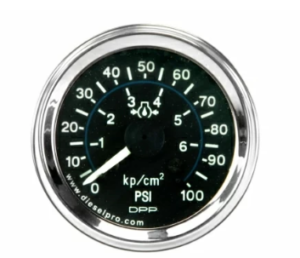
Step 4: Perform a Manual Oil Pressure Test
- Tool Needed: An oil pressure gauge.
- Procedure:
- Remove the oil pressure sensor.
- Install the mechanical gauge in its place.
- Start the engine and observe the pressure readings.
- Remove the oil pressure sensor.
- Comparison: Compare the readings with Cummins specifications. Normal operating pressure varies but typically ranges between 30–60 PSI depending on the engine load and temperature.
Step 5: Check the Oil Filter
- Remove and inspect the oil filter for blockages or signs of collapse.
- Replace with a new filter to rule out filter-related issues.
Step 6: Inspect the Oil Pump
- If all other checks are normal, the issue may lie with the oil pump:
- Check for wear in pump gears.
- Inspect the pickup screen for debris that may restrict oil flow.
Solutions for Low Oil Pressure
- Top Up or Change Oil: Ensure the correct oil type and viscosity are used.
- Replace Oil Filter: Use Cummins-approved filters for optimal flow.
- Repair Leaks: Fix any external or internal oil leaks.
- Replace Faulty Sensors: Swap out defective oil pressure sensors.
- Repair Engine Components: Worn bearings or damaged oil pumps may require an engine overhaul.
2. Identifying Oil Leaks
Why Oil Leaks Are a Concern
Oil leaks not only lead to low oil levels and reduced lubrication efficiency but can also cause:
- Fire Hazards
Oil leaking onto hot engine components increases the risk of fire.
- Environmental Damage
Oil leaks can contaminate soil and water.
- Costly Repairs
Ignoring small leaks can lead to larger mechanical failures.
Common Causes of Oil Leaks
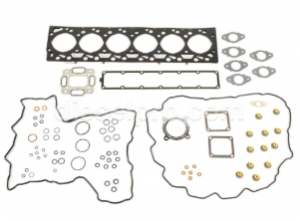
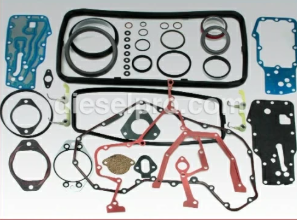
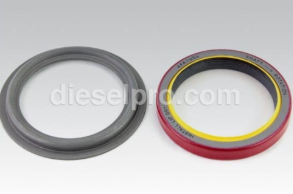
A. Worn Gaskets and Seals
- Common Areas: Valve cover gasket, oil pan gasket, front and rear main seals.
- Symptoms: Visible oil seepage around these areas.
B. Loose or Damaged Oil Filter
- Reason: Improper installation or a defective filter can cause leaks.
- Tip: Always lubricate the gasket with fresh oil during installation and ensure it’s tightened correctly.
C. Cracked Engine Components
- Reason: Overheating or physical damage can crack the oil pan, cylinder head, or engine block.
- Symptoms: Fast oil loss and visible cracks.
D. Oil Cooler or Turbocharger Leaks
- Risk Area: The oil lines feeding turbochargers and coolers are high-pressure zones prone to leaks.
- Symptoms: Oil around the turbo area or cooler fittings.
Symptoms of Oil Leaks
- Oil Puddles: Under the vehicle after parking.
- Burning Smell: Oil dripping on hot components produces a burnt oil odor.
- Blue Exhaust Smoke: Burning oil may enter the combustion chamber via leaky seals.
- Low Oil Levels: Frequent need to top off oil indicates a slow leak.
How to Detect Oil Leaks
Step 1: Visual Inspection
- Check common leak points such as:
- Valve cover gasket
- Oil pan gasket
- Crankshaft seals
- Turbo oil feed lines
Step 2: Clean the Engine
- Degrease the engine to remove existing oil, then monitor for fresh leaks.
Step 3: UV Dye Leak Test
- Add UV-reactive dye to the oil.
- Run the engine and inspect with a UV light to identify leak points.
Step 4: Pressure Test
- Use an oil pressure tester to simulate operating conditions and identify leaks.
Fixing Oil Leaks
- Tighten Fittings: Ensure oil pan bolts, valve covers, and other fasteners are torqued to specification.
- Replace Gaskets and Seals: Use OEM-quality parts to prevent recurrence.
- Repair Damaged Components: Replace cracked parts like oil pans or cylinder heads.
- Use Sealants Cautiously: Only apply engine-safe sealants where specified by Cummins.
3. Importance of Regular Oil Changes
Why Regular Oil Changes Matter
Regular oil changes are the simplest yet most effective way to prolong engine life. Oil not only lubricates but also cleans, cools, and protects engine components from corrosion.
Functions of Engine Oil
- Lubrication
Reduces friction between moving parts, minimizing wear.
- Cooling
Carries heat away from hot components like pistons and turbochargers.
- Cleaning
Suspends dirt, metal particles, and combustion by-products to prevent sludge buildup.
- Corrosion Prevention
Creates a protective film to guard against rust and oxidation.
Consequences of Neglecting Oil Changes
- Sludge Build-Up: Old oil thickens, restricting oil flow and causing overheating.
- Accelerated Engine Wear: Lack of lubrication leads to premature wear of bearings, camshafts, and pistons.
- Reduced Fuel Efficiency: Dirty oil increases engine friction, reducing efficiency.
- Engine Seizure: Complete oil failure can cause catastrophic damage requiring engine replacement.
Recommended Oil Change Intervals for Cummins ISB & QSB
- Light-Duty Applications: Every 5,000 to 7,500 miles or as specified by Cummins.
- Heavy-Duty or Industrial Use: Every 250 to 500 hours of operation.
- Severe Conditions (e.g., Marine, High Load): More frequent changes may be required.
Always refer to Cummins’ maintenance guidelines for specific intervals based on application.
How to Perform an Oil Change
Tools and Materials Needed:
- Oil drain pan
- Correct oil filter
- OEM-recommended engine oil
- Wrenches and oil filter removal tool
Step-by-Step Process:
- Warm Up the Engine: Warm oil drains more easily.
- Drain the Old Oil: Remove the oil drain plug and allow the oil to drain completely.
- Replace the Oil Filter: Lubricate the new filter’s gasket with fresh oil before installing.
- Refill with Fresh Oil: Use the correct grade and quantity as specified by Cummins.
- Check Oil Level: After running the engine briefly, check the dipstick and top off as needed.
Best Practices for Oil Changes
- Use High-Quality Oil
Always use oils that meet Cummins’ specifications.
- Keep Records
Track oil changes for warranty and maintenance history.
- Dispose of Used Oil Properly
Follow local environmental regulations.
Preventive Maintenance Tips for the Lubrication System
- Regular Oil Analysis: For commercial or industrial engines, periodic oil analysis can detect early signs of wear or contamination.
- Inspect Oil Levels Frequently: Check oil levels weekly, especially in heavy-duty applications.
- Monitor Oil Pressure Gauges: Be vigilant about sudden changes in oil pressure readings.
- Use OEM Filters: Non-OEM filters may not meet Cummins’ stringent filtration standards.
- Watch for Leaks: Address even minor leaks promptly to prevent bigger issues.
Conclusion
The lubrication system is fundamental to the performance and longevity of Cummins ISB and QSB engines. By understanding how to diagnose low oil pressure, identify oil leaks, and appreciate the importance of regular oil changes, operators and technicians can significantly reduce the risk of engine damage. Proactive maintenance not only extends engine life but also ensures optimal performance, fuel efficiency, and reliability across all operating conditions. Always refer to Cummins’ service manuals for detailed procedures and specifications tailored to your engine model.
Parts Catalog Main Page for Cummins ISB Marine Engine
Lubrication System & Related Components for Cummins ISB 4.5 Engine
Lubrication System & Related Components for Cummins ISB 5.9 Engine
Lubrication System & Related Components for Cummins ISB 6.7 Engine
Parts Catalog Main page for Cummins QSB Marine Engine
Lubrication System & Related Components for Cummins QSB 4.5 Engine
Lubrication System & Related Components for Cummins QSB 5.9 Engine
Lubrication System & Related Components for Cummins QSB 6.7 Engine
Lubrication System & Related Components for Cummins QSB 7.0 Engine