

 Free US Calls: 1-888-433-4735
 International: 305-545-5588


Parts for Detroit Diesel 371 Non-Turbo - (2 Valve Head Type) - Fuel Pump & Injector Section
 Loading...
 -
-
-
-
-
 5
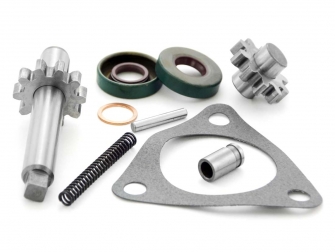
5Detroit Diesel Fuel Pump Repair Kit
5195078
Standard. Universal for repair right or left hand fuel pump.Price: $ 104.46 -
-
-
-
-
-
-
-
-
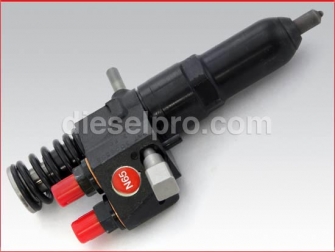
 14
14Detroit Diesel Injector N55 - rebuilt - Premium Heavy Duty
PRO55
Sold with refundable core deposit. See detailsPrice: $ 299.21 -
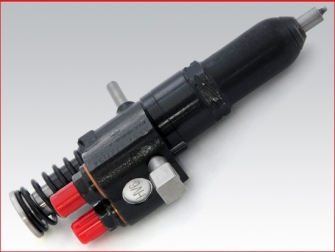
 15
15Detroit Diesel Injector N60 - rebuilt - Premium Heavy Duty
PRO60
Sold with refundable core deposit.Price: $ 299.21 -
 16
16Detroit Diesel Injector N65 - rebuilt - Premium Heavy Duty
PRO65
Sold with refundable core deposit.Price: $ 299.21 -
 17
17Detroit Diesel Injector N70 - rebuilt - Premium Heavy Duty
PRO70
Sold with refundable core deposit.Price: $ 299.21 -
-
-
-
-
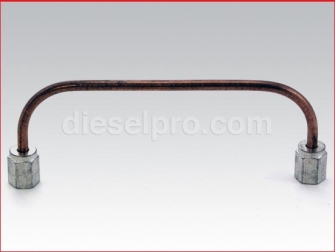
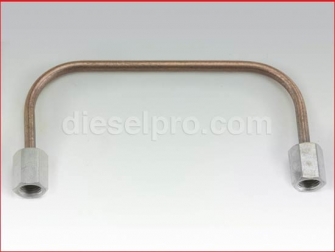
 22
22Detroit Diesel Fuel Line (Short) for Series 71 and 92
5111526
Short. Each engine uses short and long fuel lines
Price: $ 12.65 -
 23
23Detroit Diesel Fuel Line (Long) for Series 71 and 92
5111527
Long. Each engine uses short and long fuel lines
Price: $ 13.38 -
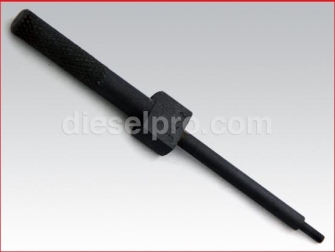
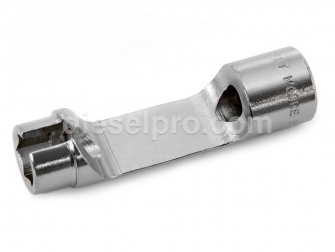 24
24Socket To Install & Remove Injector Fuel Lines For Detroit Diesel 53, 71, 92
J8932B
.Price: $ 154.53 -
-
-
-
 28
28Detroit Diesel Primary fuel filter base
5148023
For spin on filter type - 1 inch thread
Price: $ 148.03 -
-
-
 32
32Detroit Diesel Secondary fuel filter base
5148171
For spin on filter type - 3/4 thread
Price: $ 140.95 -
 33
33Detroit Diesel Elbow
8924161
45 degree Inverted flare elbow - with no restriction - 1/4 X 3/8
Price: $ 23.22 -
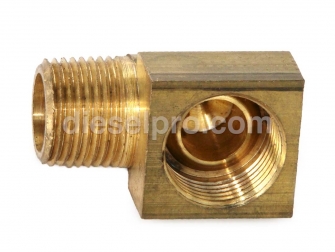 34
34Detroit Diesel Suction Elbow for Engine
8924155
Fuel pump 90 degree Inverted flare elbow - with no restriction - 3/8 x 1/2
Price: $ 20.99 -
 35
35Detroit Diesel Elbow for primary and secondary filter base
8925030
Filter base 90 degree inverted flare elbow - with no restriction - 3/8
Price: $ 13.20 -
-
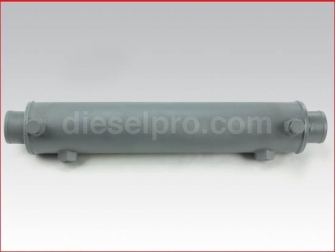 37
37Detroit Diesel Fuel cooler
5136348
2" water inlet and outlet, 3/8' fuel inlet and outlet
Price: $ 742.00 -
-
-
-
-
-
-
-
-
-
-
-
-
-
-
-
-
-
-
-
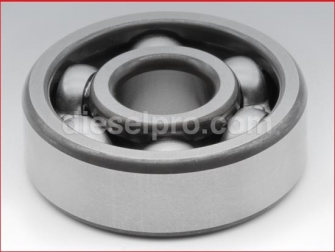
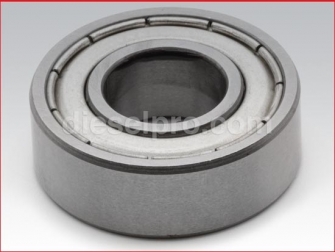 57
57Detroit Diesel Bearing for mechanical governor
9431896
Upper bearing for operating shaftPrice: $ 16.10 -
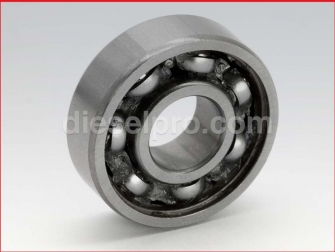 58
58Detroit Diesel Bearing for mechanical governor
9436682
Lower bearing for operating shaftPrice: $ 18.97 -
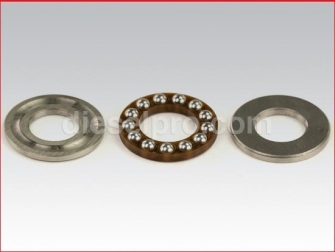 59
59Detroit Diesel Bearing for mechanical governor
9437108
Bearing for governor weights riserPrice: $ 42.40 -
 60
60Detroit Diesel Bearing for mechanical governor
9424121
Bearing for governor weights shaftPrice: $ 12.22 -
 61
61Fuel & Oil Pressure Switch - 5 PSI Make/Break
23520023
5 PSI make/break with 1/8 nptPrice: $ 95.81 -
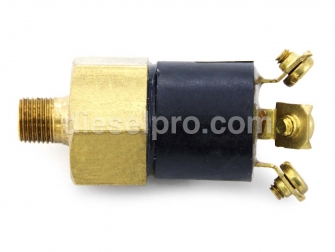 62
62Fuel & Oil Pressure Switch - 10 PSI Make/Break
23520024
10 PSI make/break with 1/8 nptPrice: $ 104.95 -
-
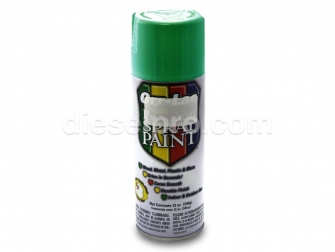 64
64Green Paint for Detroit Diesel Engines
26006
Available for ground shipping only in USA and CanadaPrice: $ 12.46 -
 65
65Detroit Diesel Fuel Gauge Sender for Diesel Engines
194SENDER
Adjusts up to 19" DepthPrice: $ 67.76 -
-
-
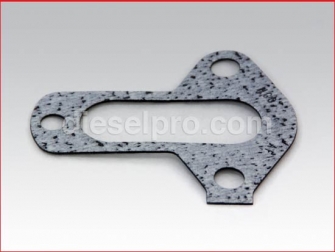
 68
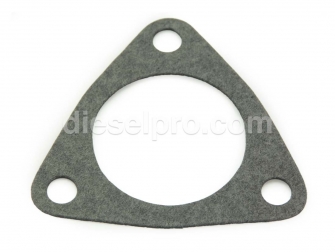
68Detroit Diesel Gasket for Hydraulic Governor Cover
3249110
For 53, 71 and 92 seriesPrice: $ 9.70 -
 69
69


Parts for Detroit Diesel 3-71 Non-Turbo (2-Valve Head) – Fuel Pump & Injector Section
Welcome to the most complete, buyer-focused catalog for Detroit Diesel 3-71 non-turbo (2-valve head) fuel pumps, injectors, and related components. This page is built for mechanics, fleet managers, and owners who want fast, confident part selection, clear install guidance, and reliable performance after the job is done. Every component below is curated specifically for the 3-71 non-turbo platform, with callouts where a part is also used across 53/71/92 Series engines. With 40,000+ satisfied customers worldwide relying on Diesel Pro Power, you can expect dependable parts, in-stock availability, and Detroit Diesel–trained support when you need it.
Engine Fitment & Section Overview
The Detroit Diesel 3-71 (often written “371” or “3-71”) is a three-cylinder, two-stroke workhorse running a unit-injector fuel system. In non-turbo 2-valve configuration, consistent fuel delivery, leak-free plumbing, and accurate injector timing are the keys to crisp starts, smooth idle, clean exhaust, and long service life. This section is organized to mirror the way professionals plan a repair:
-
Fuel Pumps (Left-Hand / Right-Hand; New & Rebuilt)
-
Fuel Pump Service (Repair Kits, Seals, Couplings, Elbows, Bypass Valve)
-
Injectors (HV6, HV7, N-Series Calibrations) & Injector Sub-Components
-
Injector Timing Tools (1.460 / 1.484 / 1.508)
-
Fuel Plumbing & Filtration (Lines, Washers, Spin-On & Cartridge Bases, Filters)
-
Fuel Conditioning (Coolers, Water Separators & Elements)
-
Governor-Related Hardware (Gaskets, Bearings, Springs, Fasteners)
-
Installation Tips, Break-In, and Troubleshooting
If you’re rebuilding a complete 3-71 fuel and injection system, move through each subsection in order—this mirrors best practice in the field and reduces rework.
Fuel Pumps for 3-71 Non-Turbo
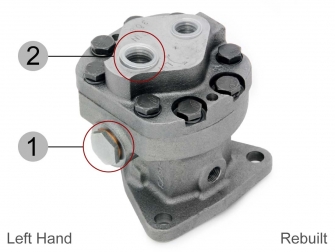
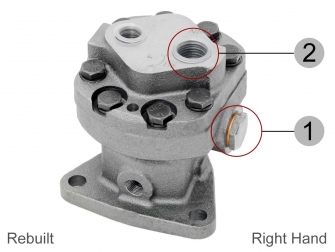
Choosing Left-Hand vs Right-Hand Fuel Pumps
Detroit two-strokes use left-hand (LH) or right-hand (RH) fuel pumps. Selection is determined by pump drive orientation relative to engine rotation and installation. If you’re replacing an existing pump, match the hand of the pump you remove. If the original is missing:
-
Inspect the pump drive gear and mounting position.
-
Confirm orientation relative to the blower and accessory drive.
-
If uncertain, contact our Detroit Diesel–trained team; a few photos of your setup (pump pad, gear, and mounting boss) will let us confirm the correct hand quickly.
Selecting correctly ensures proper internal rotor operation and stable pressure across the rack range.
Rebuilt vs New – What’s Best For You?
-
Rebuilt Pumps (LH & RH)
Rebuilt units are professionally remanufactured to marine/industrial standards and priced for fleets and owner-operators who want top value. These are sold with a refundable core deposit to keep the reman program stocked with OEM cores. Each unit is bench-tested for pressure stability and leak integrity. -
New Pumps (LH & RH)
New pumps are a good fit when uptime is critical or when your old core is missing/damaged. They deliver out-of-box consistency and are a popular choice for vessels and standby power where planned maintenance windows are tight.
Pro tip: If your 3-71 has chronic low-power or smoky starts, don’t just swap injectors—verify pump output and internal bypass function first. Weak pumps can masquerade as “bad injectors.”
Fuel Pump Service Components
Fuel Pump Repair Kit (Universal LH/RH)
A comprehensive repair kit allows you to reseal and refresh a serviceable pump body, saving time and money when the casting and internal surfaces are in good condition. Use this kit to correct seepage, minor leaks, or erratic pressure caused by worn soft parts. Ideal for preventive maintenance during a scheduled shutdown.
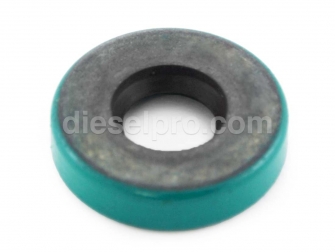
Fuel Pump Shaft Seal
The pump shaft seal is small but mission-critical. A hardened, nicked, or heat-checked seal can lead to fuel dilution of crankcase oil or external leakage. Replace anytime the pump is removed or when you see weepage around the drive area. Always inspect the shaft surface and bushing—if there’s scoring, correct the root cause before installing a new seal.
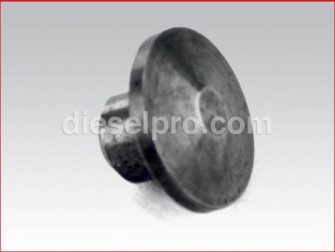
Fuel Pump Coupling & Fork
The fuel pump coupling connects the pump to its drive, and the coupling fork positions and secures the connection. Worn splines or looseness can cause pulsation, noise, and pressure fluctuations at higher rack settings. If you’re installing a new or rebuilt pump, inspect and renew these parts to protect your investment.
Elbows & Fittings (Suction, Discharge, Filter Base)
We stock inverted-flare elbows (45° and 90°) with no internal restrictions in the correct thread sizes for 71-Series plumbing. Replacing “mystery fittings” with the right non-restrictive elbows prevents unintentional starvation or aeration. Pair elbows with new sealing washers to eliminate “slow weepers” that attract dirt and cause soft hose degradation.
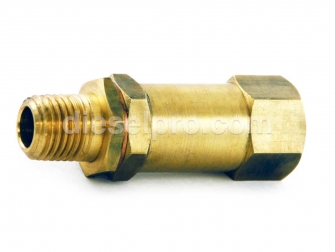
Fuel Bypass Valve
The bypass valve regulates return flow and helps establish stable fuel gallery pressure. A sticking or weak valve can create hard-start, tip-in smoke, or surging under load. Replace it whenever you overhaul the pump or chase irregular rack response.
Injectors for the 3-71 Non-Turbo
Detroit’s unit injectors meter and atomize fuel under cam-driven pressure. For the non-turbo 3-71 (2-valve head), popular calibrations include HV6, HV7 and N-Series settings such as N55, N60, N65, N70. Choosing the correct set preserves driveability, exhaust temperature, fuel economy, and engine life.
Rebuilt HV-Series Injectors (HV6 / HV7)
-
HV6: Balanced for steady idle and clean midrange on non-turbo applications with conservative fueling.
-
HV7: Slightly higher fueling curve for applications needing a bit more pull within safe EGT limits.
Both are available as rebuilt premium heavy-duty units with a refundable core deposit. Each injector is flow-tested and pattern-checked. When replacing a single injector, be sure the remaining set is healthy; mixing very different wear states can introduce roughness.
Rebuilt N-Series Injectors (N55 / N60 / N65 / N70)
-
N55: Conservative fueling—great for longevity, steady genset duty, and low-smoke operation.
-
N60: A popular “do-everything” setting; solid torque without excessive smoke.
-
N65: For slightly heavier work—watch cooling system health and exhaust temps.
-
N70: Highest of the common non-turbo settings listed here; requires excellent cooling, clean air intake, and healthy exhaust flow to keep EGTs in check.
When stepping up from N55/N60 to N65/N70, evaluate blower condition, air cleaner restriction, and exhaust backpressure. Fuel without air is a recipe for soot and elevated thermal stress.
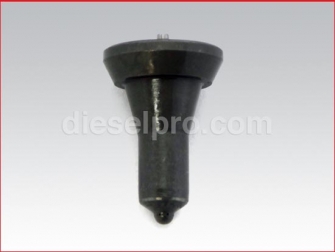
Injector Sub-Components (Tips, Plungers, Springs & Seats)
Refreshing injector internals restores spray quality and metering precision.
-
Injector Tips (for N55, N60, N65, N70/N75): New tips recover atomization and pattern symmetry, preventing wall-wetting and carbon buildup on pistons and valves.
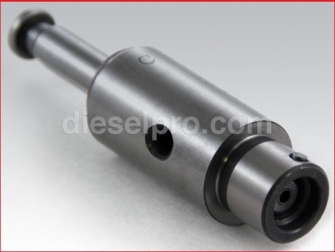
-
Plungers (N55, N60, N65, N70): New plungers correct leakage past the plunger/barrel interface that robs effective pressure.
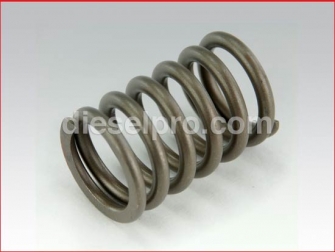
-
Valve & Spring, Spring Seat: Maintains crisp closing, stable needle control, and consistent pop behavior. If you’re experiencing idle haze, delayed response, or “hunting,” these pieces are inexpensive insurance.
Best practice: If injectors show uneven balance or if hours are high, replace or rebuild the full set to keep all cylinders contributing equally.
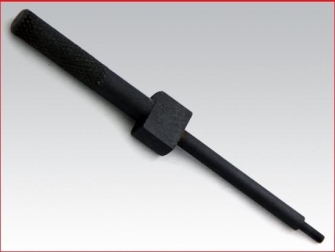
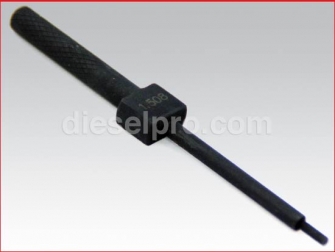
Injector Timing Tools (1.484 / 1.460 / 1.508)
Correct injector timing is non-negotiable on a Detroit two-stroke. Use the specified timing height gauge for your injector series:
-
1.484 Tool: Commonly used with HV6 and higher-flow injectors like N65/N80 in certain setups.
-
1.460 Tool: Used with HV7, and N45-N90 families depending on spec.
-
1.508 Tool: Alternate setting tool used where the service manual calls for this height.
How to time (high-level):
-
Bring the target cylinder to the correct timing position following Detroit’s firing order and cam gear marks.
-
Install the appropriate timing gauge between the injector follower and the injector body as directed.
-
Adjust the injector rack screw until the gauge just “kisses”—no lash, no preload.
-
Lock it down, then verify rack travel and move to the next cylinder per the sequence.
-
After timing all injectors, set rack synchronization and verify full-travel freedom.
If you’re replacing injectors and fuel pump at the same time, time the injectors last, after confirming stable pump pressure.
Fuel Lines, Washers & Specialty Tools
Fuel Jumper Lines (Short & Long) for 71/92
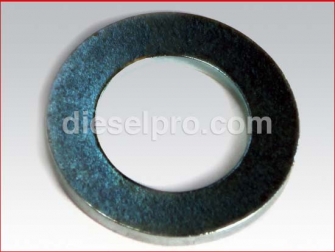
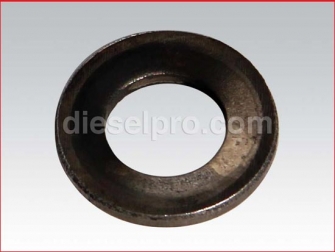
The 3-71 uses paired short and long jumper lines per injector bank. Replace lines that are cracked, kinked, or pitted. Always use new fuel pipe connector washers to prevent flare leaks. Old copper can harden and fail to seal even when “tight.”
-
Washer, Fuel Pipe Connector: Use two per injector—don’t reuse.
-
Dedicated Socket for Injector Fuel Lines: The correct crowfoot/box geometry helps you torque without rounding or twisting the line.
Single-Injector Fuel Line
We also stock individual fuel lines per injector—handy when you’re replacing one damaged section after a mishap during teardown or when a clamp has fretted a groove into the tube.
Filtration & Filter Bases
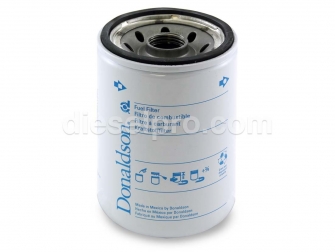
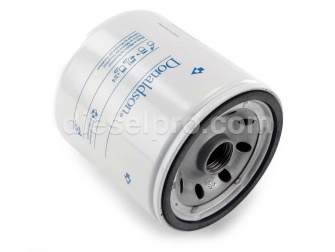
Spin-On Conversion (Primary & Secondary)
Many operators modernize to spin-on filter bases for quicker, cleaner service. We carry:
-
Primary Filter Base (Spin-On, 1" thread) with matching spin-on elements.
-
Secondary Filter Base (Spin-On, 3/4" thread) with complementary elements.
Reasons to convert:
-
Faster changes reduce air ingestion risk.
-
Better media availability across ports worldwide.
-
Cleaner work areas—less fuel spillage vs. old bowls.
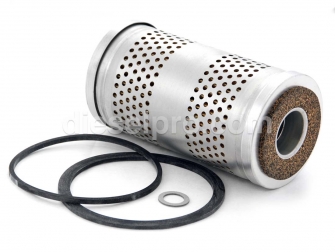
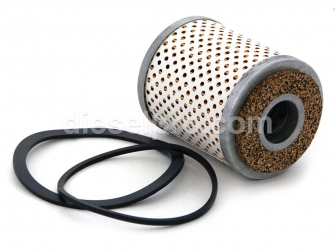
Cartridge-Type Filters (Primary & Secondary)
Prefer to retain original cartridge style? We stock primary and secondary cartridge elements sized for classic 3-71 housings. Cartridge systems are proven and durable when serviced carefully.
Service tip: Pre-fill the primary (not the secondary) with clean diesel to speed priming. Keep the secondary dry to let the media catch initial fines during restart.
Fuel Conditioning: Coolers & Water Separation
Fuel Cooler
A dedicated fuel cooler stabilizes fuel temperature on engines running high return flow or operating in warm ambient or enclosed rooms. Cooler fuel maintains density and lubricity, supporting consistent injector calibration and longer pump life. This is especially valuable for continuous-duty applications or marine engine rooms with limited ventilation.
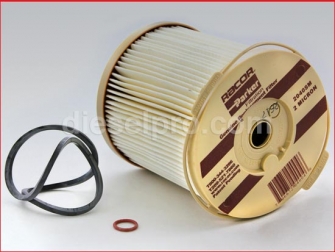
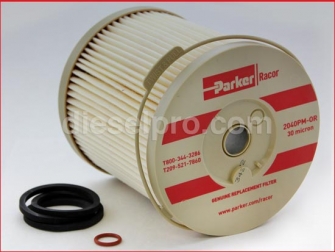
Racor-Style Water Separator & Elements
Water is the enemy of precision fuel systems. A fuel/water separator ahead of the primary filter captures free water before it reaches the pump. Choose element micron ratings based on your environment:
-
30 micron (red top style) for bulk separation in dirty or high-water risk fuel.
-
2 micron (brown top style) when polishing or operating in exceptionally clean fuel environments.
Always drain the bowl at regular intervals—more often after rough weather or heavy tank slosh in marine and mobile applications.
Governor-Related Gaskets, Bearings & Springs
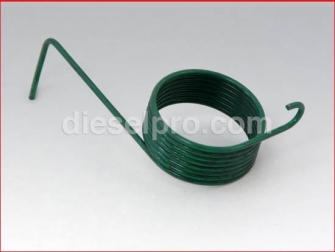
Smooth rack control depends on a healthy governor. If you feel creeping idle, inconsistent rack return, or sluggish transient response, refresh the governor cover gasket, operating-shaft bearings (upper/lower), weights-riser bearing, and weights-shaft bearing. Replace buffer-screw hardware and verify spring condition in the injector control tubesystem. Small clearances and fresh bearings pay big dividends in rack stability and emissions.
Accessory Components & Helpful Extras
-
Fuel & Oil Pressure Switches (5 PSI & 10 PSI make/break)
Use these as safety interlocks for alarms/shutdowns or to confirm lube/fuel pressure on start. Correct threading and switching logic (make/break) matter—match your harness and control logic. -
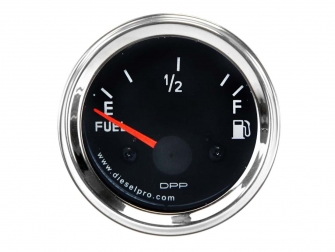
Fuel Gauge & Sender (12V)
Keep a trustworthy read on tank level. The adjustable sender fits a broad range of tank depths, and the backlit gauge integrates neatly into common marine/industrial panels. -
Detroit Green Engine Paint
After a top-end or fuel-system refresh, sealing and coating cleans up the job and helps spot leaks quickly during inspection. -
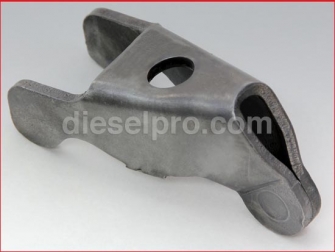
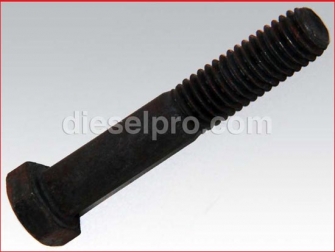
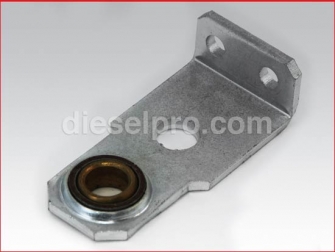
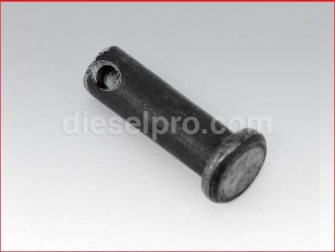
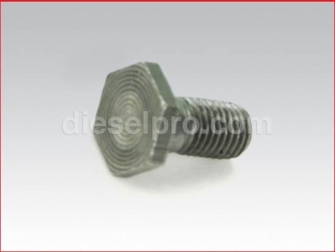
Injector Brackets, Washers, Bolts
Don’t gamble on fatigued fasteners or bent brackets. Rack hardware alignment affects injector and control tube geometry—replace questionable pieces. -
Elbows for Filter Bases
Dedicated 90° inverted-flare elbows sized for Detroit filter bases help you route lines cleanly and avoid tight bends that can cavitate or chafe.
Core Deposit & Return (For Rebuilt Pumps & Injectors)
Rebuilt fuel pumps and injectors are supplied with a refundable core deposit. To keep your costs low and the reman program healthy:
-
Save all cores during removal.
-
Cap open ports to keep dirt and moisture out.
-
Return promptly using the instructions provided.
-
Send OEM-equivalent cores in rebuildable condition (no cracked housings, no destroyed threads).
If you’re unsure whether your core qualifies, snap a few photos—our team will confirm before you ship.
Installation & Commissioning Checklist
Use this concise checklist to avoid the most common post-service issues:
Before You Start
-
Verify you have the correct pump hand (LH or RH).
-
Confirm injector calibration (HV6, HV7, N55/N60/N65/N70) matches your application and goals.
-
Replace fuel lines, washers, and elbows that show age, pitting, or distortion.
-
Choose your filtration strategy (spin-on vs. cartridge) and stage the right elements.
-
Inspect the governor bearings and control tube spring if the rack felt sticky pre-repair.
During Installation
-
Mount pump with new gasket and shaft seal as needed; align coupling and fork without forcing.
-
Set injector timing with the correct height tool (1.460 / 1.484 / 1.508), following the firing order and cam position procedures.
-
Tighten fuel lines using the proper socket to prevent twisting. Install new washers at each connection.
-
Route lines clear of sharp edges and hot surfaces; secure with cushioned clamps.
Priming, First Start & Break-In
-
Pre-fill the primary filter with clean fuel; prime the system per your manual.
-
Crank with fuel rack at idle and air supply unrestricted.
-
On first fire, watch fuel pressure, oil pressure, and water temp.
-
Allow the engine to warm at fast idle, then step into light load.
-
Inspect for leaks, re-torque line nuts if required, and check that rack movement is smooth.
After 2–10 Hours
-
Re-inspect all connections, gasket joints, and elbows.
-
Verify smoke profile under throttle transitions; excessive haze may indicate mistimed injectors, air ingestion, or a weak bypass valve.
-
Confirm filter delta-P and consider a second filter change if you cleaned a contaminated tank.
Troubleshooting Quick Guide
Hard Start After Injector Replacement
-
Air in lines or filters; reprime and verify elbow tightness.
-
Incorrect timing tool used; re-check height specification.
-
Weak pump or sticky bypass valve; test pressure at the gallery.
Surging/Uneven Idle
-
Mismatched injectors by wear state or calibration.
-
Governor bearings worn; renew upper/lower and riser bearings.
-
Control tube spring fatigued; replace.
Black Smoke Under Load (Non-Turbo)
-
Oversized injector calibration for current air supply (dirty air cleaner, tired blower).
-
Exhaust restriction or incorrect muffler.
-
Fuel pressure low; verify pump output and bypass valve function.
Fuel Smell in Oil
-
Pump shaft seal compromised—replace seal and inspect shaft/bushing.
-
Persistent leakage at line flare; renew line and washers.
Recurring Line Leaks
-
Reused washers or damaged flare seats; replace affected hardware.
-
Vibration/chafe—add clamps, reroute for gentle sweep radii.
Buyer’s Guide: Matching Injectors to Your 3-71 Use Case
-
Standby Genset / Light Industrial: HV6 or N55 for clean idle, low smoke, and excellent fuel economy.
-
Material Handling / Yard Tug / Moderate Mobile Duty: N60 offers a noticeable bump without pushing EGTs.
-
Heavier Industrial / Marine Workboat (Non-Turbo): N65 can work well with pristine cooling and intake/exhaust systems.
-
Maximum Non-Turbo Fueling Listed Here: N70 requires special attention to cooling, air filtration, and exhaust path—best for experienced operators who monitor temps closely.
When in doubt, choose the more conservative injector—you can always step up later. Good air, good fuel, and good timing beat “more fuel” every time on a non-turbo Detroit.
Why Diesel Pro Power?
-
Everything in one place: From complete fuel pumps and premium rebuilt injectors to the smallest elbow, washer, or spring seat.
-
In-stock, ready to ship worldwide: Real-time tracking keeps you informed.
-
Detroit Diesel–trained support: Get fitment answers fast (pump hand, timing tool, injector selection, filter conversions).
-
Proven quality: Components meet or exceed OEM specifications for industrial and marine duty.
-
Trusted reputation: 40,000+ satisfied customers across commercial, military, and private fleets rely on Diesel Pro Power.
If you need photos verified or want us to check your parts list, reach out—our team handles 3-71 packages every day.
Quick Part-Picking Map (This Page’s Items)
-
Fuel Pumps: Left-Hand (rebuilt/new), Right-Hand (rebuilt/new)
-
Pump Service: Repair kit, pump seal, coupling & fork, elbows (suction, discharge, filter base), fuel bypass valve
-
Injectors: HV6 rebuilt, HV7 rebuilt, N55/N60/N65/N70 rebuilt
-
Injector Internals: Tips (N55–N75), plungers (N55/N60/N65/N70), injector valve & spring, spring seat
-
Timing Tools: 1.460, 1.484, 1.508 gauges
-
Lines & Hardware: Fuel line per injector, jumper lines (short/long), washers (two per injector), dedicated line socket, injector bracket, injector washers & bolts
-
Filtration: Spin-on bases (primary/secondary) + matching spin-ons; cartridge-type primaries/secondaries
-
Fuel Conditioning: Fuel cooler; water separator with 2-micron and 30-micron elements
-
Governor Support: Gasket for mechanical/hydraulic covers; governor bearings (operating-shaft upper/lower, weights riser, weights shaft); buffer-screw nut; injector control tube spring
-
Monitoring & Finish: Fuel/oil pressure switches (5 / 10 PSI), fuel gauge & sender (12V), Detroit green paint
Pro Installation Tips from the Field
-
Label Everything: During teardown, tag each line and fitting. Crossed jumper lines will create maddening symptoms.
-
Dry-Fit First: Position lines and elbows loosely, then snug in stages to avoid pulling a flare off-center.
-
Use the Right Wrench: The injector fuel line socket avoids flare distortions and finish damage.
-
Never Reuse Copper Washers: They’re cheap; your time is not.
-
Set Timing Cold: Metal growth is minimal; verify again at temperature if chasing a precision issue.
-
Rack Sync: After timing, verify equal rack travel. A single sticky segment can mimic injector imbalance.
-
Document Settings: Note injector calibration and timing tool used on a tag for the next tech.
Maintenance Interval Suggestions
-
Fuel Filters: Inspect at 100 hours initially (or monthly). Replace sooner for suspect fuel.
-
Water Separator: Drain weekly in marine/mobile duty; daily in humid or rough-sea conditions.
-
Fuel Lines & Washers: Inspect every service; replace any line with corrosion, fretting, or kinks.
-
Injector Balance: At seasonal layup or every 1,000 hours, evaluate idle quality and do a cylinder cutout test.
-
Governor Bearings: Inspect during any rack/timing service; replace if you feel grit or play.
When to Upgrade or Convert
-
Spin-On Filters: If your team performs frequent service or you operate in tight spaces, spin-on bases pay for themselves quickly.
-
Higher-Flow Injectors: Only after intake, exhaust, and cooling systems are verified perfect. Monitor EGTs closely.
-
Fuel Cooler: Recommended for constant-duty, warm-ambient rooms, or return-flow-heavy configurations.
Environmental & Storage Considerations
-
Fuel Quality: Use stabilized, water-free diesel to reduce microbial growth and varnish.
-
Hose Materials: Ethanol-contaminated fuel from mixed facilities can attack elastomers; source clean diesel from reputable vendors.
-
Layup: Fog cylinders, top up treated fuel, and cycle the rack periodically to prevent varnish sticking.
Need Help Confirming Fitment?
Email a few clear photos of your fuel pump pad, drive gear, and existing plumbing. Tell us your injector calibration(stamped on the injector) and any symptoms you’re chasing. We’ll validate the correct pump hand, timing tool, injector set, and plumbing pieces for your exact 3-71 non-turbo, 2-valve setup.


