

 Free US Calls: 1-888-433-4735
 International: 305-545-5588


Parts for Detroit Diesel 8V71 Non-Turbo - Gasket Section
 Loading...
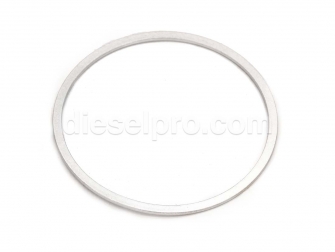
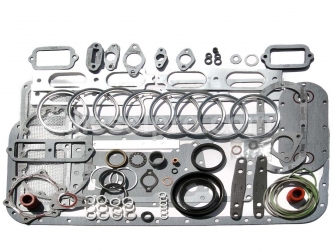


Parts for Detroit Diesel 8V71 Non-Turbo – Gasket Section
The Detroit Diesel 8V71 non-turbo (naturally aspirated) is a workhorse of the two-stroke 71-series family. Keeping one dry, tight, and ready to run comes down to smart gasket selection and careful sealing practices—especially in marine, industrial, power-generation, and coach applications where downtime is expensive and leaks are unacceptable. This catalog section focuses on the complete sealing story for the 8V71 non-turbo, organizing the components you see on the parts list above into clear use-case groups with practical guidance, troubleshooting cues, torque/installation best practices, and fitment tips. Some parts are shared with other 71/92-series or 53-series engines; when that’s true, you’ll see it called out as compatibility context—but the recommendations here remain squarely focused on the 8V71 NA platform.
Gaskets for Cylinder Head & Upper Engine (8V71-Focused)
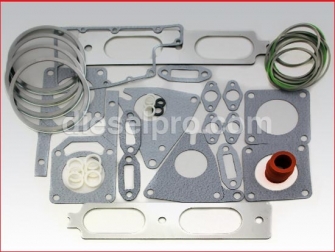
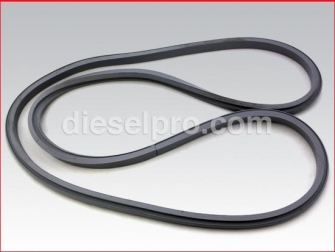
Head gasket kits (8V71 uses two kits per engine)
A head gasket’s job on a two-stroke Detroit is tougher than many four-stroke platforms because you’re sealing combustion pressures while also managing scavenge air passages and coolant galleries across relatively large mating surfaces. If you’re addressing any of the following, consider replacing the full head gasket set on the bank you touch:
-
Persistent coolant loss with no visible external leak (possible gasket seep into a cylinder)
-
Oil in coolant or coolant in oil (cross-contamination pathways often trace to head gasket failures or surface flatness issues)
-
Bubbles in the heat exchanger or surge tank with the engine under load (combustion gas intrusion into cooling system)
-
Chronic misfire on one or two adjacent cylinders that compresses fine when cold but degrades hot
Preparation & installation notes
-
Surface prep: Deck and head surfaces must be clean, flat, and free of old material. Use plastic scrapers and approved solvent; avoid aggressive abrasives that can dish aluminum rocker boxes or alter surface RA.
-
Dry vs. coated: Follow the kit’s instructions. Many Detroit head gaskets are installed dry; don’t apply RTV around coolant holes unless the service manual or kit sheet instructs you to.
-
Torque sequence: Always follow the Detroit V-pattern, working from the center outwards in stages. Re-torque after heat cycling if your service procedure calls for it.
Rocker cover (valve cover) gaskets—new style vs. old style
The 8V71 used both stamped-steel and aluminum rocker covers across its service life. The new-style gray rubber gasket is designed for aluminum covers, offering superior elasticity, crush recovery, and reusability when the cover is pulled for overhead work. The old-style black rubber gasket matches stamped covers and provides solid sealing when the cover rails are straight and bolt holes are flat. If you see gasket “squeeze-out,” seepage at the corners, or oil wicking along fastener threads, evaluate cover flatness and consider upgrading to the new-style system when appropriate.
Rocker cover hardware & kits
Where listed as a kit, you’re getting the correct profile gasket and the small seals that live under fastener heads or at the breather. This prevents slow weeps that make a clean engine grimy over time.
Crankshaft Seals & Sleeves (Front & Rear)
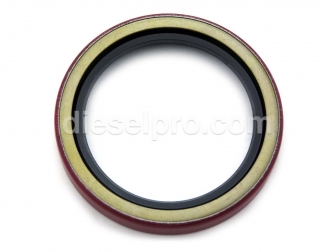
Front crankshaft seal—standard, universal rotation
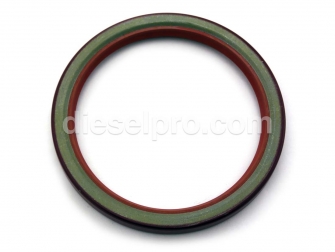
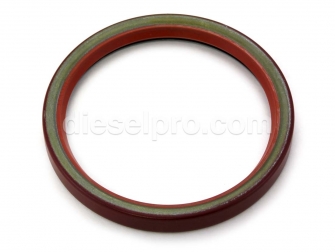
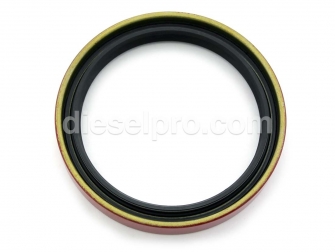
On the 8V71 NA, the front main seal lives a hard life due to accessory belt spray, salt-laden air (marine), and fine dust (industrial). Symptoms of front seal wear include oil mist around the crank pulley or sling patterns on adjacent covers. A fresh standard, universal-rotation seal restores a crisp lip and proper tension.
Rear main seals—single-lip and double-lip, standard and oversize
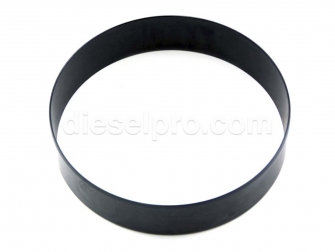
Rear leaks can masquerade as oil pan gasket issues. If you’re seeing drips at the bellhousing drain or oil traces inside the flywheel housing cover, inspect the rear main. Double-lip designs provide extra insurance on older crank surfaces; oversize variants are designed to run on a wear sleeve or a slightly larger journal diameter when wear dictates. Pair the correct seal with the recommended rear sleeve when the crank surface shows grooving—this relocates the lip to an unworn land and helps the new seal live longer.
Installation best practices
-
Dry press: Most Detroit lip seals install dry on the OD with a light oil film on the lip—confirm with the specific seal’s instructions.
-
Alignment: A proper driver keeps the seal square; cocked seals will fail early.
-
Breather function: A restricted crankcase breather will spike case pressure and push oil past new seals. Verify breather condition any time you service mains.
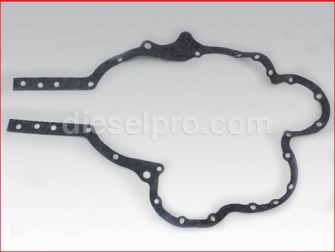
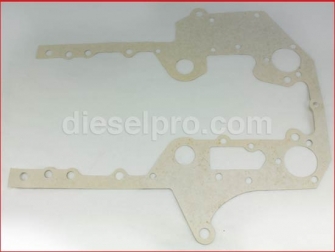
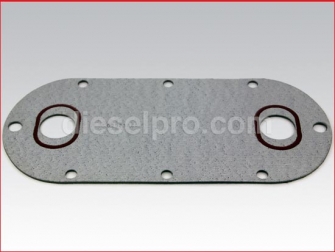
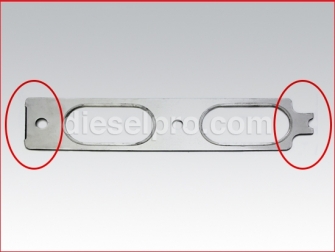
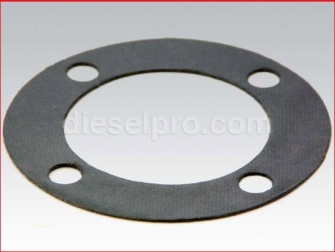
Front & Rear End-Plate Gaskets
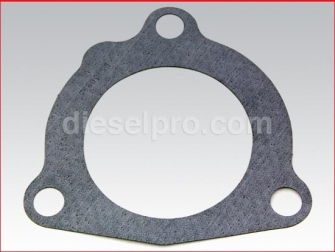
Front end-plate & rear end-plate gaskets
These gaskets sit between the block and the timing/flywheel end plates. Small seeps here migrate and can be mistaken for pan leaks. When changing the front or rear crank seal, examine the adjacent plate joints. If there’s any weeping at the seams, replace the plate gasket while you’re in there. Clean mating faces thoroughly and use the specified torque on all plate fasteners to avoid wave-induced leaks.
Flywheel Housing & Transmission Interface (Marine & Industrial)
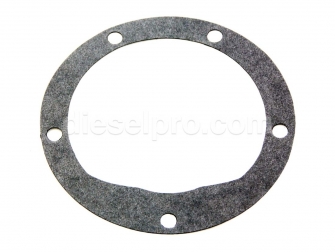
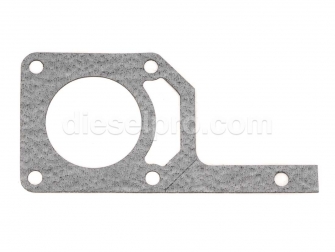
Flywheel housing gasket (V71/V92)
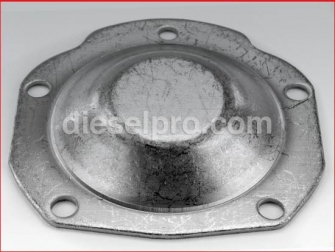
Mounted between the end plate and flywheel housing, this gasket keeps engine oil out of the bellhousing. If the inspection cover reveals oil fogging but the rear main seal looks good, this housing gasket may be the culprit.
Flywheel housing cover (large cover)
The inspection cover’s gasket and the cover itself need to be sound to maintain cleanliness and to quickly spot new leaks. Replace a warped or bent cover and refresh its gasket if you see weeping at the fasteners.
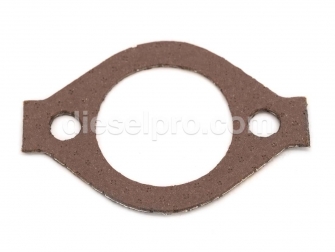
Allison marine gear interface gasket (SAE 2)
Many 8V71 non-turbo marine packages were paired with Allison M/MH marine gears. The flywheel housing-to-transmission gasket for SAE #2 is the common match. Replace this anytime the gear is removed or if you observe ATF traces where there should be only engine oil, indicating gasket failure or misalignment. Always confirm your housing size before ordering.
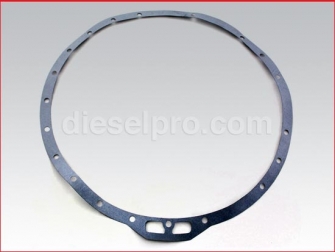
Oil Pan & Lubrication System Sealing
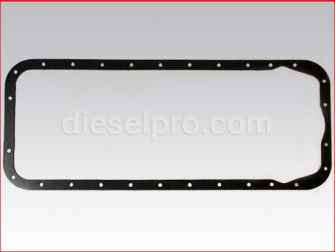
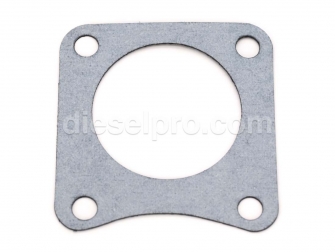
Oil pan gasket (8V71/8V92)
A pan leak can look like everything else—until you clean, run, and re-inspect. The pan gasket is a straightforward replacement if you’re already under the engine. Watch the corners near the rear main cap and around any pan rail dings. Straighten bolt holes (gently) before reinstalling so the gasket crushes evenly.
Oil cooler gaskets
The 8V71 uses oil cooler gaskets at the core interfaces. A failing gasket can show up as external oil weeping, oil in coolant (or vice-versa), or temperature control issues. Any time the cooler is disturbed for cleaning or replacement, plan on fresh gaskets and a careful re-torque after the first warm-up.
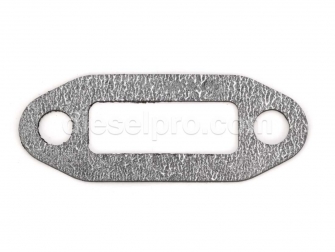
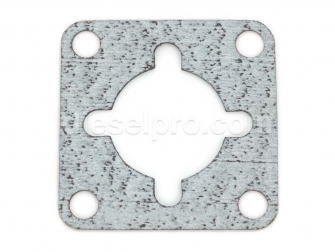
Oil filter adaptor gasket
Slow weeps around the adaptor add up to oily bilges or stained bays. Replace the adaptor gasket if you see halo patterns after wipe-downs. Clean the adaptor pad thoroughly and ensure no old paper remains.
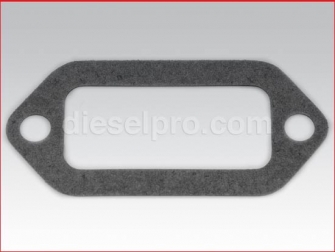
Fuel pump / water pump gasket
When you remove engine-mounted pumps for service, always have the correct thin gaskets on hand. Reusing flattened paper gaskets is a top cause of post-service drips.
Cooling System & Marine Water Pump Interfaces
Water manifold (water rail) gasket
The water rail manifold distributes coolant along the heads. Gasket condition matters for even temperature control. If you’re chasing hot cylinders or see chalky deposits at the rail joints, refresh these gaskets.
Thermostat housing cover gasket & block water-outlet gasket
Aging thermostat cover gaskets seep at the seam and can aerosolize a fine coolant mist. The block water-outlet gasket also deserves attention during heater/auxiliary plumbing work—replace both together when the system is open.
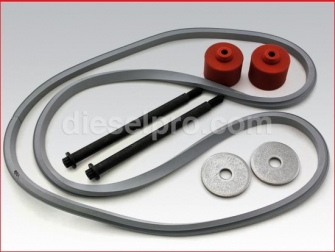
Marine raw water pump gaskets (mounting, plate, in/out)
Raw water pumps see significant vibration. Their mounting gaskets, back-plate gaskets, and inlet/outlet port gaskets should be replaced whenever the pump is removed or rebuilt. Using fresh paper at each joint maintains suction integrity (reducing aeration and cavitation) and keeps saltwater out of your bilge. Many pumps use two identical port gaskets—one for inlet, one for outlet.
Heat exchanger gasket kit (marine-focused)
On marine 8V71s, the heat exchanger’s end-cap and divider gaskets grow brittle over time. Rebuilds are the perfect opportunity to reseal these interfaces. If you’re finding green/white scale at the end bells, plan on a kit plus proper cleaning and pressure testing.
Exhaust & Manifold Interfaces (8V71 Non-Turbo)
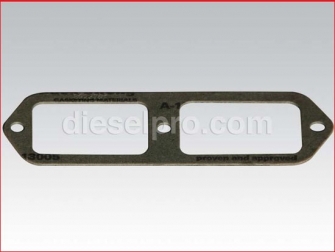
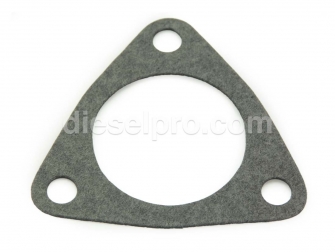
Cylinder head-to-exhaust manifold gaskets
The naturally aspirated 8V71 relies on crisp exhaust sealing to maintain scavenge efficiency and prevent sooting of the engine space. Replace any gasket that shows blow-by streaks (black trails) or if the manifold has been off for surfacing. After installation, re-check torque after a few heat cycles.
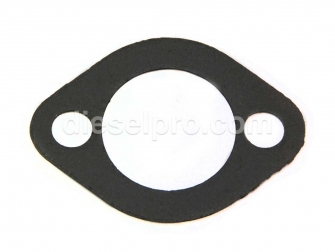
Marine manifold flange & flange-spacer gaskets
Where a marine riser or elbow meets the manifold flange, the correct gasket seals exhaust gases and protects against salt spray. Spacer interfaces often need their own specific gaskets; confirm OD/ID dimensions before ordering. Any rust tracks or salt crystals at the joint mean it’s time to renew.
Manifold insulation tape
Although not a gasket, wrap helps manage heat in tight engine rooms and protects nearby wiring/hoses. If you’re refreshing manifold joints, it’s a good time to renew thermal protection.
Air System: Blower Installation Gasket Kit (Natural Engines)
The 8V71’s Roots-type blower is the heart of its scavenging system. Even on the non-turbo engine, small air leaks at the blower base or end plates translate directly into poor idle quality, hazy exhaust, hard starting, and reduced power. The blower installation gasket kit for natural engines covers the sealing points when you remove/replace the blower. Use the correct kit for non-turbo builds, torque to spec, and verify the drive coupling alignment to avoid premature wear.
Governors & Controls
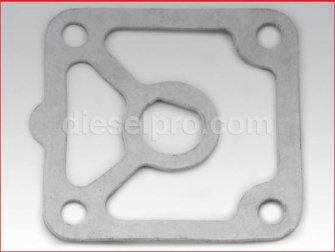
Hydraulic governor gaskets (body & cover) and spring/top cover gaskets
Governor service—cleaning, resealing, or calibration—should always include fresh gaskets between the governor and its drive, and under the covers. Oil weeping around the governor housing can collect dirt and eventually contaminate linkages. Replace both the governor-to-drive gasket and the top/spring cover gaskets any time the unit is opened.
Starter & Ancillary Seals
Starter gasket
Oil seepage at the starter adapter is a classic “mystery leak” that ends up dripping from the lowest point of the starter. If you pull the starter for service, install a new gasket on reassembly.
Front Cover & Plate Interfaces
Front end-plate gasket
Living between the timing end plate and block, this gasket prevents oil migration at the front of the engine. It’s wise to replace the plate gasket whenever the front cover is off for seal work.
Front crankshaft seal (standard, single-lip options)
Combine the correct front seal with a fresh plate gasket if you see oil fogging on the inside of the front cover.
Flywheel-Side Sealing & Inspection
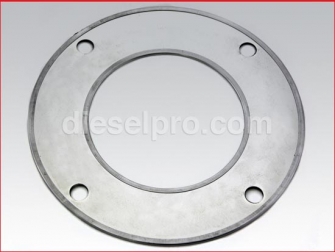
Rear end-plate gasket
If oil collects inside the flywheel housing but the rear main is good, suspect the plate gasket. Clean mating surfaces thoroughly and use a measured torque sequence.
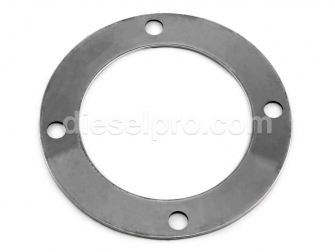
Flywheel housing cover
A good cover and gasket keep the bellhousing tidy and allow quick inspection for fresh leaks. Replace damaged covers and always fit a new gasket.
Rocker Cover Kits & Details
New-style gray rubber vs. old-style black rubber
Match your cover type to the gasket design. Aluminum covers pair with the gray profile; stamped covers use the black. Inspect cover rails for straightness, and never over-torque—crushing the gasket leads to early leaks and future rework.
Rocker cover kit for 71 & 92 series
Kits simplify ordering and ensure the small, easy-to-forget seals are included. If you’re servicing breathers or doing overhead adjustments, plan on a full kit so you reinstall clean and dry.
Cooling System: Thermostat & Water Rail
Thermostat housing cover
Replacing this gasket is inexpensive insurance any time the thermostat is changed. A clean seal here helps maintain proper fill levels and reduces coolant smell in the engine space.
Water rail manifold
Uniform sealing along the rail prevents micro-leaks that only show under temperature and pressure. After assembly, bring the engine to temperature, allow it to cool, and re-check fastener torque if recommended.
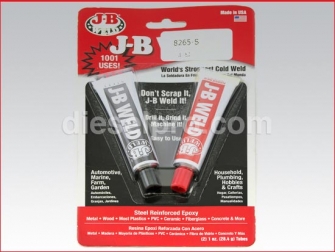
Consumables: Sealants, Threadlockers & Finishes
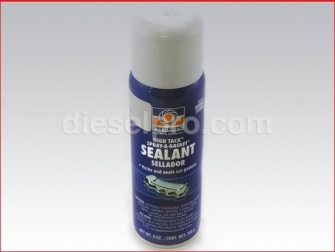
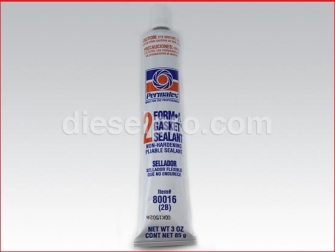
Gasket sprays and liquid sealants
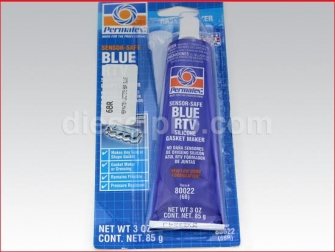
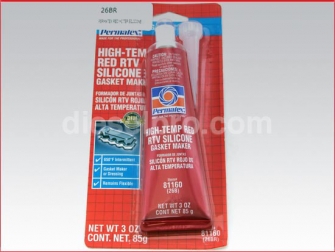
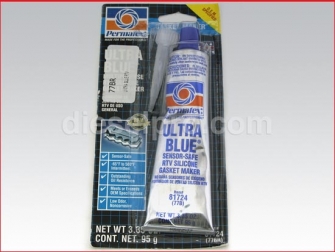
High-tack sprays can keep paper gaskets in place during assembly. Non-hardening sealants are ideal on threads that penetrate into oil or coolant passages, preventing wicking without creating future disassembly headaches. Sensor-safe RTV products belong on specified cover joints—never coat head gaskets or oil cooler gaskets unless the service sheet instructs you to.
High-temperature RTV
Use only where specified (certain exhaust or cover joints). Over-application can squeeze into passages; a thin, continuous film is correct.
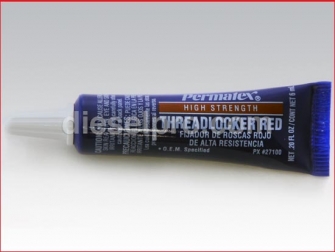
Threadlocker (red, high-strength)
Apply sparingly on fasteners subject to vibration where the service procedure allows it. Avoid on studs or fasteners you’ll routinely remove for maintenance unless specified.
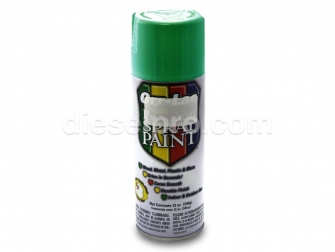
Engine paint (Detroit Green)
A fresh coat after gasket service does more than look good—it seals castings against corrosion and makes future leaks instantly visible.
Selection & Fitment Tips for the 8V71 Non-Turbo
Match the cover style
Identify whether your rocker covers are aluminum or stamped—and choose the new-style or old-style gasket accordingly.
Confirm lip type and size for rear seals
If the crank flange shows a groove where the old seal rode, step up to a double-lip or oversize + sleeve combination. This dramatically improves service life.
Replace in systems, not singles
If you’re servicing the raw water pump, replace the mounting, plate, and in/out port gaskets together. If you’re opening the heat exchanger, use the complete kit. System-level sealing eliminates “chasing” leaks from one joint to the next.
Mind torque and sequence
The 8V71’s large sealing surfaces demand proper sequence and staged torque. Use a calibrated wrench, follow center-out patterns, and re-check after heat cycles when called for.
Use the right sealant in the right place
Paper gaskets generally seal best clean and dry or with a very light bonding agent; RTV belongs only where specified. On threaded fasteners that break into fluids, a non-hardening sealant is usually best.
Keep breathers clear
Excess crankcase pressure will overpower fresh seals. Include breather inspection in any reseal job.
Clean, then diagnose
Degrease the engine, run it at operating temperature, then reinspect. Gravity and airflow can mislead you about leak origins; a clean baseline avoids unnecessary parts swaps.
Troubleshooting Common 8V71 NA Leak Points
-
Oil pan corners: Often mistaken for rear main leaks. Clean, observe, and check for pan-rail distortion.
-
Rear main vs. flywheel housing gasket: Oil inside the bellhousing doesn’t always mean the rear seal. Inspect the plate and housing gaskets too.
-
Rocker cover weeps: Check cover rail flatness and bolt grommets; upgrade to the correct gasket profile for your cover style.
-
Blower base: Idle haze and oily film around the blower? The base gasket may be leaking scavenge air and oil mist.
-
Oil cooler interfaces: Mixed fluids or temperature instability suggests cooler or gasket issues—pressure test and reseal.
Maintenance Intervals & When to Refresh Gaskets
-
At overhaul: Install complete head gasket kits, end-plate gaskets, pan gasket, cooler gaskets, and all front/rear seals.
-
At top-end service: Replace rocker cover gaskets and any disturbed coolant rail or thermostat gaskets.
-
At marine cooling service: Use a full heat-exchanger kit and renew raw water pump gaskets and mounting interfaces.
-
At drivetrain removal: Any time the gear or flywheel housing comes off, plan on fresh housing, cover, and interface gaskets.
Marine-Specific Notes for 8V71 NA Packages
-
Salt environment: Salt mist accelerates gasket aging—inspect exhaust flange and raw water interfaces more frequently.
-
Ventilation: Hot, humid engine rooms amplify oil vapor; crisp sealing and clean breathers keep bilges dry and safer.
-
Thermal cycling: Frequent short runs (harbor moves, docking) stress gaskets differently than long cruises—watch cover and flange joints for weeps.
Shop-Level Best Practices
-
Measure and record: Track fastener torque, flange flatness, and surface finish during service. Records help on repeat visits.
-
Use proper drivers: Seal drivers and alignment sleeves prevent lip damage and cocked installs.
-
Stage your parts: Have all related gaskets on hand before teardown to avoid reusing compromised paper in a pinch.
Parts Mapping: Where the Catalog Items Fit
-
Block, end-plates & housings: Front end-plate gasket, rear end-plate gasket, flywheel housing gasket, large flywheel housing cover, front & rear main seals (standard/double-lip/oversize) and sleeves.
-
Upper engine: Head gasket kits, rocker cover gaskets (new/old style), rocker cover kits.
-
Lubrication system: Oil pan gasket, oil cooler gaskets, oil filter adaptor gasket, fuel/water pump interface gaskets.
-
Cooling system (marine & engine): Water rail manifold gasket, thermostat cover gasket, block water-outlet gasket, marine raw water pump gaskets (mounting, plate, in/out), heat exchanger gasket kit.
-
Exhaust: Head-to-manifold gaskets, marine manifold flange and flange-spacer gaskets, insulation tape as needed.
-
Air & controls: Blower installation gasket kit (natural engines), governor body/cover gaskets, hydraulic governor cover gasket.
-
Ancillary: Starter gasket, engine paint, threadlocker, gasket sprays, liquid/non-hardening sealants, sensor-safe and high-temp RTV.
Ordering & Verification Checklist for the 8V71 NA
-
Identify rocker cover type (aluminum vs. stamped) → choose corresponding gasket style/kit.
-
Inspect crank sealing lands → choose standard vs. double-lip/oversize + sleeve as required.
-
Confirm flywheel housing size (SAE 2 is common for many marine 8V71s paired with Allison M/MH) before ordering the interface gasket.
-
For marine cooling service, order the full heat-exchanger kit and the raw water pump’s mounting/plate/port gaskets together.
-
If opening the blower base on a natural (non-turbo) 8V71, use the dedicated blower installation gasket kit listed in this section.
Why Buy Your 8V71 Non-Turbo Gaskets from Diesel Pro Power
Application-Driven Cataloging for the 8V71 NA
This page is written and organized for the Detroit Diesel 8V71 non-turbo—not a generic two-stroke catalog. You’ll find the exact head, cover, manifold, cooling, and drivetrain interfaces that techs service most often on this engine, with compatibility notes only where they help you finish the job right the first time.
Proven Fitment, Clear Use-Case Guidance
We group components by system and task—top-end refresh, rear main reseal, marine cooling service—so you get everything you need in one shot. Where the 8V71 shares a component design with another 71/92-series or 53-series interface, we say so plainly, but the focus remains on the 8V71 NA’s real-world needs.
Stock on Hand & Fast Fulfillment
From small paper gaskets to full head sets and double-lip rear seals, the goal is to have the parts you need in stock so your vessel, coach, or generator is back on the job quickly. Items in this section are curated for frequency of use and reliability.
Marine-Ready Options & Sealing Strategy
Bilge-friendly sealing is different: salt, heat, and vibration punish the weak links. This catalog highlights the marine interfaces that matter most on an 8V71 NA—raw water pump joints, exchanger gaskets, manifold flanges—so you can build a leak-free package tailored to your environment.
Knowledgeable Support
If you’re unsure whether your rocker covers are aluminum or stamped, debating single-lip vs. double-lip, or choosing the right sleeve/seal stack for a grooved crank, you can lean on experienced parts pros who understand Detroit two-strokes and the realities of maintaining a legacy 8V71.


