

 Free US Calls: 1-888-433-4735
 International: 305-545-5588


Parts For Detroit Diesel Series 60 11.1 Ltrs for Australia - Camshaft Section
 Loading...


Detroit Diesel Series 60 11.1L — Camshaft & Valvetrain Components Catalog
Welcome to the camshaft section dedicated exclusively to the Detroit Diesel Series 60 11.1-liter engine. This guide combines clear, application-specific explanations with practical installation insights so you can select the right parts, understand how they interact inside the engine, and complete repairs with confidence. Everything below is organized in the exact order of the catalog items you’ve provided.
How the 11.1L Series 60 Camshaft System Works (Quick Primer)
The 11.1L Series 60 uses an overhead camshaft layout to control intake, exhaust, and injector timing via rocker shafts and arms. Rotational drive originates at the crankshaft gear train: the crank drives the bull gear, which turns intermediate/idler gears that ultimately drive the camshaft and accessory systems. Precise end play (thrust control) and radial support (bearings and shells) keep the cam in alignment so the lobes can deliver the designed lift, duration, and event timing. When any part in this chain wears—gaskets, gears, bearings, seals, keys, or rocker rollers—valve and injector events drift out of spec, causing power loss, smoke, elevated fuel burn, or in severe cases, catastrophic failure.
Below you’ll find each component—what it does, why it matters, symptoms of wear, inspection tips, and best-practice installation notes—specifically for the 11.1L.
Gasket for the Accessory Drive Cover
What it does
The accessory drive cover gasket seals the front accessory housing where it mates to the block/cover assembly. On the 11.1L Series 60, this cover encloses the gear train area that routes drive energy toward the camshaft and ancillary systems. A healthy seal prevents oil leaks that can contaminate belts, sensors, and connectors and ensures the gear mesh area remains properly lubricated.
Why it matters on the 11.1L
The 11.1L runs a relatively compact front gear train with tight splash-lubrication pathways. Even a small seep at the accessory cover can mist the bay, attract grit, and set off a cycle of abrasive wear that shortens the service life of idler bearings, bull gear teeth, and cam thrust seals.
Common symptoms of a failing accessory drive cover gasket
-
Oil film around the cover perimeter or down the front of the engine
-
Drips forming after shutdown
-
Slung oil pattern on the fan, belts, or lower shroud
-
Increasing top-ups between PM intervals without a visible pan leak
Inspection & install pointers
-
Clean the mating surfaces thoroughly; remove old gasket material without gouging aluminum.
-
Dry-fit the cover to confirm bolt hole alignment; do not force bolts to “pull” misaligned parts together.
-
Use a light, even torque pattern progressing in stages.
-
After initial warm-up, re-inspect for weeping—especially near corners and around dowels.
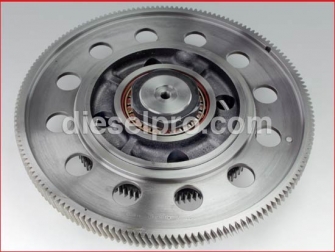
Bull Gear Set — Series 60 (New for DDEC II)
What it does
The bull gear is the large driven gear in the front gear train. It receives torque from the crank gear and distributes it to the camshaft and other timed drives. The set typically includes the bull gear and matched companions engineered to the timing and profile requirements of the controller generation.
Why “New for DDEC II” matters on 11.1L
DDEC II-era calibrations rely on tightly controlled cam timing and gear backlash to keep injection and valve events locked to the ECM’s expectations. A fresh, correctly specified bull gear set helps restore factory timing fidelity—critical for clean starts, stable idle, and proper injector synchronization on the 11.1L.
Symptoms of bull gear wear or damage
-
Whine or growl rising with engine speed from the front cover area
-
Flaky metal or bronze specks in the front cover or filter media
-
Irregular timing marks during overhead set procedures
-
Unexplained smoke or derates after other causes are ruled out
Inspection & install pointers
-
Measure backlash with proper feelers/indicators; compare to spec in your service literature.
-
Inspect companion gears for pitting, chipping, scoring, or profile wear—replace as a set if wear patterns are mated.
-
Heat cycling matters: follow the recommended procedure for press fits and use proper pullers/press tools—never pry against the cover face.
-
Verify timing marks with the engine at true TDC for cylinder 1 on compression; then lock in overhead settings.
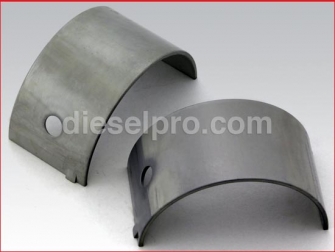
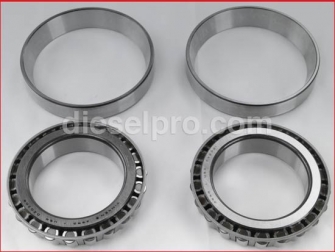
Camshaft Bearing (Series 60)
What it does
Cam bearings support the cam journal surfaces, maintaining oil clearance and alignment so lobes and followers meet at the correct geometry. On the 11.1L, tight control of cam height and journal concentricity directly impacts valve lash, injector height settings, and long-term valvetrain wear.
Signs the cam bearings are due
-
Low or fluctuating oil pressure isolated to the top end (with bottom-end OK)
-
Bright polishing or wiped areas on cam journals
-
Excessive cam end play even with a healthy thrust plate/seal
-
Audible top-end tick after lash set, or lash that won’t “hold” across intervals
Installation tips
-
Check housing bores for ovality; if marginal, correct before fitting new shells.
-
Lubricate generously during assembly; pre-lube oil galleries.
-
Align oil feed holes exactly; a misaligned shell starves the journal and lobes.
-
After installation, rotate the cam by hand to confirm smooth, consistent drag.
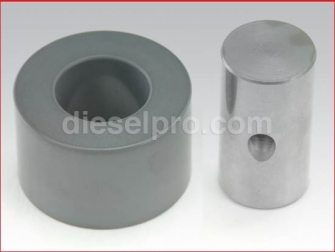
Roller and Pin Kit for Rocker Arm — Injector & Exhaust Valve Arm
What it does
This kit renews the roller follower and its pin in the rocker that rides the cam lobe for injector and exhaust events. On the 11.1L, injectors are cam-actuated; any flat-spotting or roller roughness translates directly into erratic injection pressure and timing.
When to replace
-
Palpable flat spot on the roller or “gritty” feel when spun by hand
-
Witness marks or spalling on the mating lobe track
-
Uneven injector response cylinder-to-cylinder even after overhead set
-
Exhaust valve lash that drifts between services
Installation notes
-
Replace as matched pairs on affected cylinders; avoid mixing new rollers with badly worn lobes.
-
Verify rocker shaft bore condition and oiling; a sticky pin accelerates roller failure.
-
After install, re-set injector height and valve lash; perform cylinder balance checks if available.
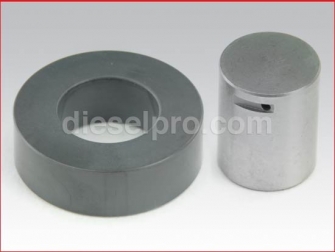
Roller and Pin Kit for Rocker Arm — Intake Valve Arm
Role in the system
The intake rocker roller translates cam lobe motion into precise valve lift. Any roller roughness or pin play introduces lash instability and can reduce effective valve lift, hurting volumetric efficiency—especially noticeable on the smaller-displacement 11.1L, where breathing is already tight at higher loads.
Failure clues
-
Chirp/squeak at idle tied to valvetrain speed
-
Lash that repeatedly drifts wider on intake valves
-
Drop in manifold vacuum (where measured) and sluggish spool on turbo models
-
Visual pitting along the lobe’s intake track
Installation best practices
-
Clean rocker galleries; confirm steady oil feed at idle after assembly.
-
Check spring tip contact pattern after lash set to confirm geometry.
-
If multiple rollers show similar wear, inspect cam hardness and oil quality history.
Seal, Camshaft Thrust
What it does
Controls end play oil control at the cam’s thrust interface and prevents oil migration toward the front cover cavity. On the 11.1L, accurate end play is critical to injector timing and to keeping the cam’s phasing precise as load and temperature fluctuate.
Symptoms & risks
-
Oil mist or weep at the thrust area behind the front cover
-
Measurable cam “walk” fore/aft beyond spec
-
Audible tick that changes when the clutch is engaged/disengaged (in vocational trucks)
Installation tips
-
Measure end play before disassembly to understand baseline wear.
-
Replace the thrust plate and seal together if the plate shows scoring.
-
Use assembly lube on the thrust face; rotate by hand after torqueing to confirm smooth travel.
Seal for Camshaft Thrust Plate — Series 60
Purpose
This seal works with the thrust plate to keep oil in and debris out at the cam’s axial control point. It’s a small part that does a big job: maintaining clean lubrication at the most load-sensitive cam interface.
When to renew
-
Any time the thrust plate is removed
-
After bull gear service (you’ve disturbed the stack—cheap insurance)
-
If end play was high and you’re bringing it back within spec
Pro tips
-
Inspect the plate for heat discoloration—evidence of boundary lubrication.
-
Light sealant only where specified; avoid over-application that can extrude into oil passages.
-
Confirm axial movement is within spec after installation.
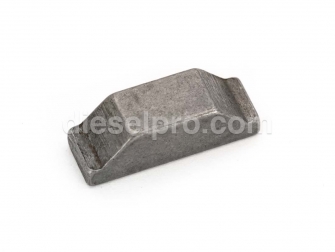
Key for Camshaft (Woodruff Key, 1/4" x 3/4")
What it does
The Woodruff key locks the camshaft gear to the camshaft so rotational timing cannot slip. On engines like the 11.1L that rely on gear-driven injector timing, a compromised key can cause sudden timing loss, misfire, or non-start.
Failure indicators
-
Sheared or deformed key on teardown after gear noise
-
Unexplained timing drift without ECM faults
-
Elongated keyway or evidence of fretting between gear and cam hub
Installation advice
-
Always use a new key when replacing the cam gear or upon gear removal.
-
Ensure the gear seats fully on the taper/shoulder with the key flush—no rocking.
-
Torque fasteners in stages and re-check after first heat cycle.
Bearing for the Idler Gear — Series 60
What it does
The idler gear bearing supports the intermediate gear that routes motion from the bull gear to driven gears (including the cam). A healthy bearing maintains proper gear mesh and backlash—fundamental to quiet operation and stable timing on the 11.1L.
Signs of idler bearing wear
-
Front cover rumble that rises with RPM
-
Gear tooth patterns showing edge contact or uneven marking compound spread
-
Magnetic drain plug glitter from the front cavity
-
Elevated gear oil misting in the cover area
Installation & setup
-
Inspect the idler shaft and bore; replace if scoring or out-of-round.
-
Pre-lube rollers; verify smooth, free rotation without radial play.
-
After assembly, paint teeth with marking compound and sweep by hand to confirm centered contact.
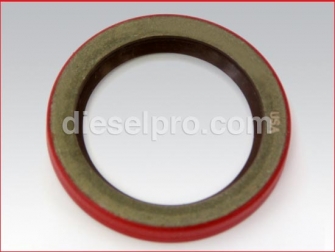
Seal, Oil — Accessory Drive
Purpose
This seal prevents oil escape at the accessory drive interface where rotation passes through the front cover. On the 11.1L, a failing accessory drive seal often masquerades as a general front cover leak but will typically show circular sling patterns on nearby components.
Failure symptoms
-
Circular oil sling on the inside of the cover or fan hub area
-
Rapid grime build-up around the accessory shaft boss
-
Minor oil loss between PMs with no pan or filter head leaks
Installation guidance
-
Inspect the shaft surface for grooves; polish or sleeve if necessary.
-
Lubricate the seal lip; use the correct driver to avoid cocking the seal.
-
Verify shaft runout is within spec to prevent premature lip wear.
Troubleshooting the 11.1L Camshaft System — From Symptom to Part
Hard starts, erratic idle, cylinder imbalance
-
Begin with roller and pin kits (injector & exhaust; intake), then assess cam lobes.
-
Verify cam end play and renew thrust seal/plate if excessive.
-
Check bull gear backlash; replace the bull gear set if gear wear is evident.
Persistent front cover noise or whine
-
Inspect idler gear bearing and tooth contact.
-
Confirm accessory drive seal integrity and shaft condition.
-
Evaluate bull gear for pitting/chipping—replace as a set if patterns are mated.
Oil leaks at the front of engine
-
Start with accessory drive cover gasket and accessory drive oil seal.
-
If the leak traces higher and rearward, evaluate the cam thrust seal and plate.
-
After any reseal, clean the area and recheck post-warmup to pinpoint residual weeps.
Installation Best Practices for Long-Term Reliability
Pre-assembly
-
Cleanliness is critical: flush oil galleries, blow down with lint-free air, wipe with solvent-dampened cloths.
-
Lay out parts in the exact install order you’ll follow to avoid orientation errors (bearings and seals especially).
-
Pre-lube journals, rollers, and bearing surfaces—dry starts accelerate wear.
Alignment & timing
-
Bring the engine to true TDC on #1 compression; confirm timing marks on crank, bull gear, and cam gear.
-
Use proper backlash gauges and marking compound to validate gear mesh.
-
Lock the overhead set last, after all gear-train work and thrust measurements are complete.
Torque & fasteners
-
Replace single-use fasteners where specified; lightly oil threads if required by the manual.
-
Apply torque in stages with a cross-pattern on covers and housings to prevent warping.
-
Paint-mark critical fasteners after final torque to simplify post-heat-cycle checks.
Post-install checks
-
Prime the oil system, then crank with fuel disabled to build pressure before first fire.
-
On first run, monitor oil pressure, listen for abnormal front cover sounds, and scan the valvetrain with a stethoscope.
-
After heat soak and cooldown, re-inspect for seepage and re-verify lash/injector settings.
Service Intervals & Preventive Care (11.1L Focus)
-
Oil & filters: Adhere strictly to your duty-cycle-based interval; the 11.1L’s valvetrain is sensitive to oil quality and aeration.
-
Overhead set: Re-check valve lash and injector height at the manufacturer’s recommended interval or after any top-end work.
-
Front gear train check: During major services, remove the inspection access (where equipped) to check gear tooth patterns and backlash.
-
Noise logs: Keep a record of any front cover noises—when they occur (hot/cold, load), duration, and changes over time—to catch idler or bull gear issues early.
Choosing the Right Parts for Your 11.1L
-
Match generation: DDEC II-era engines benefit from the correctly specified bull gear set; mixing generations can compromise timing quality.
-
Replace in systems: If a roller fails, inspect companion rollers and the lobe; replacing kits cylinder-by-cylinder keeps geometry consistent.
-
Seals and gaskets: Whenever the front cover is disturbed, budget to renew the accessory drive cover gasket and accessory drive seal.
-
Keys & bearings: Treat the Woodruff key and idler bearing as small, high-impact parts—cheap compared to the cost of a re-do.
Why Buy Your Series 60 11.1L Camshaft Components from Diesel Pro Power
-
Model-specific curation: The items above are curated specifically for the 11.1-liter Series 60, so you’re not sifting through generic listings or parts meant for 12.7L/14L variants.
-
In-stock readiness: Downtime costs money. Fast fulfillment and clear stock visibility help you plan the repair and get the truck back on the road.
-
Quality you can trust: From roller & pin kits to idler bearings and bull gear sets, parts are selected to meet or exceed OEM fit and performance.
-
Technical clarity: Each component listing aligns with how the 11.1L is built—gear-train first, then cam support and valvetrain contact points—so you can order logically and install efficiently.
-
Customer-first support: Need help differentiating DDEC generation implications, or validating a diagnosis between an idler bearing and bull gear? Get direct, practical guidance before you buy.
Ordering Checklist
Identify engine as Series 60 11.1L and note DDEC generation.
-
Confirm complaint (noise, leak, lash drift, injector imbalance).
-
Choose primary fix (e.g., bull gear set, roller & pin kit, cam bearing).
-
Add supporting seals/gaskets (accessory drive cover gasket, thrust seals, accessory drive oil seal).
-
Include small hardware that prevents re-work (Woodruff key, fasteners as required).
-
Plan post-install: oil, filters, marking compound, lash tools, and timing gauges.
Catalog — Item-by-Item
Accessory Drive Cover Gasket
A precision-cut gasket for the Series 60 accessory drive cover that restores a clean seal across the front housing interface. Use this any time the cover is removed to service gears, the accessory drive, or thrust components.
Bull Gear Set — New for DDEC II
Matched gear set engineered for DDEC II timing characteristics. Replacing as a set helps restore correct backlash and mesh quality, improving timing stability, idle smoothness, and injection synchronization on the 11.1L.
Camshaft Bearing
Replacement cam bearing shells designed to hold oil clearance and cam height within spec. Ideal during cam or lobe follower service, or when inspection reveals journal polish or oil starvation history.
Roller & Pin Kit — Injector/Exhaust Rocker
Renewal kit for the roller follower and pin on the injector and exhaust rocker arm. Restores smooth rolling contact on the corresponding cam lobes and stabilizes injector pressure and exhaust valve events.
Roller & Pin Kit — Intake Rocker
Replacement roller and pin for the intake rocker arm. Eliminates roughness and lash instability, supporting correct valve lift, reduced valvetrain noise, and consistent cylinder filling.
Seal — Camshaft Thrust
Axial oil control seal for the camshaft thrust interface. A small part that protects timing stability by helping maintain proper end play under all thermal conditions.
Seal — Camshaft Thrust Plate (Series 60)
Companion seal for the camshaft thrust plate. Recommended whenever the thrust plate is serviced to keep the cam’s axial control surface clean and sealed.
Key for Camshaft (Woodruff, 1/4" × 3/4")
Hardened key that locks the cam gear to the camshaft, preventing timing slip. Always replace during gear removal/installation for dependable phasing.
Bearing for the Idler Gear — Series 60
High-load bearing supporting the idler gear in the front gear train. Restores quiet gear operation, proper mesh, and protects against timing drift caused by gear walk.
Seal — Oil, Accessory Drive
Front cover accessory drive seal that prevents oil sling and contamination of front-end components. Replace whenever the accessory drive is serviced or if circular sling patterns appear.
Final Fitment & Quality Notes
-
Fitment focus: All content here pertains to the Detroit Diesel Series 60 11.1L configuration. While some components may appear across other displacements, this catalog and guidance stay focused on the 11.1L application for clarity and accuracy.
-
Replace as systems: Gear-train and valvetrain parts wear together. If your inspection reveals mating wear patterns, replace companion parts to avoid repeat labor.
-
Document everything: Record backlash readings, end play, lash settings, and torque marks. Good notes shorten future diagnostics and protect uptime.
Ready to Repair with Confidence
Whether you’re stopping a stubborn front cover leak, chasing a gear-train whine, or restoring injector timing precision, this catalog equips you with the right 11.1L-specific parts in the exact order you’ll likely consider them. Pair these components with careful measurements, clean assembly practices, and a methodical post-run check—and your Series 60 11.1L will reward you with quieter operation, steadier idle, and longer valvetrain life.


