

 Free US Calls: 1-888-433-4735
 International: 305-545-5588


Parts For Detroit Diesel 12V92 Turbo for Canada - Camshaft Section
 Loading...
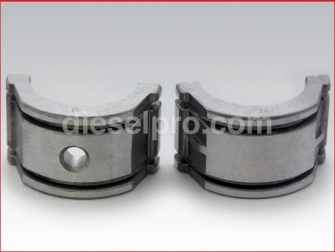


Camshaft Parts Catalog for Detroit Diesel 12V92 Turbo
This section is dedicated to the camshaft system and directly related hardware for the Detroit Diesel 12V92 Turbo engine. While a few components may also fit other Series 71/92 applications, everything below is organized and explained for 12V92 Turbo owners and technicians first—covering what each part does, how it interacts with adjacent assemblies, typical failure symptoms, installation notes, and best practices for ensuring long service life in heavy-duty, marine, industrial, and power-generation environments.
How to Use This Catalog
-
Start with inspection. Identify exactly where wear shows up—cam lobes, bearings, followers, gear drive, front cover seals, flywheel housing interface—so you know which parts to replace together.
-
Replace in systems. Camshaft shells/bearings, fasteners, locks, keys, seals, and gaskets work as a system. Replacing one worn item while leaving its companion parts fatigued can shorten the life of your rebuild.
-
Mind the 12V layout. The 12-cylinder V configuration introduces unique alignments, oiling passages, and gear-drive loads. Use components designed and vetted for the 12V92 Turbo’s geometry and operating pressures.
-
Follow torque, pattern, and sequence. For bolts, nuts, and retainers in the cam drive and front cover, adhere to OEM torque specs and tightening patterns. Improper clamping can cause gear misalignment, seal leaks, and bearing distress.
-
Document what you replace. Mark which bank, position, and orientation components came from. This helps you track wear patterns and confirm that you’re eliminating the root cause—not just the symptom.
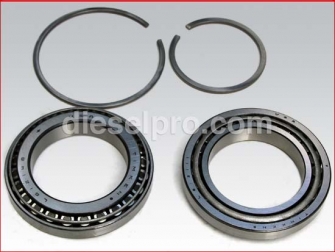
Camshaft Bearings & Shell Sets
Purpose and Function
Camshaft shell bearings support and locate the camshaft within the block, maintaining the oil film that allows the cam to rotate smoothly under high load. In the 12V92 Turbo, proper bearing selection and fit are essential for maintaining correct cam-to-follower geometry and consistent valve timing at boost.
When to Replace
-
Visible scoring, flaking, or discoloration on shells or cam journals.
-
Low oil pressure at idle coupled with upper valvetrain chatter.
-
Hot restart knock that diminishes with oil pressure.
-
Out-of-round or misaligned bores discovered during teardown.
Installation Notes
-
Clean the bores thoroughly and verify oil feed passages are open.
-
Lightly oil shell surfaces; never install dry.
-
Confirm camshaft endplay and radial clearance with feeler gauges and plastigage as applicable.
-
After torqueing caps (where applicable), rotate the camshaft by hand to feel for tight spots.
Camshaft Bearing Bolts, Washers & Lock Components
Bearing Bolts (Intermediate / Position-Specific)
These fasteners secure bearing caps or thrust components where applicable. On a 12V V configuration, bolt integrity prevents cap shift that could pinch the cam or distort the oil film.
Best Practices
-
Always use new critical fasteners if the originals show stretch, corrosion, or thread wear.
-
Clean threads; chase if needed; apply the specified lubricant or sealant.
-
Torque in progressive stages and follow the correct sequence.
Camshaft Bearing Washers
Washers distribute load evenly under bolt heads, preventing galling and maintaining torque. Replace any washer that shows grooving, cupping, or deformation.
Lockwashers for the Camshaft Assembly
Lockwashers provide secondary retention for dynamic joints. For boosted engines, vibration and torsional pulses are higher—don’t reuse fatigued lock hardware. Confirm the lock feature lies flat after torque.
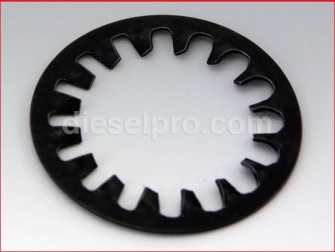
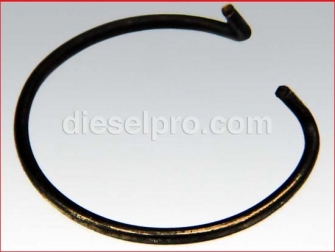
Ring Locks for Cam Bearings
Ring locks retain specific bearing elements in the bore. If a ring has softened (spring loss) or shows burrs, replace it. Verify the ring fully seats in its groove before installing the bearing.
Camshaft Nuts, Keys & Retainers
Camshaft Nuts
The camshaft nut is part of the stack-up that holds driven gears or hubs in correct thrust relationship. A nut that backs off can change timing, causing performance loss or catastrophic contact.
Tips
-
Inspect threads carefully; replace if pitting or flaring is present.
-
Use the specified thread preparation and final torque.
-
Pair with the correct retainer.
Camshaft Gear Nut Retainers
A retainer prevents nut rotation after torque. Always inspect the retainer’s tab engagement and replace any part with rounding, cracks, or loss of spring.
Camshaft Keys (Woodruff)
The woodruff key sets positive angular alignment between the camshaft and its gear or hub. Replace keys that show peening or fretting. Never file a key to “make it fit”—use the correct, tight fit to avoid slop and timing drift.
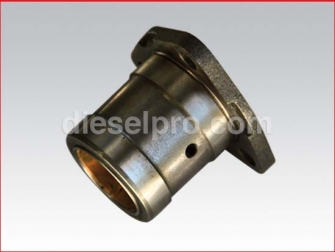
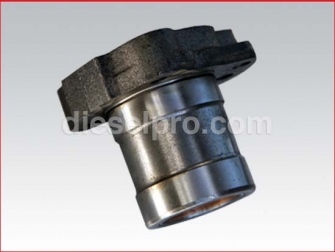
Front & Rear Camshaft Bearings (V-Engine Considerations)
On 12V92 Turbo engines, the rear cam bearing often takes additional thrust from gear-drive forces while the front bearing interfaces with seals and accessory drives.
Inspection Checklist
-
Look for crescent-shaped wear patterns (oil starvation).
-
Check for copper/overlay exposure on shell surfaces.
-
Verify journal concentricity—cam runout can masquerade as “bearing wear.”
Replacement Guidance
-
If a front bearing is replaced due to scoring or misalignment, evaluate the seal land and front cover alignment at the same time.
-
For rear bearing concerns, inspect the gear train and idler shaft bearings that share loads with the cam.
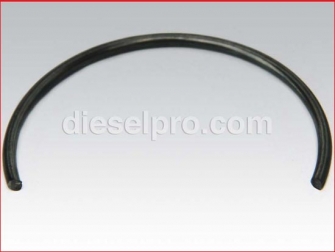
Seals for the Camshaft & Accessory Drives
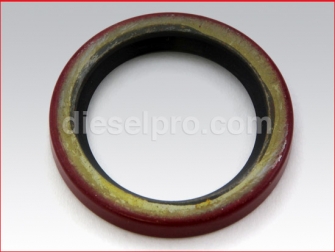
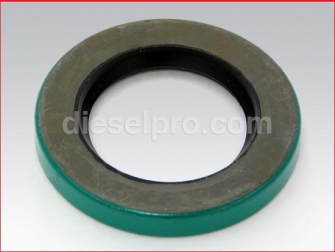
Camshaft Front Seal
Designed to keep crankcase oil inside while the cam hub or gear turns. In turbocharged engines, crankcase pressure pulses are more pronounced, so seal condition matters.
Symptoms of Failure
-
Oil misting around the front cover.
-
Drip lines from the front housing after shutdown.
-
Oil contamination of the cam gear or belt-driven accessories.
Fitment Notes
-
Inspect the seal bore for nicks and corrosion.
-
Use the proper driver to avoid cocking the seal.
-
Lightly lubricate lips and verify the shaft surface is smooth.
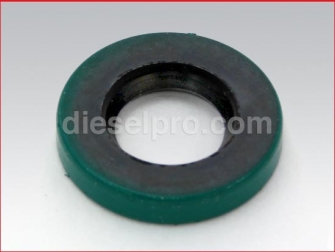
Drive Pulley Hub Seal
This seal prevents oil escape at the pulley hub that’s driven off the cam or accessory shaft. Correct outside diameter and proper seating depth are critical.
Tachometer Drive Cover Seal
The tach drive cover is small but critical—failure smears oil around the front housing and can contaminate belts or sensors. Replace at the same time as the primary cam seal if there’s evidence of leakage.
Pulley Drive Shaft Seal (Series 71/92 Fitment)
On engines where the cam or companion shaft drives front-end accessories via a pulley, a dedicated seal keeps splashed oil contained. Confirm the outside diameter and lip design are matched to the housing revision you have on the 12V92 Turbo.
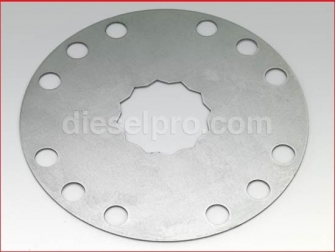
Spacers, Hubs & Front Pulley Interfaces
Front Camshaft Pulley Spacer
The spacer sets correct axial position for the pulley/hub stack-up. An incorrect spacer thickness can lead to belt misalignment, premature seal wear, and harmonic noise.
Setup Tips
-
Dry-fit the stack and verify pulley alignment across all grooves.
-
Confirm the spacer sits fully against the register—no debris between surfaces.
-
After final torque, rotate the assembly to ensure no rub or wobble.
Idler Gear Hardware (Support for Cam Drive)
Idler Gear Bearings
The idler gear routes drive power between crank and cam. Bearing condition directly affects cam timing stability and gear mesh noise.
Replace If
-
There’s detectable radial play or “rumble” when spun.
-
You see pitting on rollers/races or metallic sheen in the oil filter.
-
Gear tooth contact shows edge-loading or frosting, which often points back to bearing wear.
Idler Gear Bolts
These fasteners carry significant load and must be free from thread stretch and head rounding. Replace any bolt with damaged threads, corrosion, or signs of previous over-torque.
Installation
-
Use manufacturer-recommended thread lock or oil as specified.
-
Torque in steps and re-check after a short dwell.
-
Confirm the idler free-rotates without binding after fastener torque.
Followers, Guides & Pushrods
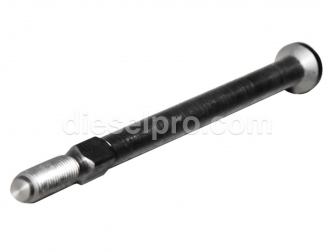
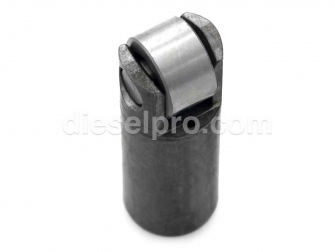
Cam Followers (Assemblies)
Followers translate cam lobe lift into pushrod motion. On the 12V92 Turbo, follower wear can arise from dirty oil, incorrect lash settings, or misaligned guides.
Symptoms
-
Ticking that follows RPM; metallic glitter in oil.
-
Uneven valve lift/logging data that shows cylinder imbalance.
-
Spalling on follower faces or roller flats.
Service Notes
-
Inspect every follower face/roller. Replace any with scoring, pitting, or brinelling.
-
Verify oil feed to follower galleries.
-
Always reset lash to specification after replacement.
Follower Guides
Guides prevent follower rotation and maintain the correct approach angle to the cam lobe. Worn guides cause skewed loading and rapid lobe wear.
Replacement Guidance
-
If a single guide is worn, inspect the entire bank—misalignment can arise from block or housing movement.
-
Check guide bores for ovality; correct before installing new guides.
Pushrods & Pushrod Retainers
Pushrods carry motion to the rocker arms. In high-boost applications, valvetrain loads are elevated, so straightness and tip integrity matter.
Check For
-
Bent shafts (roll on a flat plate).
-
Pitted or flaked ball ends.
-
Blueing/discoloration (overheat from oil starvation).
Retainers keep the pushrod in place during assembly and operation. Replace any retainer with spring fatigue or cracked tabs.
Gaskets at the Cam & Flywheel Interfaces
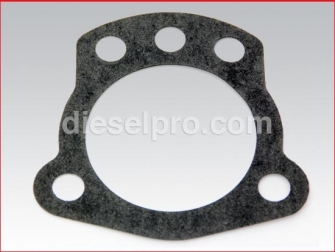
End Bearing Gasket
This gasket seals the end bearing cover or cap. A leaking end gasket can mist oil over the flywheel housing and magnetic pickup areas.
Installation
-
Clean both mating faces completely; remove old sealant.
-
Verify the cover is flat; correct any warp before assembly.
-
Bring bolts down evenly to avoid pinching the gasket.
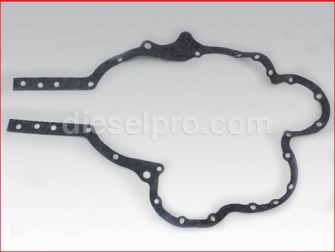
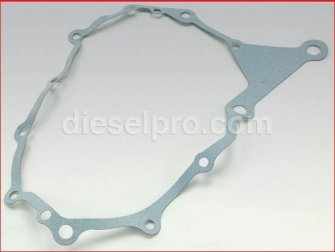
Flywheel Housing Gasket (V71/V92 Pattern)
Where the end plate meets the flywheel housing, a large-profile gasket maintains a dry interface. Because the camshaft passes oil along galleries that return near this area, leaks here can mimic a main seal issue. Replace whenever the housing is removed.
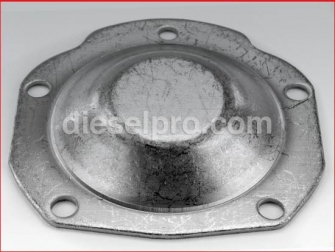
Balance Weight Cover Gasket
The balance weight (counterweight) cover keeps the front-end drive cavity sealed. Replace this gasket whenever the cover comes off for access to the cam or idler assembly.
Flywheel Housing Cover (Large Cover)
The large cover provides inspection and service access. Pair the cover with a fresh gasket and ensure even clamping to prevent seepage at the perimeter.
Flywheel-to-Salt-Water Pump Gasket (Marine-Focused Installations)
On marine 12V92 Turbo setups, the interface between the flywheel housing and raw/salt water pump adapter can be a leak path if reused. Replace the gasket, verify mating surfaces are clean and parallel, and torque in sequence to prevent a corner lift.
Front Cover, Alignment & Leak Prevention
-
Dry-fit the front cover with dowels or alignment tools before final torque. Misalignment can prematurely wear the cam seal and the pulley hub seal.
-
Inspect cover bores for corrosion and pitting; these irregularities cause seal walk and early lip failure.
-
Use correct sealants on bolt threads that penetrate oil cavities. Residual weeping often comes from thread leakage, not from the main seal itself.
Timing Integrity: Gear Mesh, Endplay & Backlash
-
Verify camshaft endplay within specification after bearings and thrust components are installed. Excess endplay affects gear tooth contact and timing stability.
-
Check gear backlash at multiple points around the gear. If the idler shaft or bearings are worn, backlash can vary, producing gear whine and variable timing.
-
Blue-check tooth contact if you’ve changed any gear, hub, or spacer. Look for centered, even contact patches—not edge-heavy patterns.
Common Wear Patterns & Root Causes
-
Lobe pitting or spalling: Often contaminated oil or mis-set lash leading to impact loads. Replace followers with the cam; confirm oiling.
-
Bearing overlay loss: Low-viscosity or overheated oil, or misalignment. Verify cooling system performance on turbo builds, especially marine installations.
-
Seal groove tracks on hubs: Hard-lip running on a scratched hub land. Polish or replace the hub; install a new seal with correct lube.
-
Fretting at key/keyway: Micro-movement from loose hubs/nuts. Replace key, nut, and retainer; verify torque and retainer engagement.
Troubleshooting Guide
Symptom: Ticking That Increases With RPM
-
Likely causes: Worn follower face, insufficient lash, or bent pushrod.
-
Check: Lash settings, follower face condition, pushrod straightness, guide wear.
Symptom: Sudden Valve Timing Drift
-
Likely causes: Loose cam nut, failed retainer, sheared woodruff key.
-
Check: Cam hub stack torque, retainer tab engagement, key integrity, gear backlash.
Symptom: Front Oil Leak After Rebuild
-
Likely causes: Cocked cam seal, nicked bore, worn hub land, or overfilled crankcase.
-
Check: Seal seating depth and squareness, hub finish, breather function.
Symptom: Gear Whine at Specific RPM
-
Likely causes: Incorrect backlash, idler bearing wear, misaligned front cover causing gear thrust change.
-
Check: Backlash pattern, idler shaft/bearing play, cover alignment dowels.
Marine Application Notes for 12V92 Turbo
-
Salt water pump interface: Always replace the gasket at the flywheel adapter. Misalignment here can mimic front seal leaks.
-
Humidity control: Condensation accelerates corrosion on hubs, seal lands, and exposed fasteners. A light corrosion inhibitor on external surfaces helps.
-
Load profiling: Marine engines often run at steady high loads; verify cooling capacity and oil grade to maintain film strength over long pulls.
Preventive Maintenance Intervals (General Guidance)
-
Oil & Filter: Keep to a strict interval appropriate for load and environment. Dirty oil is the fastest way to kill cam/follower surfaces.
-
Valve Lash: Re-check after major service and at recommended service hours—drifting lash indicates wear.
-
Front-End Inspection: At scheduled intervals, inspect for oil mist at the front cover and verify belt or coupling alignment and tension.
-
Gear Train Noise Check: A quick stethoscope listen at idle and at a light load can spot early bearing issues.
Parts Overview (What You’ll Find in This Section)
-
Camshaft shell/bearing sets engineered for proper oil film and alignment in the 12V92 Turbo.
-
Bearing bolts, washers, and lock hardware to secure caps and retain thrust relationships.
-
Camshaft nuts, retainers, and woodruff keys for precise timing security and hub/gear alignment.
-
Front/rear cam bearings specific to V-configuration load paths.
-
Seals for the camshaft, pulley drive hub, tachometer drive cover, and related front cover penetrations.
-
Spacers and pulley/hub interfaces to safeguard alignment and seal longevity.
-
Idler gear bearings and bolts to stabilize gear mesh and timing.
-
Cam followers (assemblies), follower guides, pushrods, and pushrod retainers to transmit motion reliably from cam to valve train.
-
End bearing, balance weight cover, flywheel housing, and flywheel-to-pump gaskets to keep the cam area dry and clean.
-
Large flywheel housing cover for service access with the right sealing strategy.
Why Buy 12V92 Turbo Camshaft Parts from Diesel Pro Power
-
Specialized focus on Detroit Diesel two-stroke platforms. You’ll find the exact cam, follower, seal, and gear-drive components that match the 12V92 Turbo—not generic substitutions.
-
Curated kits and companion hardware. We group seals, locks, and gaskets that are commonly replaced together, helping you avoid mid-job delays.
-
In-stock availability with fast shipping. Keep your downtime to a minimum with parts that are ready to go when you are.
-
Bilingual product support. English and Spanish descriptions and support help eliminate ordering mistakes and speed up verification.
-
Proven reliability with 40,000+ satisfied customers. Diesel Pro Power’s customer base reflects long-term trust in fitment accuracy and durability.
-
Marine and industrial know-how. Guidance tailored to continuous-duty and high-load 12V92 Turbo applications.


