

 Free US Calls: 1-888-433-4735
 International: 305-545-5588


Parts for Detroit Diesel 16V71 Non-Turbo for Canada - Gasket Section
 Loading...
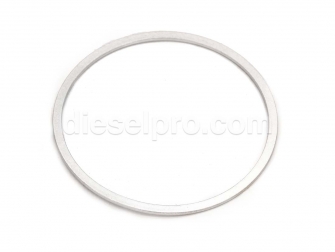


Parts for Detroit Diesel 16V71 Non-Turbo — Gasket Section
Welcome to the dedicated gasket and sealing catalog for the Detroit Diesel 16V71 non-turbo engine. On this page you’ll find detailed, application-focused guidance for the gaskets, seals, and related sealing supplies you’ve listed—organized to mirror your catalog order and written specifically for the 16V71 natural (non-turbocharged) configuration. Because many Detroit Diesel components are shared across V-71 and V-92 families, you’ll see where a part is cross-compatible; however, the installation notes, selection advice, and maintenance best practices here are tailored to owners, operators, and rebuilders working on the 16V71.
Below, each item is presented in the same sequence as your catalog. Use the quick explanations to confirm function and fit, learn what to check during installation, and understand how a given gasket or seal contributes to oil, coolant, and exhaust integrity on the 16V71.
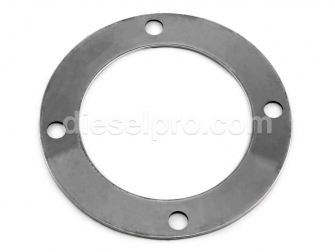
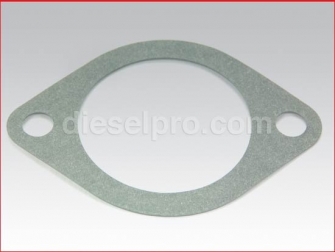
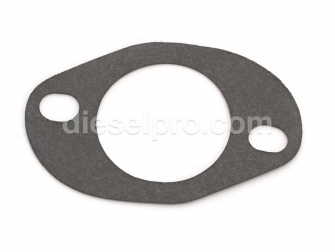
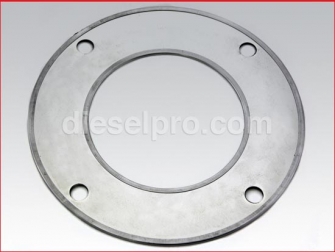
Block Plug Gasket (2.5" Diameter) — For Detroit Diesel 16V71
What it does
This round gasket seals the block plug to prevent coolant seepage at the deck or coolant gallery interface. Even minor weeping at a core/block plug can introduce air into the cooling system and leave telltale staining on the block.
When to replace
-
Any time you remove a block plug for cleaning, flushing, or inspection.
-
If you see crusted coolant residue, surface pitting, or a flattened/deformed gasket face.
-
During in-frame overhauls—gasket rubber ages and takes a permanent set.
Installation tips
-
Clean the plug bore and plug OD to bright metal; remove mineral scale and old gasket fragments.
-
Lightly oil or apply a thin film of compatible non-hardening sealant if surfaces show minor porosity (avoid excess).
-
Torque the plug evenly; recheck after the first few heat cycles.
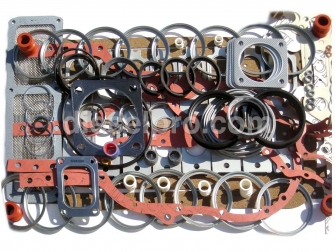
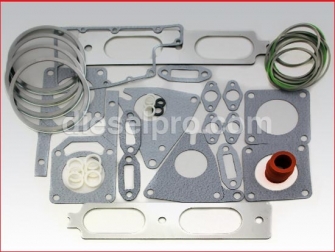
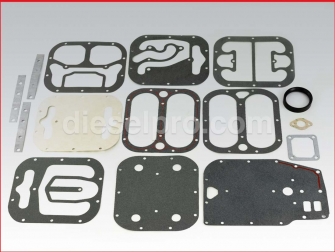
Engine Overhaul Gasket Kit — 16V71
Purpose and contents
An overhaul gasket kit consolidates the core sealing interfaces required for a major in-frame or out-of-frame rebuild. Expect upper and lower engine gaskets (head, rocker cover, intake/exhaust interfaces, oil pan, water manifold, and many sub-gaskets), plus critical seals and O-rings.
Why kit selection matters
The 16V71 uses four cylinder heads and extensive coolant/oil passages; comprehensive coverage minimizes mid-job delays. Kits also help ensure consistent material quality across all joints—important for mixed metal surfaces (cast iron block/heads, aluminum covers).
Best practices
-
Inventory the kit on arrival; match count and profiles to your engine plan (e.g., number of head gaskets, water rail gaskets, and rocker cover components).
-
Dry-fit larger profile gaskets (oil pan rails, flywheel housing) to verify hole alignment.
-
Combine with fresh fasteners where torque-to-yield or seal washers are specified.
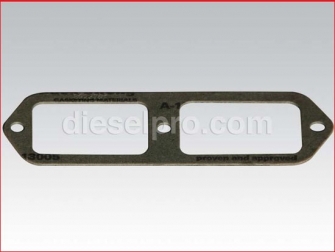
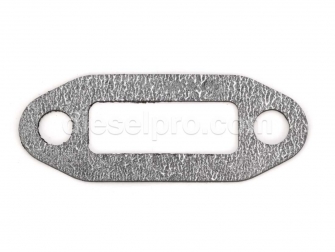
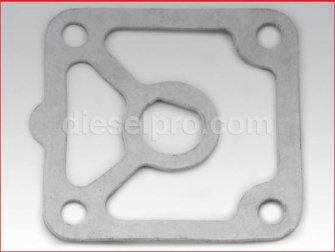
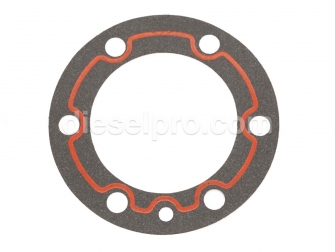
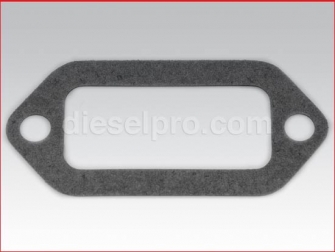
Inspection Block Cover Gasket — For V-71 Applications (16V71 Focus)
Function & location
Seals the inspection cover opening on the block. On a 16V71, removing the cover eases internal inspections (e.g., liner skirt, crank throws) without disturbing major joints.
Failure symptoms
-
Oil film or drips along the cover perimeter.
-
Seepage that worsens at cruise RPM or after sustained load.
Installation notes
-
Check cover flatness; gently dress high spots on a surface plate if needed.
-
Use a light, even bead of sensor-safe RTV only if the mating surface is scratched—most new gaskets install dry.
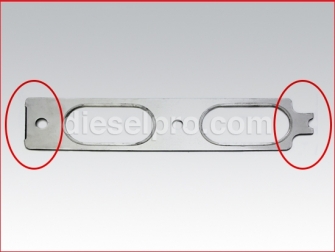
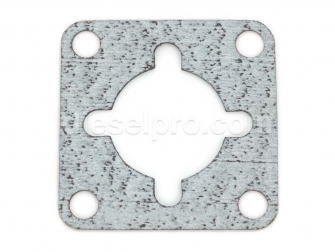
Inspection Cover Gasket — New-Style Profile
Why “new-style” matters
Updated rubber compounds and bead geometries improve resilience against vibration and thermal cycling typical of the 16V platform. If you’re replacing an older fiber or cork gasket, the new style often delivers longer leak-free intervals.
Fitment
Designed for the updated inspection cover pattern. Always compare the perimeter and bolt spacing with your existing cover to confirm the style match.
Pro tip
Torque cover screws progressively in a crisscross pattern. Over-torquing can cause local puckering and early weeping.
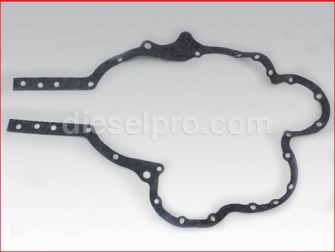
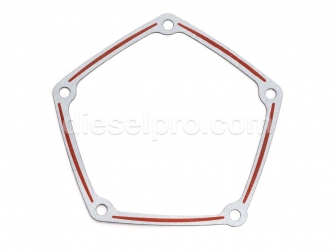
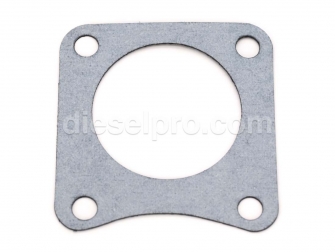
Front End Plate Gasket — Between Block and End Plate
Role in engine sealing
The front end plate closes the timing gear space and passages. Its gasket must contain oil splash and maintain geometry for accessory mounting surfaces.
Common causes of leaks
-
Plate removal without resurfacing or cleaning dowel areas.
-
Old gasket bonded to both faces—leaving embedded fragments.
-
Fastener unevenness or reuse of stretched bolts.
Installation checklist
-
Verify dowel integrity—loose dowels can fret the gasket line.
-
Clean threads; apply the specified threadlocker only where called for.
-
After installation, inspect for oil sling near the crank pulley during first run.
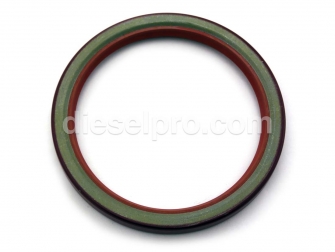
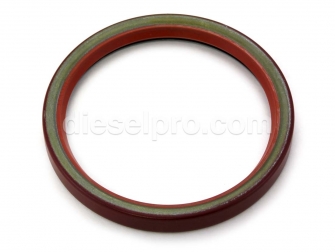
Rear Crankshaft Seal — Standard, Single Lip (Rear for 16V71 Applications)
Understanding lip style
A single-lip seal relies on a primary sealing lip and garter spring to control oil at the crank flange. On a 16V71, this rear main seal is a prime defense against drivetrain oil contamination.
When to choose standard size
Use standard when the crankshaft seal journal measures within OEM spec and shows no groove wear. If a distinct wear groove exists, consider the oversize seal with a sleeve (below).
Installation tips
-
Inspect the crank journal for scoring; polish lightly if needed.
-
Lubricate the seal lip prior to installation.
-
Use a proper driver to avoid cocking; verify flush, even seating.
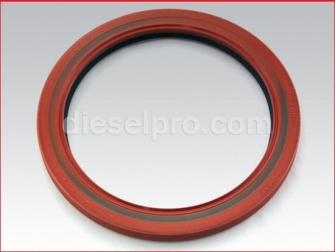
Rear Crankshaft Seal — Oversize, Single Lip (With Front Use on Other Models)
Why oversize?
Oversize seals and companion sleeves relocate the lip’s contact path away from a worn groove. This is a proven approach on high-hour 16V71 engines that show journal wear.
Pair with a sleeve
When spec’d, install the sleeve to restore an ideal sealing surface. Cleanliness and alignment are critical—any burr under a sleeve will cause runout and leaks.
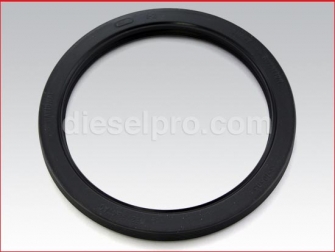
Rear Crankshaft Seal — Standard, Single Lip, Universal Rotation
Universal rotation explained
Designed to handle either left-hand or right-hand engine rotation without directional oil pumping features. This is beneficial on fleets with mixed rotation gear-trains or where rotation is known to be standard but a universal option simplifies stocking.
Installation
Confirm rotation requirements during parts selection. On install, the same cleanliness and concentricity rules apply—misalignment is the #1 cause of fresh seal leaks.
Rear Crankshaft Seal — Oversize, Left-Hand Rotation (New-Style)
Left-hand rotation detail
Some seals include directional micro-ribs; choose the correct rotation so the ribs “pump” oil back inward during crank rotation. Left-hand versions are for engines whose crankshaft turns counter to standard right-hand setups.
When to use
Pair this oversize, left-hand seal with a wear sleeve where the crank journal is grooved. Always measure—guessing at oversize can lead to under-compression and leakage.
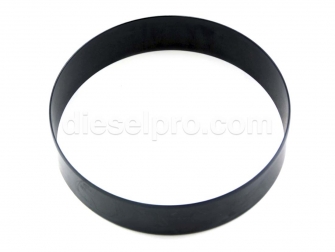
Oversize Sleeve — Rear (71 Series) / Front (For 16V71) Seal Journal
Purpose
A precision sleeve restores the sealing surface dimension and finish so the lip maintains proper contact pressure and hydrodynamic behavior.
Key steps
-
Deburr and solvent-clean the journal.
-
Use the supplied driver or a correctly sized collar.
-
Align the sleeve squarely; do not hammer directly.
-
After install, verify sleeve runout is within spec.
Rear Crankshaft Sleeve — For Oversize Seal Use
Application on 16V71
When mating with an oversize rear main seal, this sleeve is your insurance policy against seepage. It also protects the crank journal from future abrasion at the lip track.
Tip
Mark the sleeve position so the new lip rides on an unworn area. Finalize by oiling the lip and rotating the crank by hand to confirm smooth contact.
Cylinder Head Gasket Kit — For 8V71 & 16V71 (Quantities: 2 for 8V, 4 for 16V)
Why a head-specific kit
Head gasket performance sets the baseline for compression and coolant integrity. The 16V71 uses four individual heads, so you’ll need four kits for a full top-end reseal.
Surface prep & torque
-
Clean deck/head surfaces to manufacturer RA finish.
-
Verify liner protrusion height uniformity (critical for sealing).
-
Follow the staged torque pattern meticulously and re-torque if required by your procedure after heat-soak.
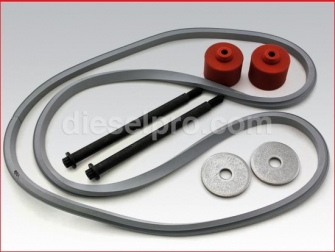
Rocker Cover Kit — New-Style for Aluminum Covers
What’s included
Typically a perimeter gasket plus seals for fasteners or grommets, tailored to aluminum rocker cover geometry.
Why replace proactively
The high thermal cycling over the heads flattens older gaskets, leading to misting or light oil drip. Fresh elastomer keeps blow-by vapor inside and the engine bay clean.
Install note
Avoid RTV unless instructed; the molded gasket is designed to seal dry on clean, oil-free covers.
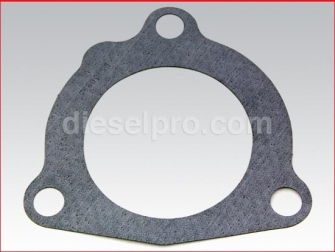
Water Manifold (Rail) Gasket
Role in cooling efficiency
The water rail distributes coolant across heads and block galleries. Even subtle leakage here can introduce air pockets that reduce pump efficiency and promote hot spots.
What to check
-
Pitting on the rail mating face.
-
Fastener corrosion or thread damage.
-
True alignment across long runs—stress can shear gaskets over time.
Rocker Cover Gasket — Gray Rubber, New-Style
Material advantages
Gray rubber compounds resist compression set and hardening, maintaining seal force over long intervals—ideal for 16V71 head temperatures and vibration.
Quick install sequence
Degrease the head channel, set the gasket, align the cover carefully, then torque evenly in small increments.
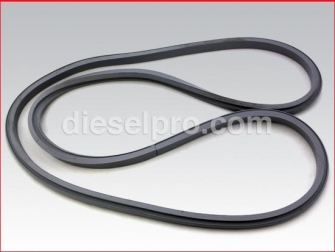
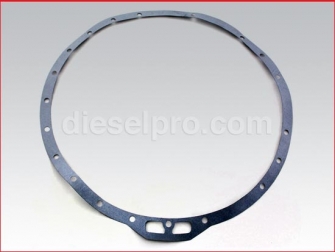
Flywheel Housing Gasket — V-71 / V-92 Pattern
Why this joint leaks
The flywheel housing intersects with oil-splash zones. Any gap or nick can throw oil outward as the flywheel spins.
Prevention
-
Inspect the end plate and housing faces; remove old sealant films fully.
-
Test-fit dowel engagement—loose dowels equal future leaks.
-
Use the specified pattern and torque.
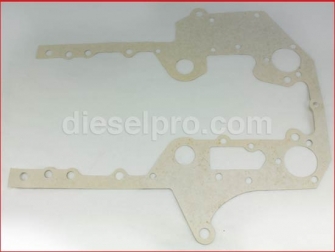
Rear End Plate Gasket — Block to End-Plate
Critical interface
Similar to the front plate, the rear plate closes off oil passages and gear spaces. On a 16V71, vibration plus temperature cycles demand a robust gasket and clean mating faces.
Tip
Replace suspect seals (rear main, cam plug) while the plate is off to avoid repeating labor.
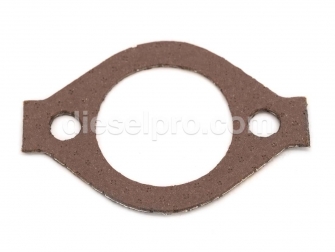
Pump Gasket — Fuel/Water Pump Interface
Where it fits
This flat gasket usually sits between the pump body and the mounting surface. It prevents external leakage and air ingress (for fuel pumps).
Symptoms of failure
-
Fuel odor or sheen near the pump.
-
Coolant weep lines or streaks.
-
Inconsistent prime or noisy operation (air leak at fuel side).
Allison Marine Transmission Flywheel Gasket — SAE #1
Application note
For 16V71 marine packages pairing to an Allison M/MH marine gear with SAE #1 housing size. This gasket helps maintain a dry bell housing, preventing clutch/flywheel contamination.
Installation
-
Confirm bellhousing size (SAE #1).
-
Clean both faces; align dowels carefully.
-
Inspect coupling alignment to minimize vibration after reassembly.
Allison Marine Transmission Flywheel Gasket — SAE #2 (Most Common)
Fitment
For installations where the engine’s flywheel housing and transmission share the SAE #2 size. This is frequently encountered in 16V71 marine refits.
Best practice
Always verify the ring gear and coupling alignment after assembly to protect the rear main seal and prevent housing fretting.
Blower Installation Gasket Kit — Natural (Non-Turbo) Engines
Why a blower kit on a non-turbo 16V71
The Roots-type blower is essential for scavenging on two-stroke Detroits. This kit covers the sealing interfaces required when removing/reinstalling the blower on a natural engine.
Checklist
-
Inspect blower end plates and case for scoring.
-
Replace drive seals if any oil traces are present.
-
Ensure dowel alignment and correct gear lash per spec.
Governor Spring Cover Gasket
Function
Seals the spring cover on the mechanical governor, preventing oil seepage and contamination.
Tip
When removing the cover, note spring preload position. Use the new gasket dry unless the procedure calls for a thin film sealant.
Governor Top Cover Gasket
Why it matters
A clean, sealed governor ensures stable speed control. Leaks can pull air or lose oil, subtly affecting governor response.
Installation
Clean the flange, install the new gasket carefully, and verify that breather passages aren’t obstructed by stray sealant.
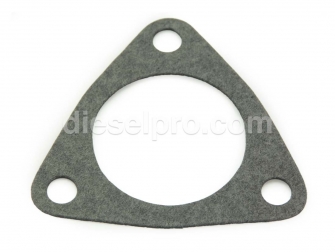
Head-to-Manifold Gasket — Exhaust Interface (16V71 Count per bank)
Role
Maintains a gas-tight seal from head exhaust ports to the manifold, protecting against hot gas erosion and preventing oxygen ingress that can skew EGT balance.
Installation watch-outs
-
Ensure manifold faces are flat; long castings can warp.
-
Use a torque sequence from center outward.
-
Re-torque warm if procedure allows, especially after manifold servicing.
Marine Exhaust Manifold Flange Gasket
Purpose
Seals the flange between the manifold and marine exhaust elbow/transition. On water-jacketed systems, a proper seal also keeps seawater containment secure.
Fit check
Confirm OD/ID dimensions match the connection hardware. Any mismatch can shear the gasket edge on tightening.
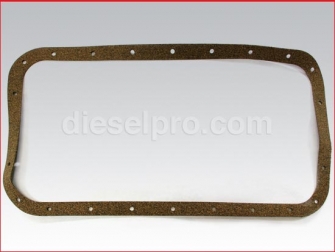
Oil Pan to Block Gasket — Main Pan (16V71 / 16V92)
What it does
Seals the main oil pan perimeter. On a 16V71, pan removal is common during in-frame service; never reuse a compressed, oil-soaked pan gasket.
Prep & install
-
Straighten pan rails using a flat bar and light hammer work.
-
Degrease thoroughly; install dry or with specified tack.
-
Torque to spec; avoid crushing the gasket at corners.
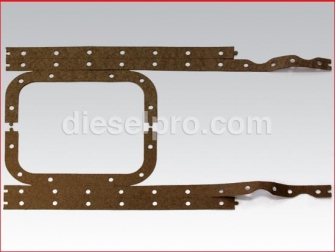
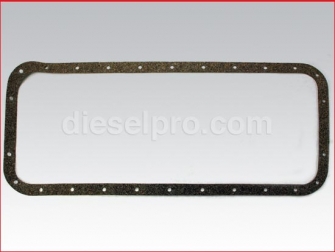
Oil Pan Gasket — Front Lower Section (Two per 16V71)
Sectioned pan note
The 16V71 uses lower pan sections; the front section uses this gasket. Replace both front pieces on a reseal to maintain symmetry and clamping.
Tip
Apply a tiny dab of RTV only at rail step joints—never along the entire length unless procedure requires.
Oil Pan Gasket — Rear Lower Section (Two per 16V71)
Rear section specifics
Handles splash and drainback flows from rear galleries. Condition of rear rails and cleanliness around the rear main cap are crucial.
Install
Repeat the front-section approach; confirm even compression across the rail, especially at corner radii.
Oil Pump Inlet Gasket
Why it matters
Any air leak at the inlet allows aeration and oil foaming, which drops oil pressure. Replace on any pump removal.
Troubleshooting
If you see intermittent low oil pressure after a pump service, reinspect this gasket first.
Oil Pick-Up Tube Gasket
Function
Seals the pickup tube flange to the pump or block, preventing air entrainment. Always replace with the oil pump inlet gasket as a pair.
Install
Inspect tube ODs and flanges; dents can cause turbulence and cavitation.
Oil Filter Adapter Gasket
Consequences of a poor seal
Oil bypass or external leakage at the adapter can quickly empty a sump under load. This low-cost gasket prevents a costly mess.
Tip
Clean the adapter face and check for gouges from previous prying—dress lightly if needed.
Hydraulic Governor Gasket — Between Governor & Drive
Purpose
Maintains a leak-free joint where drive motion enters the governor body. Oil integrity here preserves stable governor operation.
Install
Align carefully; don’t pinch the gasket during insertion. Confirm smooth rotation post-assembly.
Oil Cooler Installation Kit — Double Coolers
Where used on a 16V71
Some 16V71 packages run dual oil coolers for heavy duty or marine service. This kit supplies the gaskets and seals needed to mount and connect the pair.
Best practices
-
Flush coolers before install.
-
Replace all sealing rings and gaskets—mixing old/new often leads to weeps.
-
Pressure test after assembly.
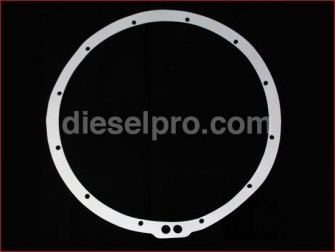
Fresh Water Cover Gasket
Role
Seals the freshwater side cover—often disturbed during coolant system inspections or thermostat service. Fresh gaskets prevent micro-leaks that can lead to air ingestion.
Inspect
Check cover flatness and corrosion at bolt holes; pitting under a bolt head can create a sealing path.
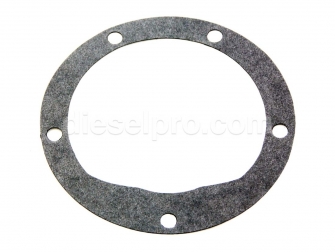
Engine Water Pump Cover Gasket
Symptoms of failure
Coolant weeping around the cover perimeter, dried residue trails, or slow loss of coolant without visible hose leaks.
Install
Clean thoroughly; avoid RTV unless instructed. Torque evenly to prevent cover distortion.
Raw (Seawater) Pump Mounting Gasket
Marine installations
This gasket seals the raw water pump mount to prevent both seawater leaks and air ingress that can cause pump cavitation.
Care tips
Inspect for salt crystallization and galvanic pitting on adjacent faces; neutralize and clean before reassembly.
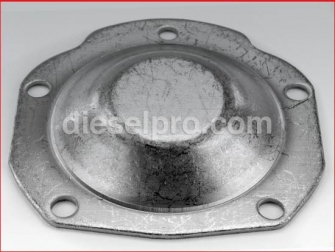
Flywheel Housing Cover — Large Cover (Series 53/71/92 Fit)
Use on 16V71
Covers inspection or access openings on the flywheel housing. Replacing the cover seal keeps the bellhousing area dry and clean.
Install
Inspect cover flatness and use even torque. If the cover was pried off previously, dress any edge burrs.
Flywheel to Salt Water Pump Gasket
Unique joint
On certain marine configurations, a drive from the flywheel area mates to the salt water pump. This gasket prevents oil migration and water ingress at the interface.
Tip
Always verify the mating faces are free of corrosion products. Any roughness can cut the new gasket.
Raw Water Pump Plate Gasket
Function
Seals the plate on a marine water pump body. A correct seal prevents suction leaks that reduce raw water flow and cooling capacity.
Installation
Fit the new gasket dry and torque the plate screws evenly; check for even gap all around.
General-Purpose Gasket — 53/71/92 Compatibility
Stocking rationale
A versatile gasket used at multiple accessory interfaces. Keeping a few on hand can save time mid-service.
Note
Always compare the profile to the removed gasket; subtle variations exist across production runs.
Block Water Outlet (Block Heater) Gasket
Purpose
Seals the block heater or outlet plate. Leaks here drip onto external accessories and lead to coolant odor in the engine room.
Install
Clean and dry both faces. If the block heater uses an O-ring, confirm whether this flat gasket is additionally specified or superseded.
Marine Exhaust Manifold Flange Spacer Gasket
Why a spacer gasket
Used where a spacer is installed to adjust exhaust hardware alignment. The gasket’s dimensions accommodate the spacer’s OD/ID to maintain a proper seal.
Alignment tip
Dry-fit the spacer and elbow with the gasket to confirm geometry before final torque.
Starter Gasket
Function
Seals the starter mounting to prevent oil mist and dust from entering the bellhousing area and to reduce corrosion at the interface.
Good practice
Replace whenever the starter is removed; the thin gasket can tear on disassembly.
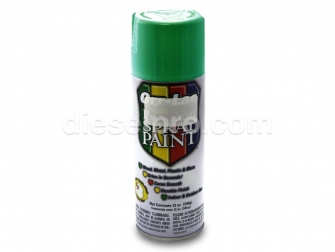
Detroit Green Engine Paint (Aerosol)
Why include in a sealing kit
After gasket replacement, cleaning and paint touch-up protect exposed metal, aid leak detection (fresh leaks show clearly), and restore OEM aesthetics.
Safety
Aerosols are ground-ship only. Mask gasket lines if painting near fresh seals.
Hydraulic Governor Cover Gasket — 53/71/92
Use on 16V71
Seals the governor cover, complementing the spring and top cover gaskets. A clean governor keeps speed control predictable.
Tip
Avoid over-sealant; excess can migrate into tiny governor passages.
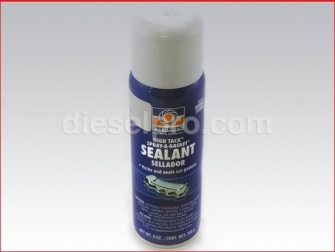
Gasket Spray — High-Tack Sealant
When to use
High-tack spray is helpful on large, flat gaskets (oil pan rails, flywheel housing) to hold them in place during assembly. It’s not a substitute for damaged surfaces.
Application
Light, even coats to both sides; allow tack to develop before positioning.
3H Liquid Gasket Maker
Use case
A non-hardening sealant useful for fine machining imperfections, threads, and select cover joints where a film is specified.
Caution
Apply sparingly—thin film only. Over-application can squeeze into passages.
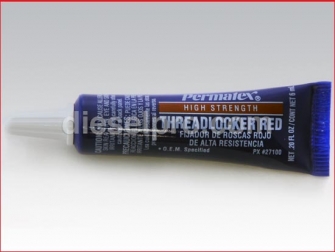
High-Strength Threadlocker (Red)
Why it’s on this page
Critical fasteners at sealing joints rely on correct clamping load over time. High-strength threadlocker helps retain torque where specified.
Best practices
-
Degrease threads; apply only to the clean, dry area.
-
Do not use where future disassembly is frequent unless the spec calls for it.
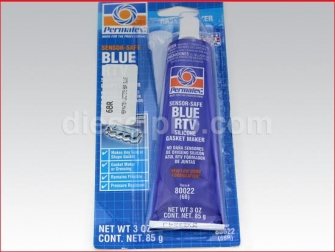
Sensor-Safe Silicone Gasket Maker (Blue)
Role
Ideal where a flexible, RTV seal is specified and oxygen or temperature sensors are present nearby (sensor-safe).
Use tips
Lay a uniform bead; allow skinning per instructions; torque fasteners after initial cure if specified.
J-B Weld — Cold Weld
Why carry it
For temporary repairs on non-pressurized housings or to stabilize a minor casting nick away from the sealing bead. Not a replacement for proper parts.
Guideline
Use only as a stop-gap; schedule permanent repair at the next service window.
High-Temp Silicone RTV
Use case
For exhaust-adjacent interfaces where high radiant heat is present and an RTV fillet is specified (never replace a required metal/composite gasket).
Tip
Confirm temperature rating exceeds your manifold and turbo-zone exposures.
Ultra Blue RTV — Sensor-Safe
Where it shines
General-purpose RTV with good oil resistance and sensor safety—useful around covers and sumps on the 16V71.
Install
Thin, even bead; avoid bead breaks at corners; allow proper cure before full load operation.
Non-Hardening Pliable Sealant
When to choose
Threaded plugs, minor surface porosity, and interfaces that may need future adjustment. It stays flexible, easing disassembly and reseal.
Caution
Don’t rely on it to compensate for severely pitted faces—resurface when needed.
See All Parts for Detroit Diesel 16V71 Non-Turbo
Use this link to navigate to the broader 16V71 non-turbo catalog, including non-gasket components (cooling, fuel, air/exhaust, electrical, and rotating assemblies). Keeping sealing work synchronized with the rest of your service plan reduces rework: for example, replace water pump seals while the water rail is off, and handle rear main service while the flywheel housing is open.
Why Buy 16V71 Non-Turbo Gaskets & Seals from Diesel Pro Power
Application-first compatibility
Every gasket and seal listed above is curated with the 16V71 non-turbo in mind. Where cross-family components are referenced, we highlight the specific 16V71 use and any nuances (counts per engine, rotation, or sleeve requirements).
Quality materials
Modern composites, molded rubbers, and updated “new-style” profiles deliver better compression-set resistance and temperature stability than legacy materials. This matters on long manifold rails, multi-cover heads, and plate joints that see constant vibration.
Complete solutions
From full engine overhaul kits to specialized blower and governor gaskets, you can stage a complete reseal without chasing one-off pieces mid-job. Stocking the right adjuncts—high-tack spray, sensor-safe RTV, and non-hardening sealants—helps produce first-start success.
Marine-ready options
If your 16V71 is in marine service, the catalog includes the correct flywheel-to-transmission gaskets (SAE 1 and SAE 2), raw water pump mounting and plate gaskets, and marine exhaust flange interfaces—items often overlooked during engine-only lists.
Installation insight baked in
The guidance above draws attention to the realities of 16V71 work: dowel alignment on end plates, manifold flatness checks, liner protrusion verification before head gasket torque, and rear main seal/sleeve decisions based on journal wear.
Customer service & fulfillment
We maintain deep inventory to support in-frame schedules and dockyard timelines, and our team can help verify counts (e.g., four head gasket kits for a 16V71) and steer you toward the correct “new-style” components when supersessions exist.
Trusted by thousands
Diesel Pro Power has served 40,000+ satisfied customers with precise parts matching, reliable shipping, and real-world technical support to keep classic Detroit Diesels working as hard as they were built to.


